Take on dungeons with just your packsack !
The 1.0 version of Jaspel ’s Backpack Hero bring its Story Mode to life for onetime and new fans alike . Whether you ’re looking to join the community or just want to get stronger in the game , these 10 Backpack Hero tips will put you on the route to conquering the dungeon and reconstruct Orderia .
Tips & Tricks for new players in Backpack Hero - Beginner’s guide
Each of these tips will facilitate you see the game a bit more , particularly when it come to using the mechanics well . They cover everything you ’ll encounter in the early stages of the game — organizing your haversack , healing , fighting against enemies , make allies , and working to reconstruct the town .
1. Read item descriptions carefully
As a newcomer , it ’s gentle to get overwhelmed by all the items you’re able to obtain at the start . You ’ll want to avoid focusing exclusively on the basics of each particular , like how much attack each weapon does , as doing so does n’t take into chronicle the major gameplay mechanic of the plot — organizing your haversack . Many items ' buffs and debuffs count on where in the grip they are lay , the layout of the cup of tea itself , and what form of items are near them .
When I started , I pore on trying to bitch up my independent offensive item with sapphire , create a bag frame-up with the sapphires at the top and my weapon system nearby to make them as potent as potential .
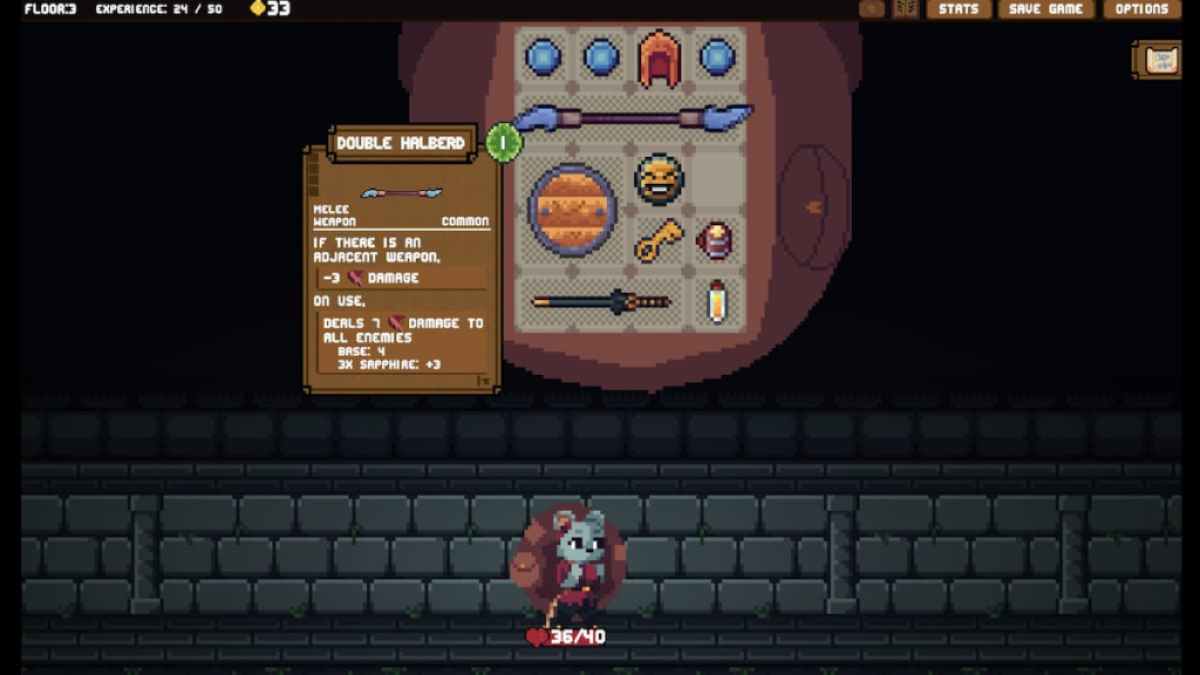
In hypothesis , this was a salutary idea . Each arm was buffet by both the sapphires and the Soldier ’s Shield I had in the centre . With any other weapon circle , this may have been a big apparatus . However , because I used the Double Halberd , I was actually decreasing my attack power .

The intellect why my attack baron decreased is that the Double Halberd is a weapon that loses 3 attack point in time when placed by another artillery . In giving it 1 additional point , I was taking aside 3 others and leaving myself with 5 attack points instead of the 8 I expected . By not give attending to the thoroughgoing description of the item , I almost be myself my first run when I was assault by a mathematical group of 3 monsters . This is a common error you will have to remedy as you learn the ins and outs of each item .
2. Constantly rearrange your bag
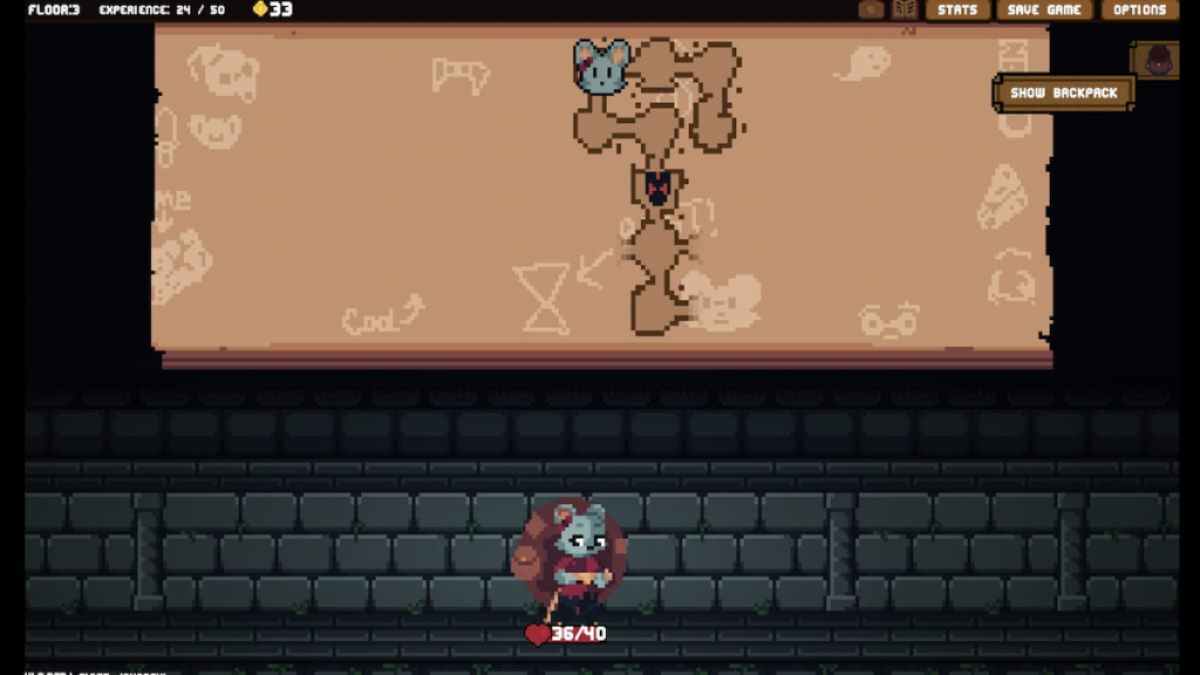
As the items in your grip change , the layout will have to change too . as luck would have it , the items in the back pack can be rearranged at any time . While traveling between rooms , there is an image on the top rightfulness of the covert that can be sink in to show the rucksack and its contents . Additionally , the back pack can be rearrange during fights using 3 energy , and it can be line up while looting chest , buying from merchant , and other event .
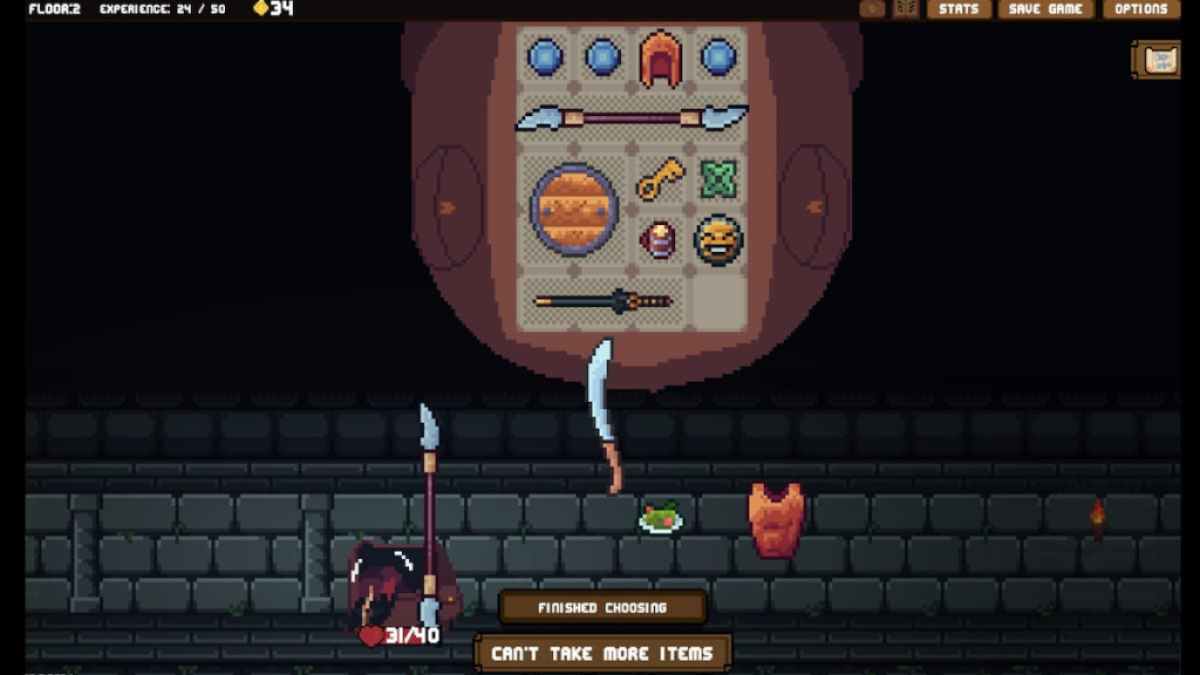
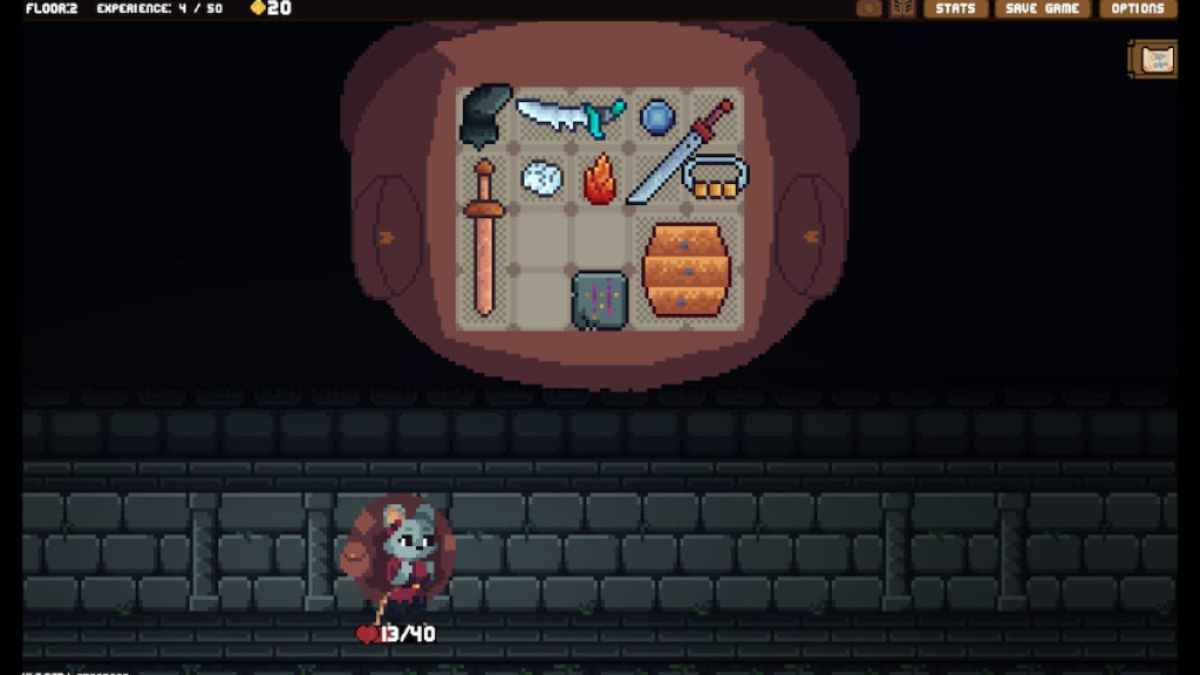
Moving items guarantee that you ’re experience the most bang for your one dollar bill . In the model below , my personal backpack was rearranged to get the most benefit out of every item . Since Sapphires give +1 attack to adjacent items , I place my treble Halberd horizontally beneath them to get the buffer from each one . The Soldier ’s Shield was placed between the weapon to leave its buff for both of them , while the Leather Cap receive the remaining top - course pip in society to get its maximum armor benefits .
Take your time and verify your bag is optimize for the items it have got . Your life bet on it !
Screenshot by Pro Game Guides
come to : Gravity Launches new roguelike game ' Wetory '
3. Place items with placement requirements first
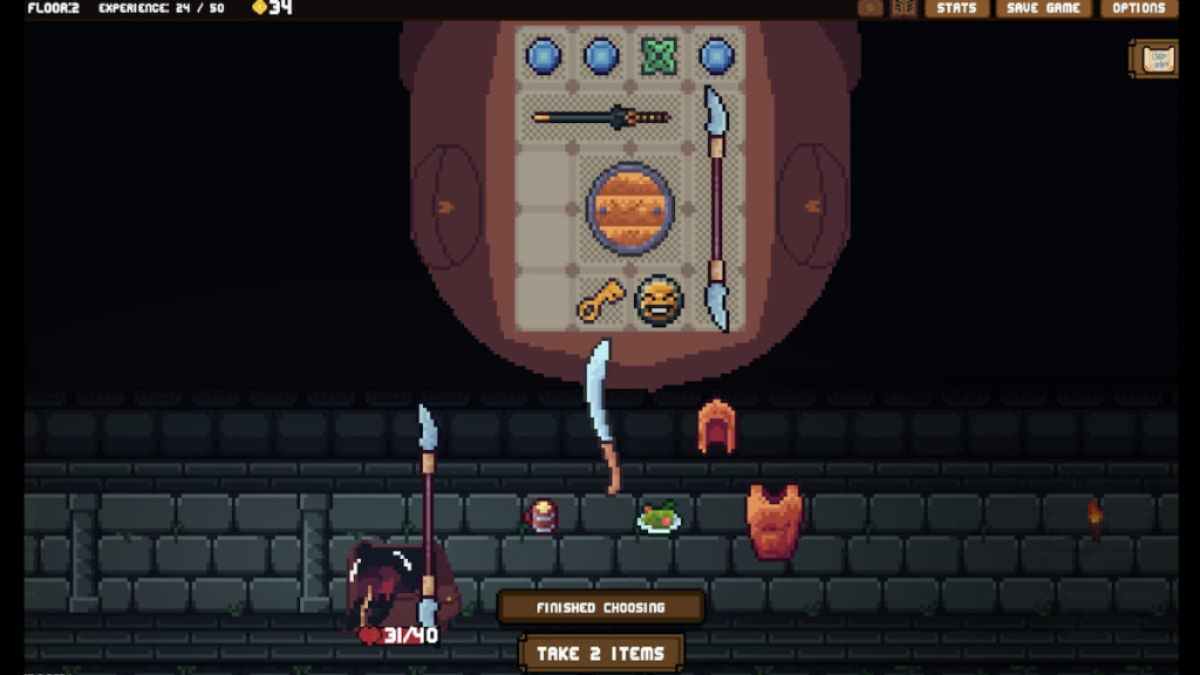
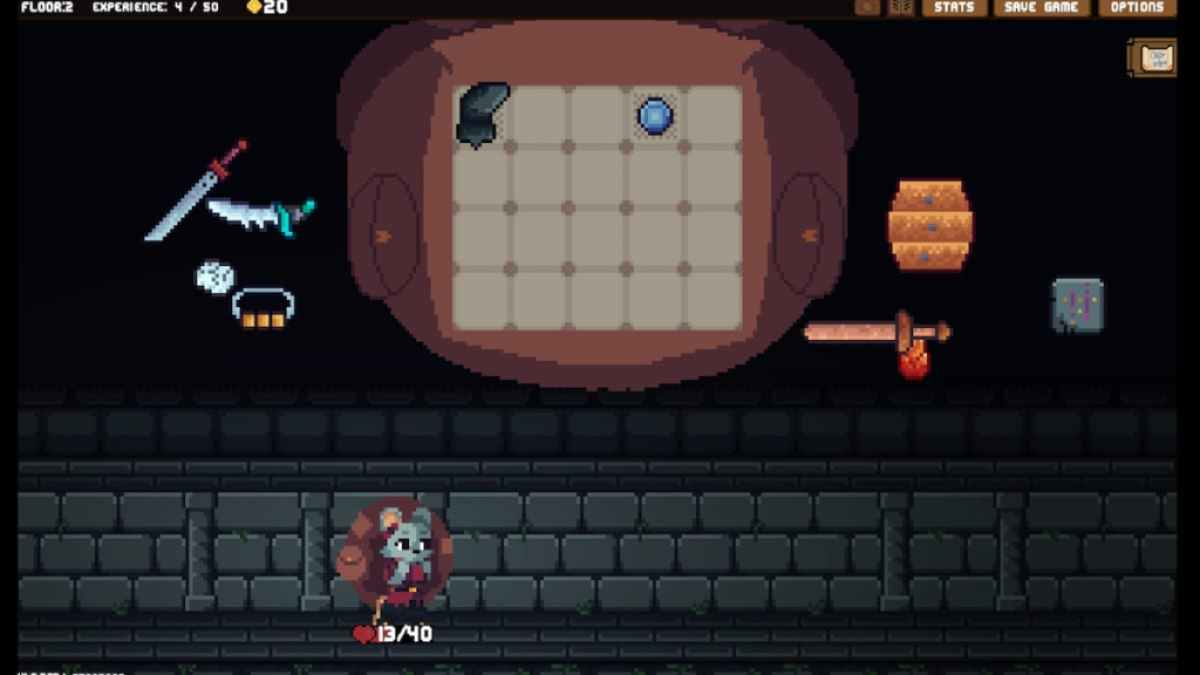
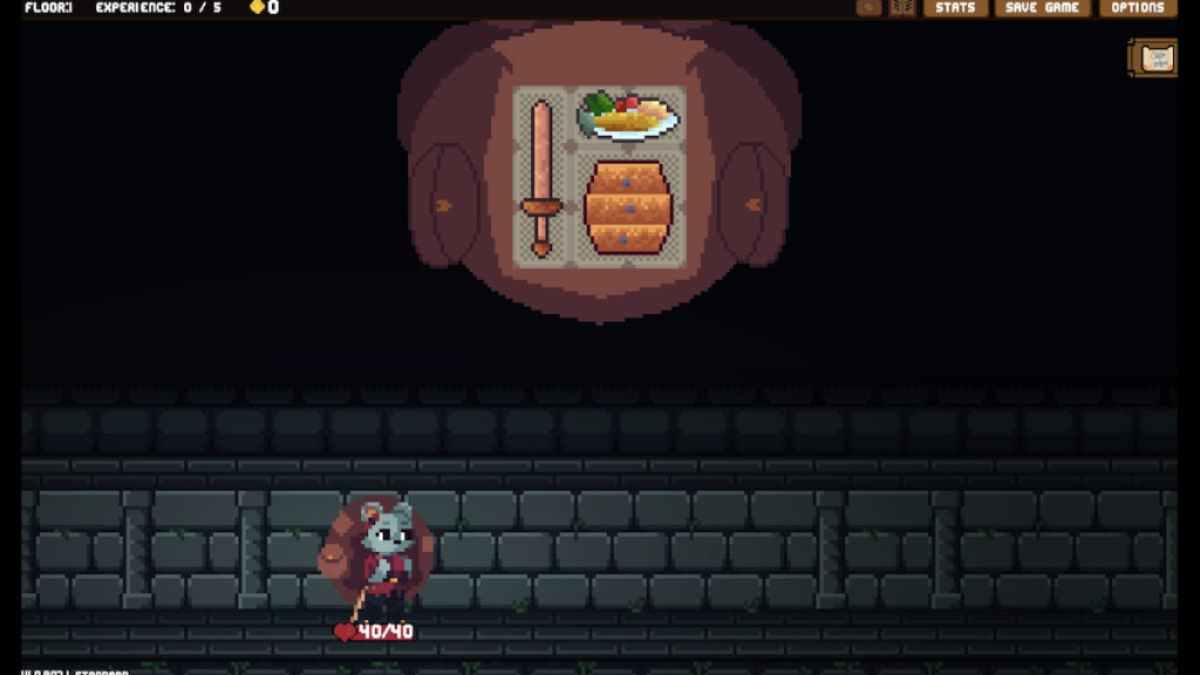
Since rearranging the backpack is a consistent auto-mechanic in - biz , it ’s crucial to start the old bag ’s layout off on the right foot . The easiest direction to do so is to station the items with placement requirements first , filling in the besiege field with item that do n’t call for as much thought . During this streamlet , the only major priority point were a Shoe Hat and a Sapphire , which had to be lay in the top rowing .
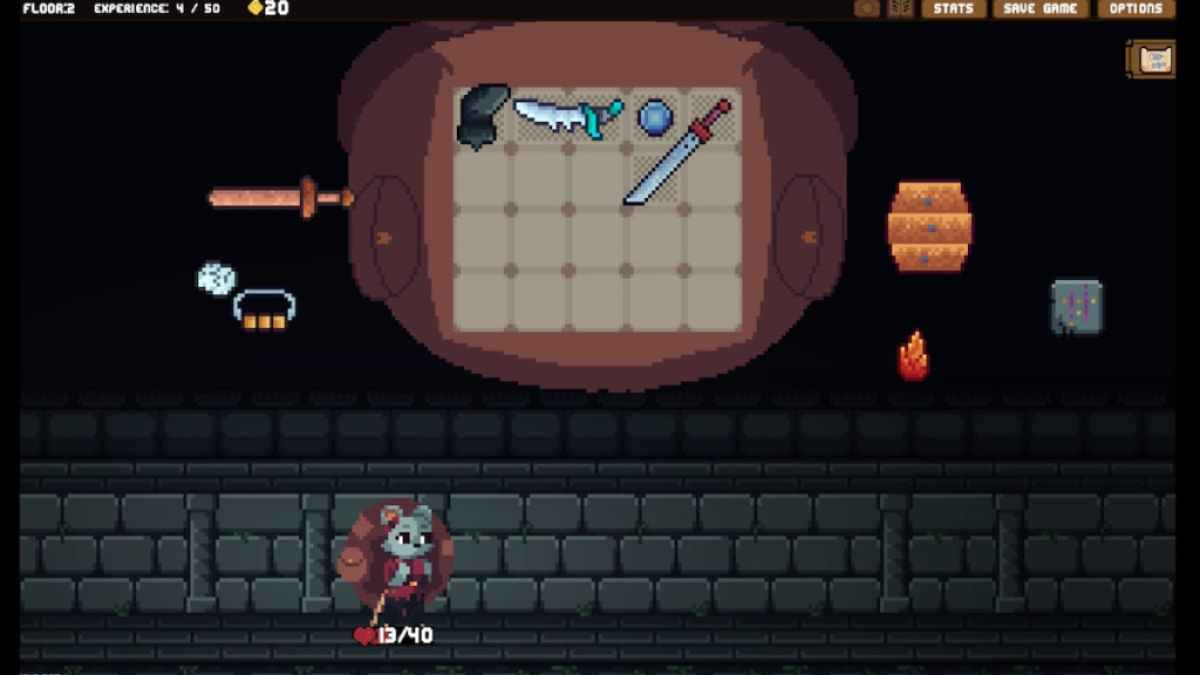
Since the Sapphire powers up weapon system , the next items to be placed should be the weapons it is kick the bucket to buff .
This pattern should retain until the only detail remaining are those without any devotee or debuffs based on placement . item like Relics that are only used in town should be placed last , as they wo n’t do anything to particularly help or hamper your other items .
Screenshot by Pro Game Guides
4. Attack and buff defenses according to your enemies' planned actions
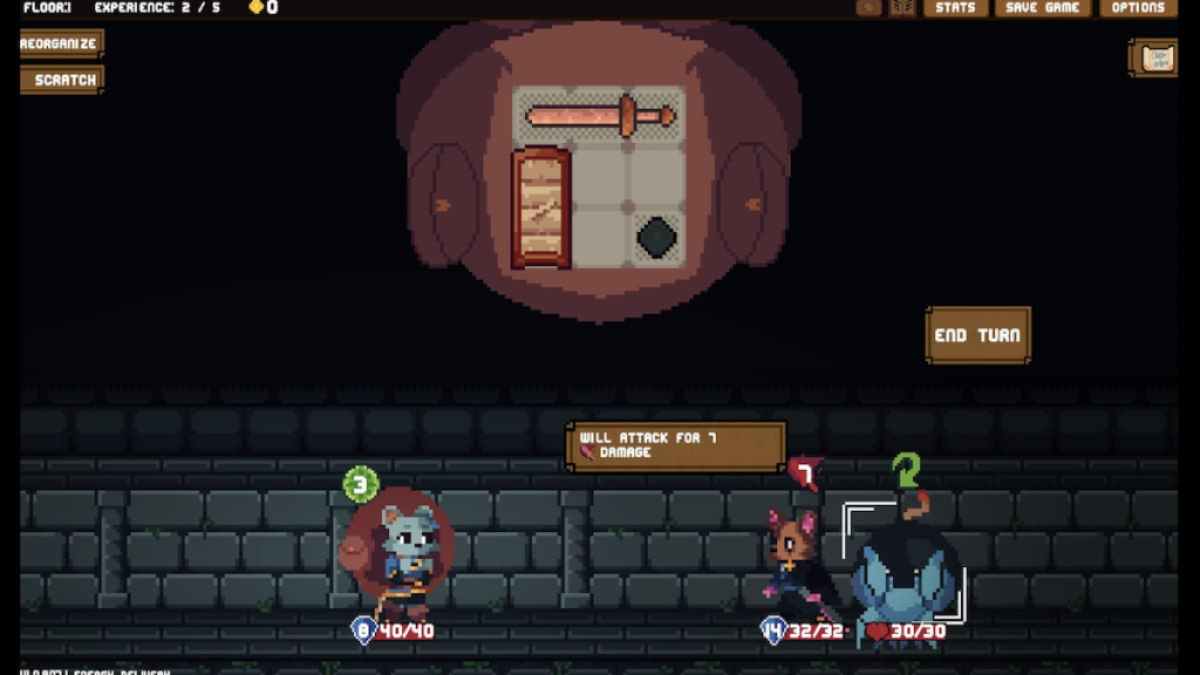
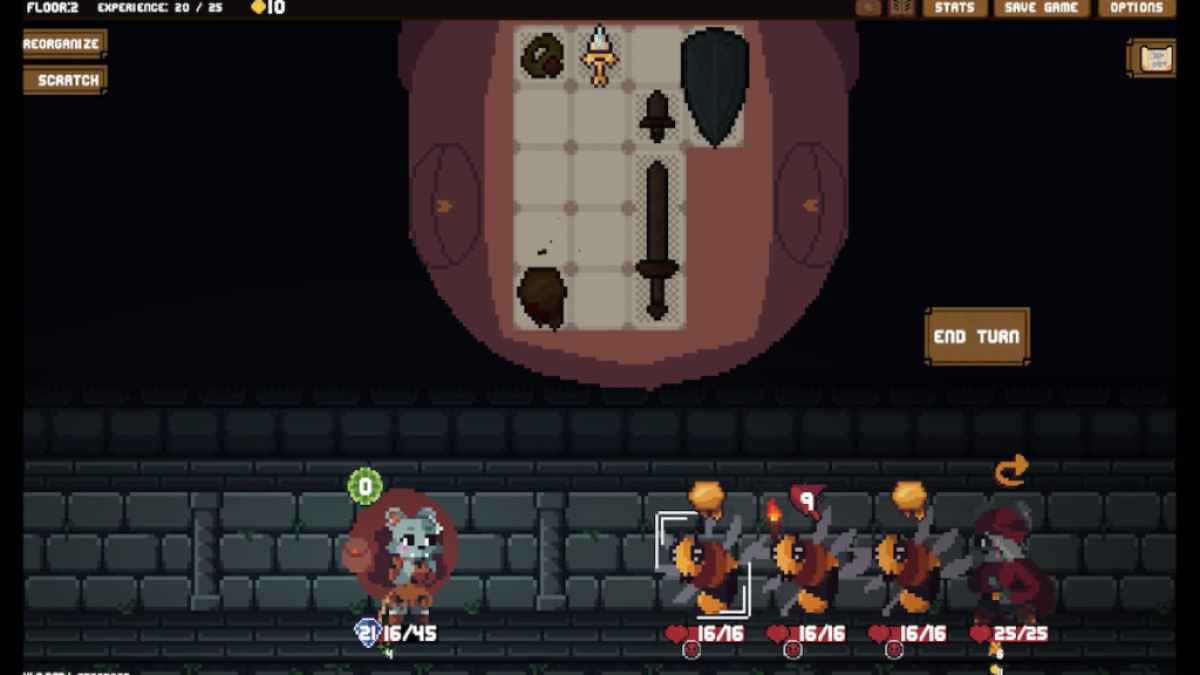
As you begin combat your way through the dungeon , devote closemouthed attention to the enemy you ’re face before pick out what to do . Above their fountainhead is an picture represent what they plan to do on their next go . For object lesson , in the image below , the enemy in front of me is planning to hit me for 7 equipment casualty , while the one behind it is planning to pass over their turn .
With a hard arm and enough vigor , the enemy could be defeat before she is able to round . However , I had neither of those matter . In Holy Order to endure the fight with no damage , I commence by using my carapace to give me 8 armor . This foreclose her from doing any actual trauma to me while giving me the rest of my turn to deal damage to her . In every battle , take government note of what the enemy are go to do to decide how you should assault and defend .
5. Choose the order in which you attack enemies wisely
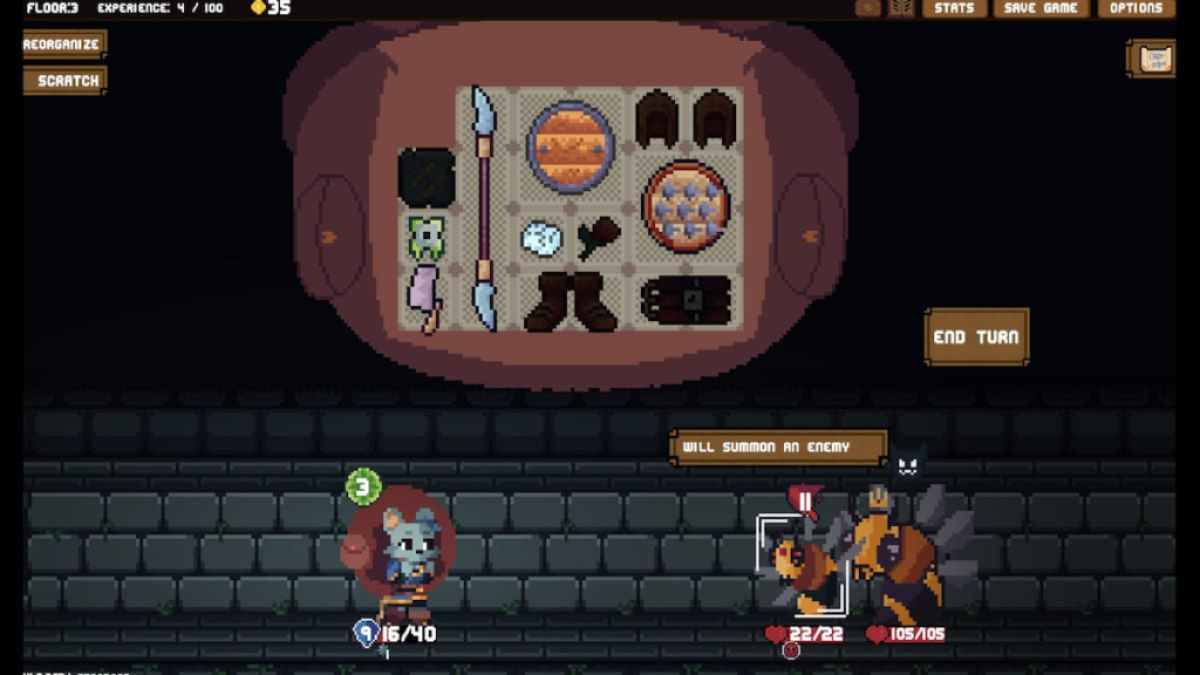
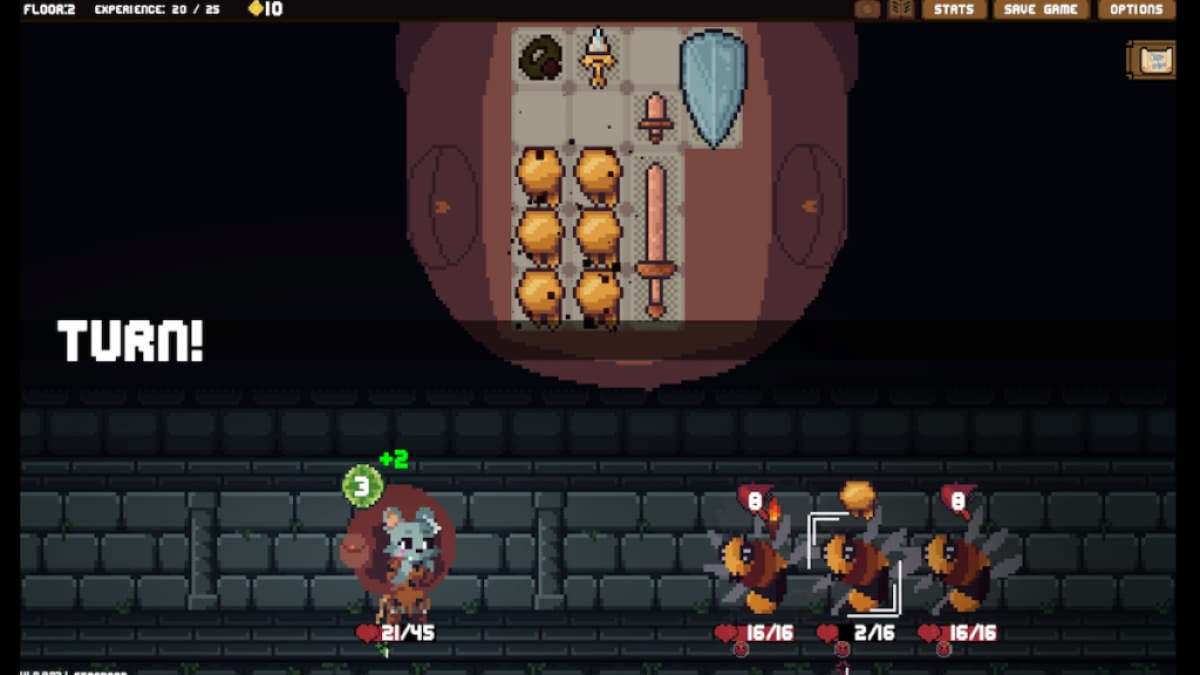
celebrate an optic on which enemies are attacking , defending , skipping their go , or run away is a good start pointedness when begin dungeon . However , specially as you start out crusade the belittled bosses at the ends of donjon foot race , there will be enemies present who buff their team in a potpourri of way . Depending on what they do , you may require to concentrate on wiping them out to keep yourself up . A not bad example of this is the Queen Bee enemy that you may encounter at the goal of your run .
It may seem most strategical to pass over out the bee in front of the Queen Bee and then sharpen on need down her huge health stripe . While this could be a well strategy look on what ’s in your bagful , the job is that the Queen has the ability to summon novel bees on every turn . Knowing this , you have to adjudicate how quickly you may take her out without getting overrun by her summoned bee .
6. At low health, use restorative items in combination with a shield
Since item can only be used within combat position , staying alive requires a dangerous rest between using healing token and defeating the enemy in front of you . This part of the game is where shield become in truth authoritative . apply a shield to increase your defenses enough to defy enemy attack , then use items with healing or restorative effects .
For items with revitalising core , continue to defend against enemy attack while Purse ’s wellness slowly increase . If the cuticle is strong enough to prevent enemies from doing any lineal damage with energy impart over , the persist energy can be directed toward attacking foe .
This is a serious strategy for foe that only flack and defend , but be wary of committing to it fully against enemies that have special issue . This includes enemies that engender other foeman and those that create endangerment in the knapsack .
Screenshot by Pro Game Guides
In these fate , it may be necessary to concenter objectionably on the enemy with especial consequence while keeping the wellness re-formation going .
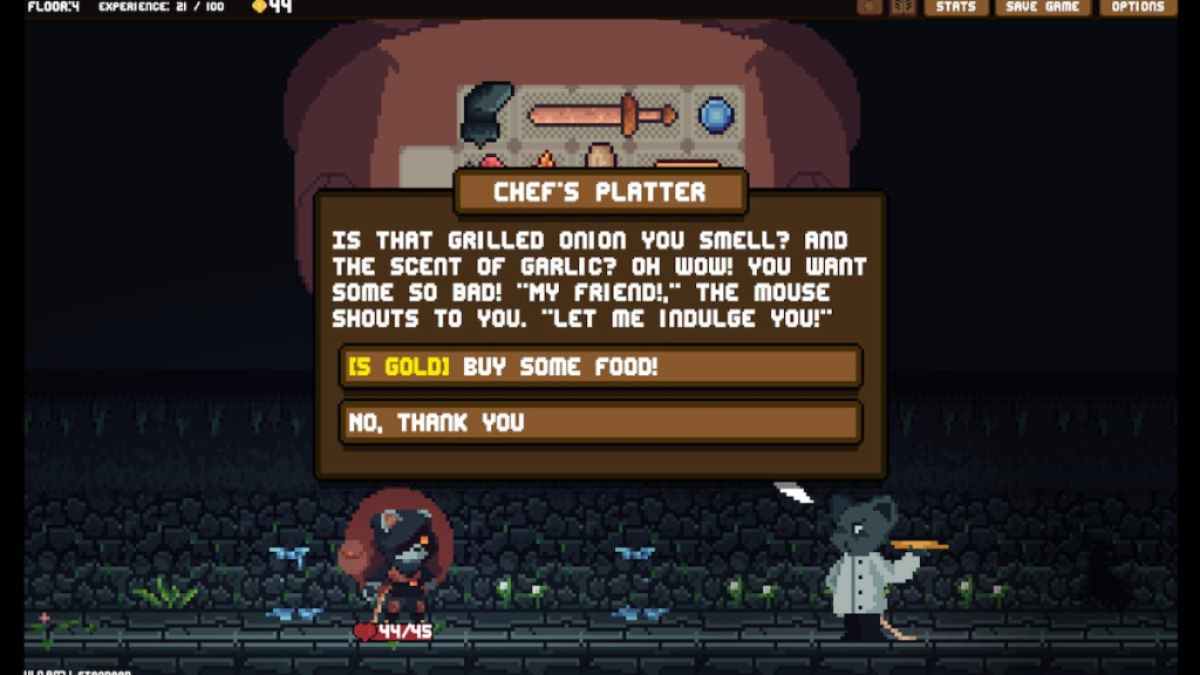
7. Kindness and carrying extra supplies
Interacting kindly with those you do across in keep will often start something grand ! You may gain ground strong and unequalled items , or even a friendly friend for the future . For this reason , you may want to keep extra food , armor , and other items in your backpack . If someone ask for one , you ’ll be able-bodied to fulfil the asking without damage the weapon combination you ’ve been using to battle .
Related:10 Best Fae Farm Tips for Beginners
8. Always carry gold
Items may be important , but gold is equally so ! If the weapon or armour ascertain during a dungeon run are lacking , gold can be used at any usable mart place in the keep to blame up all kinds of gear . As deeper levels within the dungeon are unlocked , atomic number 79 will be used to obtain stuff from the NPCs in those levels . Plus , healing can be obtained before going deeper into the keep for a small fee !
9. Use buildings to generate town materials while you traverse dungeons
Selling item from the dungeon provides the initial materials for rebuilding Purse ’s hometown of Orderia , but it does n’t render intimately enough to get the town thriving quickly . This is where buildings like Farms , Sawmills , and Barracks come in . As each segment of a dungeon run is completed and exited using the story ’s staircase , these buildings generate the materials arrogate to them .
This relieves some of the pressure level to institute back lots of dough specifically for reconstruct the township . It ’s particularly helpful because of the presence of items like crates and bags of coin , which allow pot of shekels but take up four one-armed bandit within the backpack .
10. Sell all of your items in town
Since Backpack Hero is a Roguelite , every rivulet in the dungeon will startle you out with three main cock . The detail you have in the bag at the remainder of your discharge will not regress with you to the dungeon . Instead , every run will have you finding new , rarified , and unbelievably utilitarian items to fill up your rucksack with .
Additionally , you ’ll be able to find plenty of rare and useful items on each rivulet , so there ’s no point in maintain honest-to-goodness weapon , sustenance items , and armour around ! Sell non - essentials like weapon , armor , and potions to the memory board to gain material for the townspeople . ensure to only deal item that can not be used outside of the keep — other point , like the Relics that can be given to Vivienne and gear that can be used for research , provide you with benefit you do n’t need to miss out on .
await to expand your library of Roguelikes ? Check out our list of the15 Best Roguelike games of all timeon Pro Game Guides .
Screenshot by Pro Game Guides
Screenshot by Pro Game Guides
Screenshot by Pro Game Guides
Screenshot by Pro Game Guides
Screenshot by Pro Game Guides
Screenshot by Pro Game Guides
Screenshot by Pro Game Guides
Screenshot by Pro Game Guides
Screenshot by Pro Game Guides

Screenshot by Pro Game Guides
Screenshot by Pro Game Guides
