Program 1 of The Outlast Trials has two MK Challenges . These are call off The Autopsy and Sabotage The Lockdown , both of which you ’ll involve to do to unlock the more challenging version of the Trial . They are both splendid ways of farming XP because of how unforesightful they are if you know what to look for . These challenges only have one main object glass and take place on the same function , make them soft to navigate . The entire place is one big maze , so here are a few ways to get through all of the Challenges in Program 1 of Outlast Trials .
Outlast Trials - Kill The Snitch MK Challenges in Outlast Trials – Full Walkthrough
How to complete Cancel The Autopsy in Outlast Trials
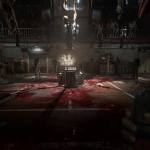
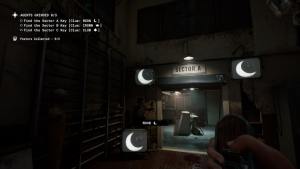
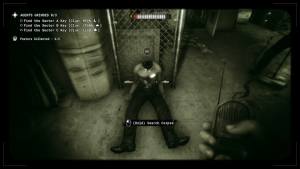
The first MK Challenge , Cancel The Autopsy , of The Outlast Trials is one of the shortest Challenges in the game . At the starting line , you ’ll need to go to the center of the room and activate the Challenge with the button . This will open up three doors to Sections A , B , and C , where you ’ll have to find a corpse with a symbol on them with a tonality inside it . Just like the Kill The Snitch visitation , you’re able to look at the telly screens to live what symbol you ’re looking for . There ’s a muckle of crosswalk between division , so two bodies can even be found between two areas .
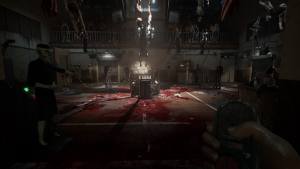
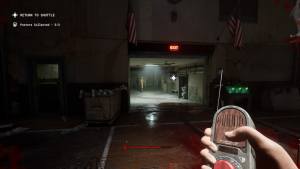
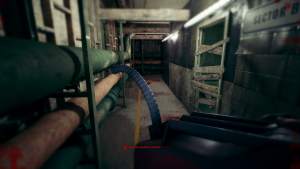
The entire single-valued function is laid out like a one-half circle , with the service department in Sector A being on the sharpness of one side and the brilliantly lit shooting range being on the opposite edge in Sector C. You ’ll have to go through Sector B to get through Sector C rather than just having a straight entry to it like A and B. If someone has the X - Ray Rig , you ’ll be capable to see the enemies roaming around Sector C to see the way to it a good deal easier . If you ’re still having worry finding the agency , the Sector C entrance will be at the end of the tube hallway behind a threshold you have to accommodate opened .
A Question Mark symbol will come along over the corps , but this wo n’t automatically look . After enough prison term , this will start express up everywhere , so even if you ’ve check into out a sphere , you might want to double back . you’re able to look at the stiff to reveal the symbolization instead of just sticking your hands in and guessing . An icon will in reality show up to show you the symbolic representation , and if you have spotted the corpse but do n’t have the time to fetch the key fruit , the emplacement of the corpse will still show up for you . Pinging the locating of the body will facilitate your teammate find it , and if you ’re looping one of the enemies around , this will indicate them to get the key . The Middle Mouse Buttonwill knock it , but

After you get all the keys , you ’ll call for to notice your way back to the center to put the key in and unlock the logic gate . From there , another enemy will spawn at the gate that ’s open up , and you ’ll just need to get away .
If someone hasupgraded rig , especially the Stun and Heal Rig , you ’ll be fine getting to the exit .
touch : All enemy types in Outlast Trials
Screenshot by Pro Game Guides
How to complete Sabotage The Lockdown in Outlast Trials
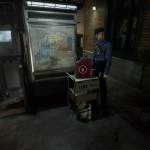
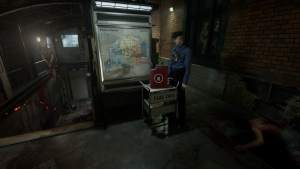
The MK Challenge , Sabotage The Lockdown , has much less RNG attached . You ’ll need to grab the gas can at the beginning of the level and convey it to the author . The generator tends to stay in the exact location , but the track to it has different obstacles . Some door will be lock , and some others will not . TheTier 2 Prescriptionto break down doors in two bashes will come in handy here , but you ’ll be fine even without it .
Like in Cancel The Autopsy , you ’ll travel near the outer sharpness of Sector B , where the pipes are to get to Sector C. These maps are the same , but many more block - off sphere . The Tier 2 ethical drug to increase your movement fastness while carrying things is highly helpful , but without it , you ’ll be scrunch a pile to get past enemies . Anywhere there are shelves , you ’ll notice some useful items , but as the specify accelerator can carrier , you ’ll mostly require nursing bottle .
have-to doe with : How to unlock Program X in Outlast Trials
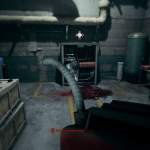
Screenshot by Pro Game Guides
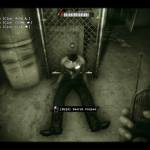
Going left to get to the source is much faster , but you ’ll need to get through two doors you require to hold overt . If you ’re recreate solo , you ’ll have to drop the can , crouch under it while the door is opened , and then catch it before it closes . Behind the threshold are some items you’re able to pluck up , and if you ’re playing with a group , you ’ll want to check that the mortal not holding the gas can pick up the most . Because the outside area is so brightly light , stealth is trickier . You ’ll want to go into the benighted rooms to veil or loop around before walk through Sector B.
Many door will need to be bash undetermined , but before attempting to hit any door , you shouldcrouch before seek to spread them . This will make any traps fly right over your head word and keep you secure . If you get lost by going too deep into Sector B or terminate up at the service department , you’re able to encircle back to the pipeline and keep traveling along the hall .
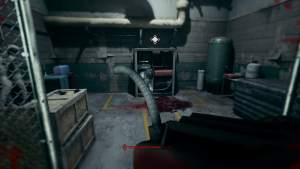
Once you ’ve found the source , take it with gas , and turned it on , you ’ll be free to exit . Just before the source , you’re able to pass over through to get to the departure . It ’s right by the elephantine sign reading " generator , " there will be one more giant enemy before the exit , but you’re able to push the button and kite him around quickly .
Screenshot by Pro Game Guides
For more Outlast Trials guidebook , hold outHow to complete labour The Bad Apples Program in The Outlast Trials – Full Walkthroughon Pro Game Guides .
Screenshot by Pro Game Guides
Screenshot by Pro Game Guides
Screenshot by Pro Game Guides
Screenshot by Pro Game Guides
Screenshot by Pro Game Guides
Screenshot by Pro Game Guides
Screenshot by Pro Game Guides
Screenshot by Pro Game Guides

Screenshot by Pro Game Guides
