Find the Diamond - tip Drill and Factory Safe here !
The last Tier 5 mordant Mous cabal missionary station is one of the most clock time - consuming and complex mission in Call of tariff : Warzone DMZ . Crack The Code tasks you to take the special rhomb - tipped drill and use it to reach the Factory Safe . In this guide , I ’ve shown in detail how you may make out this missionary post tight and with simplicity .
Crack The Code Black Mous Mission DMZ Walkthrough
Below are all the objectives for Crack The Code :
Items required for this mission
Before we get , I want to brief you on some item I recommend you take with you to Crack The Code :
Now , deploy into Al Mazrah and then journey to Koschei Complex via theentranceof your choice . Make your manner to the Chemical Plant section and equip yourNight Vision Gogglesfor clear vision .
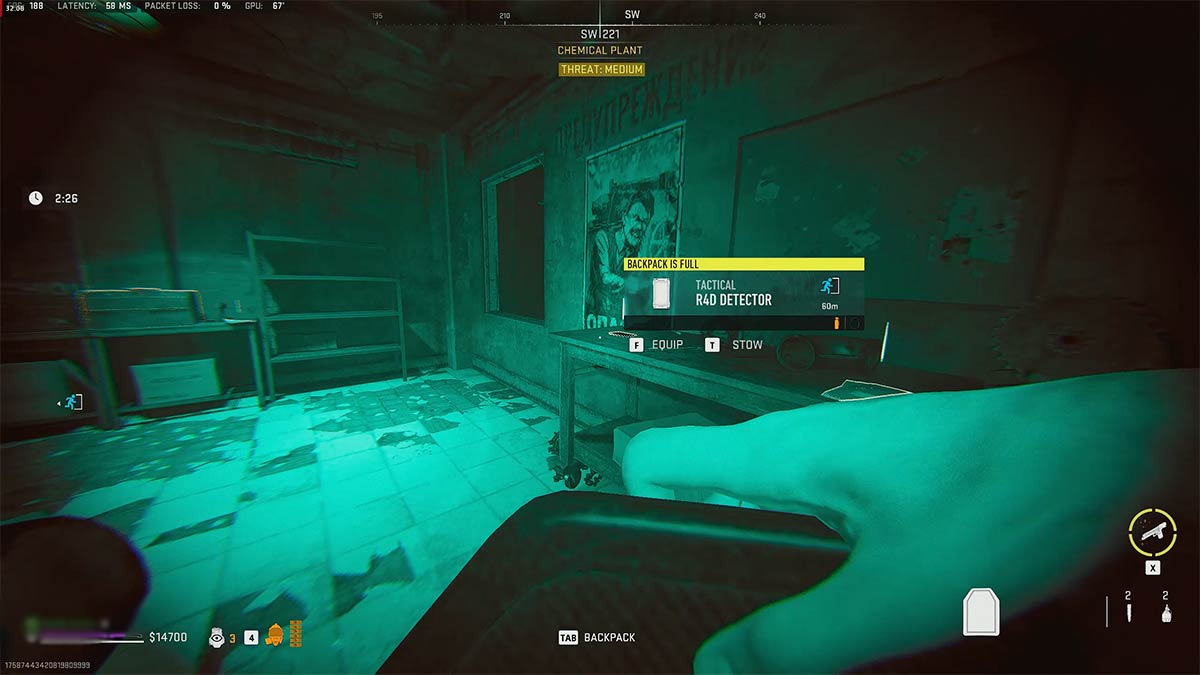
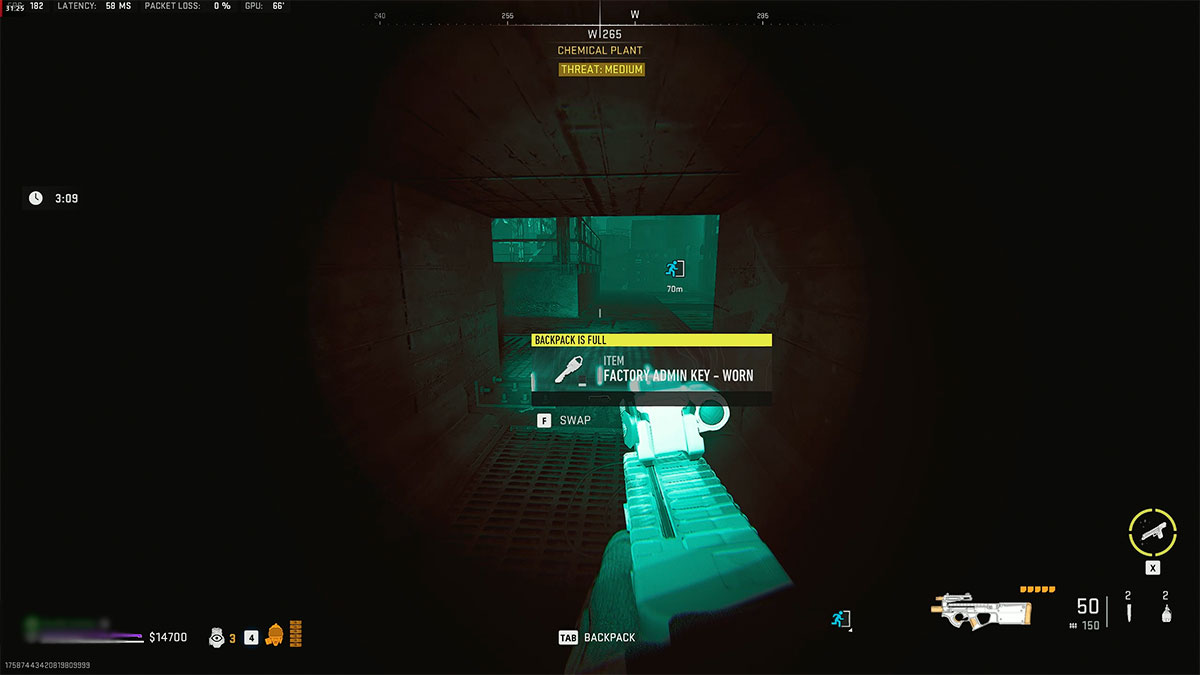
Where to find the R4D Detector and Factory Admin Key
To solve the puzzle of the computer keyboard - locked room inside Alpha Cluster , you ’ll ask the R4D Detector tactical equipment . This gadget can be found inside thetwo little office staff roomsin theChemical Plantsection . Also , get your hands on the Factory Admin Key that should be sitting somewhere in the nearbyvents .
Related : release Through The Sector Alpha DMZ Mission Guide
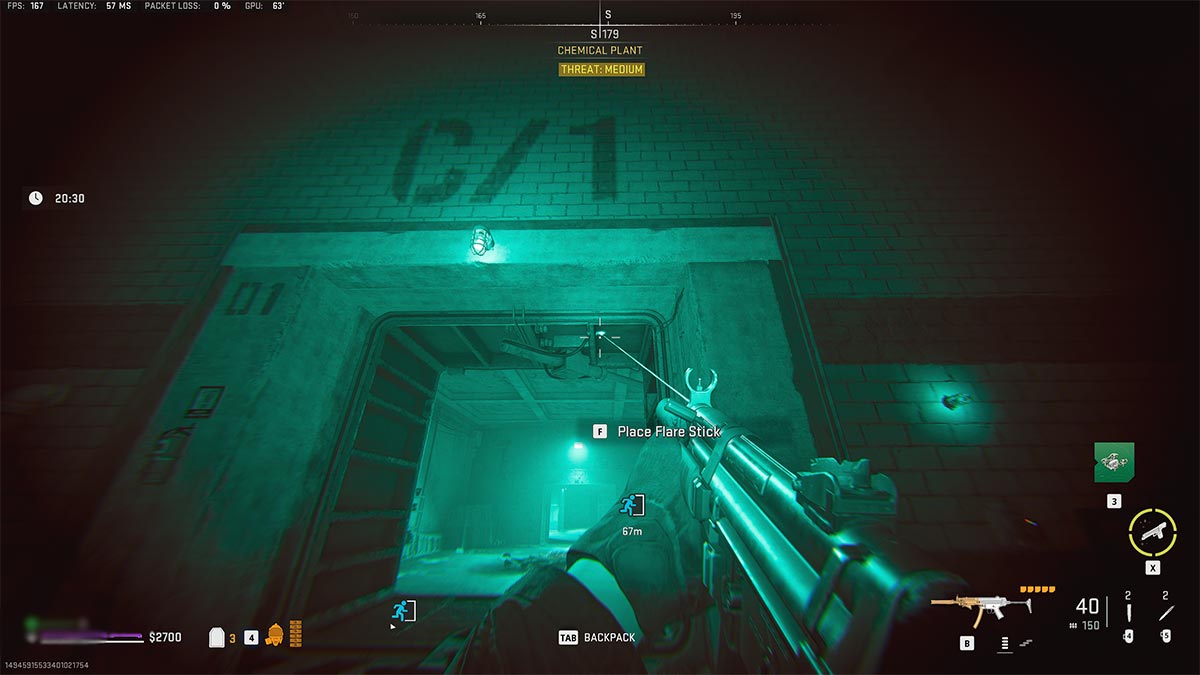
Where to find the Alpha Cluster and how to unlock it
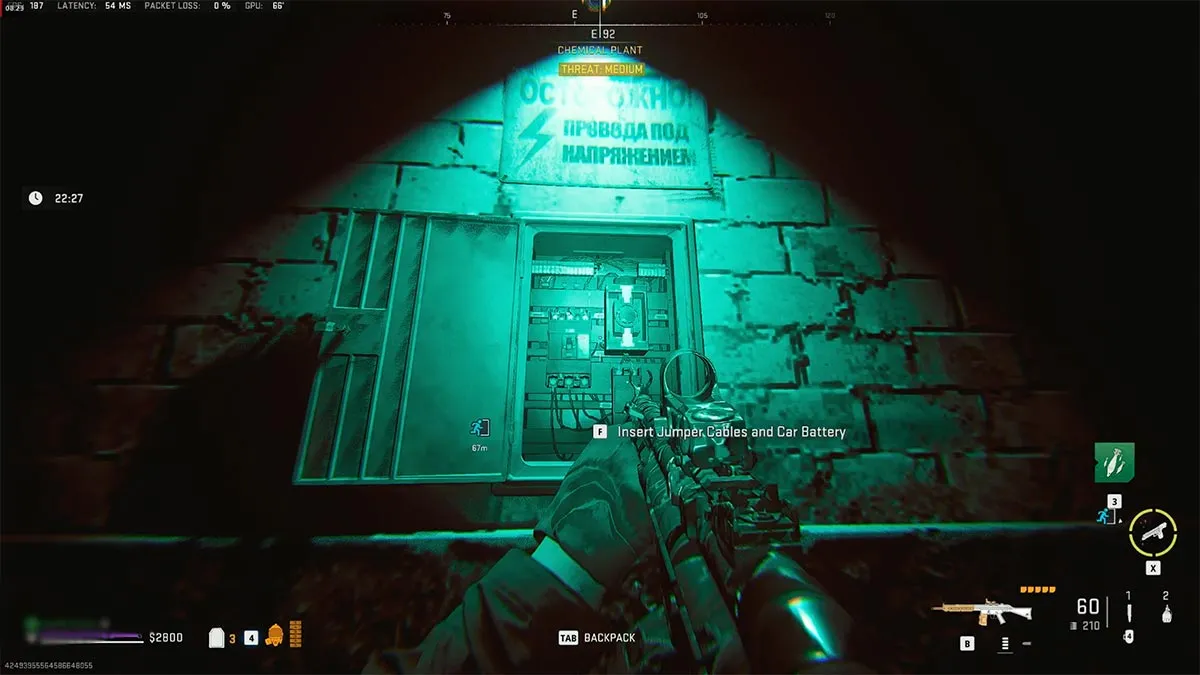
Once you have the need item , head in thesouth directionuntil you get along up onBunker Door C/1 or C/2 . Between these doors , you ’ll find a ledgeman board where you take toplace the Car Battery and Jumper Cablesyou convey with you . This will power up the bunker doors , which you’re able to then unlock to reach the Alpha Cluster .
How to get the diamond-tipped drill from the keypad-locked room
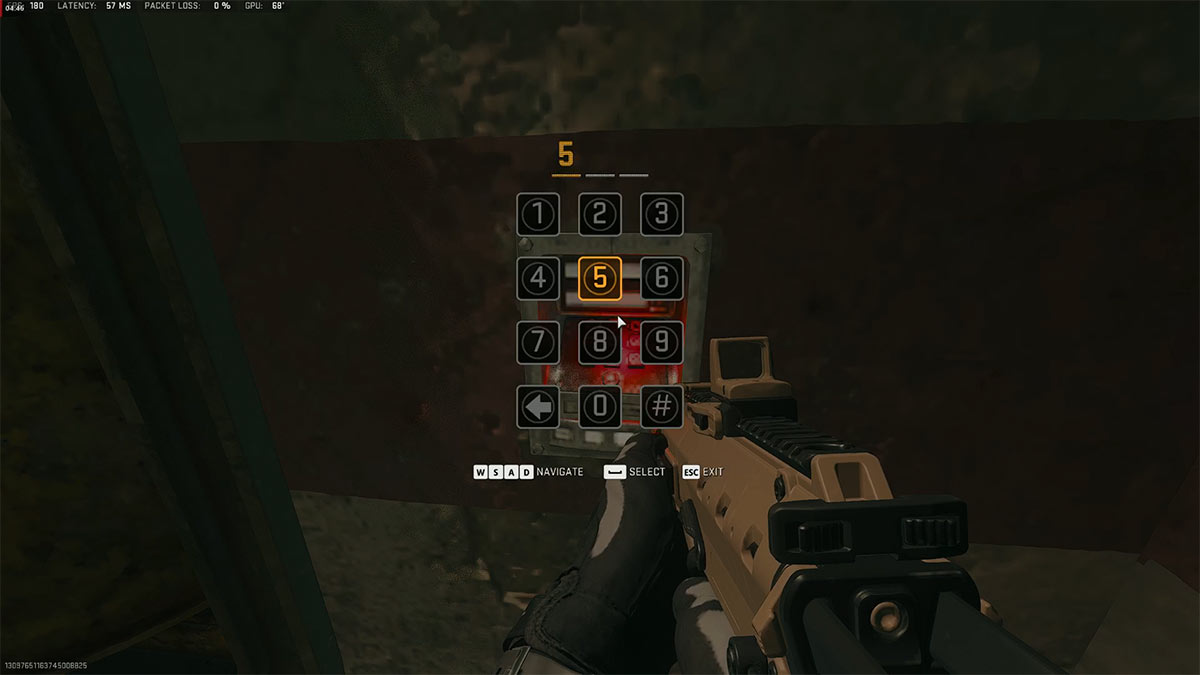
Make your style inside the Alpha Cluster , and at thewest endof the sector , you ’ll find two watch gun turret guard an area . Take out the guards and the turret and approach thekeypad - locked room , as shown in the first image . Scan the keypad next to the door with your R4D Detector , and you ’ll seethree symbols . Todecipher these symbols , take care forchalkboardsaround the Alpha Cluster and rake them using the R4D Detector .
Each blackboard has a symbol , and it may or may not be the one you need to decode . If you find a chalkboard with one of the symbolic representation you need to decode , note the act associated with it . In my case , the dactyl for the first symbol B was 5 as you may see in the last word picture . Also , beware of the optical maser hole and guards while exploring the area .
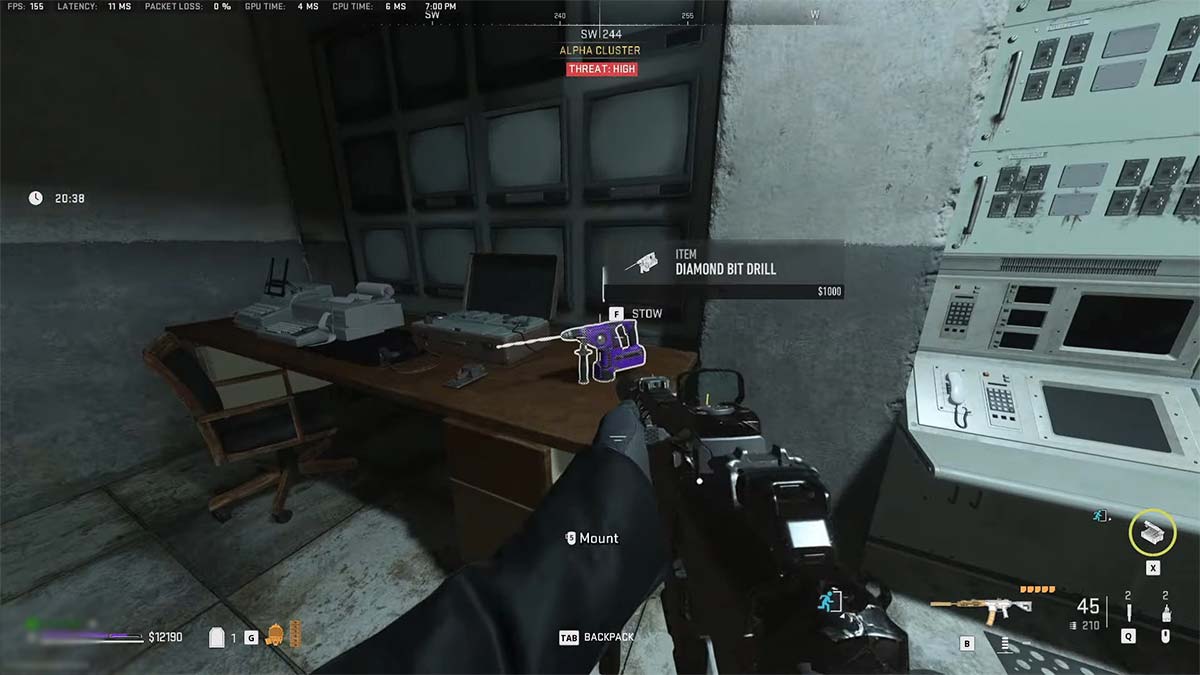
Once you have decoded at least two of the symbol , go back to the computer keyboard - locked room and hear to unlock the threshold by guessing the third digit that you do n’t know . For example , I know the first two digit were 5 and 7 , so I start up using numbers game from 0 to 9 for the third code until I finally unlocked the doorway . Now , pick up theDiamond Bit Drillfrom the table and head back out of the Alpha Cluster . you may also take theHeated Madness blueprintpart from the room .
relate : DMZ Breaking the Bunker mission guide
Where to find the safe in the Factory Wing
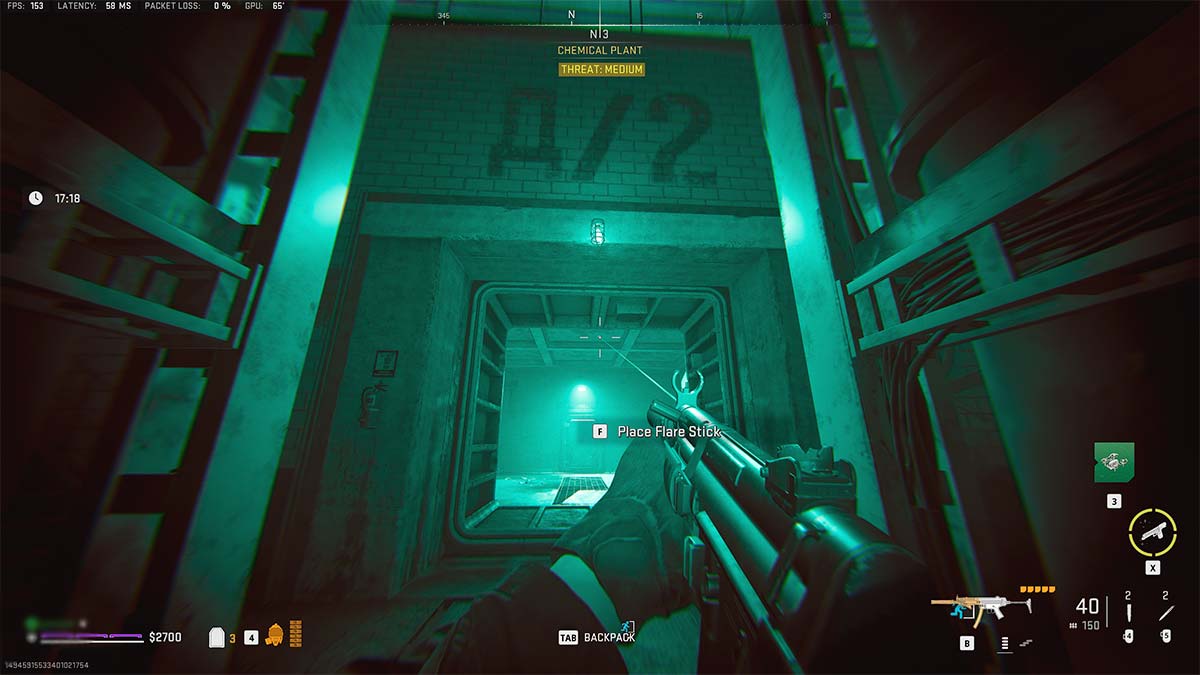
In thenorth end of the Chemical Plant , you ’ll findBunker Doors A/1 and A/2 . enrol either one of these airlocks and use the Factory Admin Key to unlock the yellow room access . This will lead you to the Factory Admin section , where you’re able to reach the Shopkeeper buy stations . I highly suggest you fill up up your backpack with munition boxes and armor plate , as you ’ll need them soon .
Proceed further inside the region while fighting off bots , and you ’ll finally reach out theFactory Wing . This is the segment wherethe Rhinoceros and the Sniperare keep up . While the Rhino will be on the same level as you , the Sniper resides one floor above that you could get at only via the door you could see in the image above .
Now , you could take out the Rhino in one magazine of theKV Broadside Shotgunif you have the 25 Round Drum mag and Dragon ’s Breath attachment on it . Make indisputable to shoot him up close and be prepared to take some damage .
Screenshot by Pro Game Guides
Alternatively , the easy way of life to take the political boss out is by using theBomb Dronekillstreak . Sit in a good daub away from the bots and fly the Bomb Drone close to the Rhino before detonating it . Similarly , utilise the second Bomb Drone , if you have it , to kill the Sniper concealment on the top trading floor .
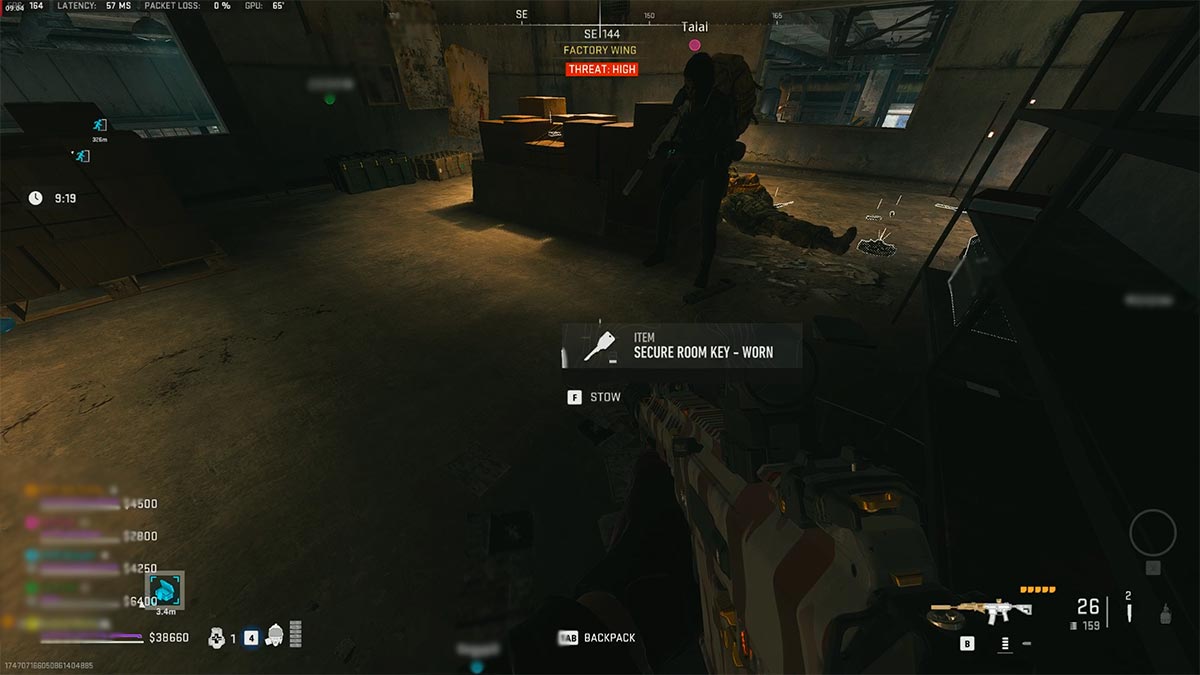
Once the Rhino is down , take the step up and carefully dodge and disable thelaser traps . Now , kill the Sniper if you do n’t have the 2nd Bomb Drone . Once the Sniper is down , he ’ll neglect aSecure Room Key . Grab this keystone , and the Secure Room will be differentiate for you . But for this foreign mission , you do n’t even have to unlock that threshold as thefactory safesits in the corner outside the elbow room ( see image ) .
How to drill the safe in the Factory Wing
The next part is simple , just go about the safe and campaign the interact button tostart boring . think , this is only possible while you ’re carrying the diamond - topple drill from the Alpha Cluster . waitress until the oil production operation is over for the good to open . Inside the safe , you ’ll find three type of vest , Dr. M ’s Lab NotebookandBunker Safe Note .
I stow both the notebook and dependable note into my backpack just in case . Once you ’ve picked up the two detail , all you have to do is exfil from Koschei Complex to complete the Crack The Code commission . I suggest using theL2 Restricted Zoneinside Factory Wing to extract as it ’ll be safer than the Chemical Plant exfil lift .
outride tuned to Pro Game Guides for more Call of Duty : Modern Warfare 2 and Warzone 2 content . In the interim , head over to our article onExplosives Sourcing DMZ Mission Guide .
Screenshot by Pro Game Guides
Screenshot by Pro Game Guides
Screenshot by Pro Game Guides

Image by Pro Game Guides
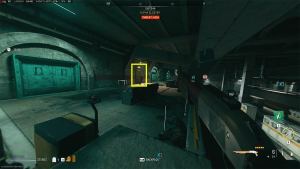
Image by Pro Game Guides
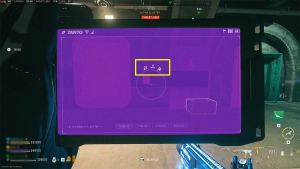
Image by Pro Game Guides
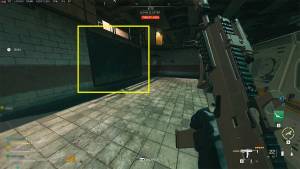
Image by Pro Game Guides
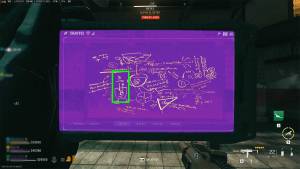
Image by Pro Game Guides
Screenshot by Pro Game Guides
Screenshot by Pro Game Guides
Screenshot by Pro Game Guides
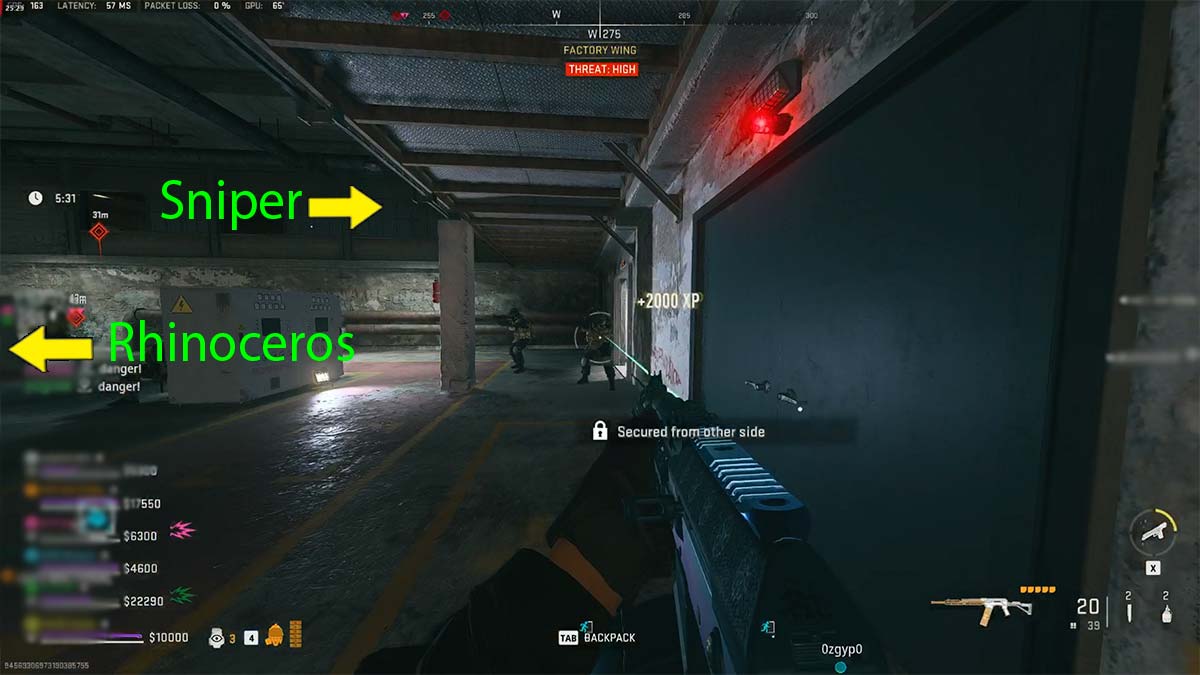
Image by Pro Game Guides
Screenshot by Pro Game Guides
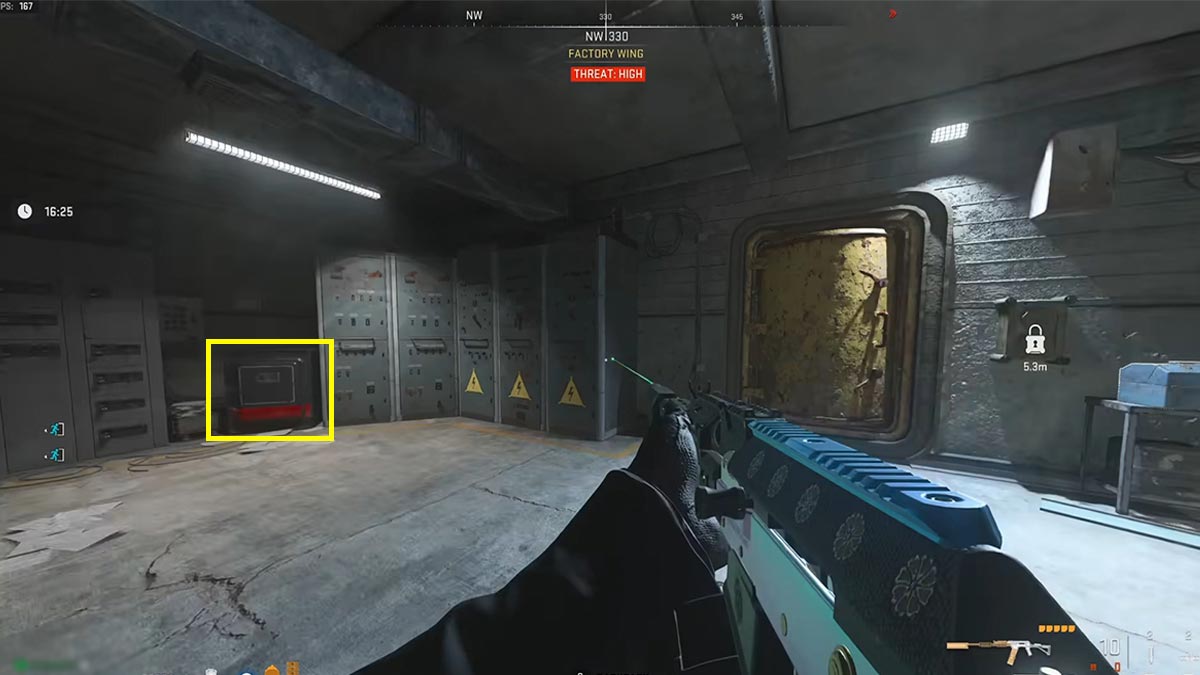
Image by Pro Game Guides
