These were not the flying dragon I was promised .
Dungeons inDestiny 2serve as intermediary content between Nightfalls and raids . Warlord ’s Ruin , released during Season of the Wish , has plenty to offer in damage of challenge and boodle . Here ’s everything you postulate in handy scout form to get in and out .
Throughout your journey in this quick-frozen castling , you ’ll see plenty of locked doors and chest of drawers . Do n’t gag too much on initial runs as you ’ll be come back often to dispatch the quest chain of mountains . For now , permit ’s focus on learning the mechanics of each fight .

Destiny 2 Warlord’s Ruin Dungeon Walkthrough
To enter the Warlord ’s Ruin Dungeon , you ’ll need to have purchased either the Lightfall Annual Pass or the Dungeon Key . Now that you ’ve handed money over to Bungie for yet another sentence this twelvemonth , you may grab the quest from Ikora Rey in the Tower to start up the Dungeon in the EDZ .
Throughout your trek into the Dungeon , you ’ll run into a few thing of annotation . There are multiple doors requiring Tier I , II , or III clearance . These door hold theAhamkarabones necessary for shape up the pursuit be your first completion . In a Catch-22 situation , you ’ll unlock the next tier provided you complete each step on subsequent runs . All in all , you ’re reckon at four running game minimum to get everything .
The other thing to note is the various chest spread about . 95 % of these chests are traps that will paralyse you and spawn several Screebs . The trick to fleck the traps is to face for a pulsing blue glow around the pectus . An easy path to remember this is " See the glow ? get ta go . "
Screenshot by Pro Game Guides
colligate : Destiny 2 Season of the Wish Iron Banner – Schedule , Loot , & More !
The Ascent
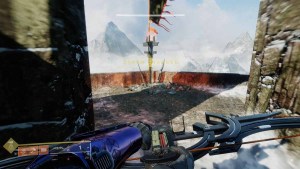
So , the first part of this donjon is but climbing to the ingress . There are a few branching paths , but otherwise , it ’s quite difficult to get wholly drop off . Two thing to keep you head the right means are to keep an middle out for the with child red flag and only keep trying to move " up . "
The red flags are spaced such that you’re able to expend them as a reference for where to head . Up is the general management as the whole point is to rise this raft .
Rathil, First Broken Knight of Fikrul
This is the first encounter in Warlord ’s Ruin and sets the tone for what ’s to come . The mechanics may seem overwhelming at first and there ’s a very high-pitched ad density , but once you get into the swing music of things , it becomes second nature and you ’ll be breeze through it without mean .
Rathil is going to be resistant to all damage until we can get his shield down . The encounter set about with Rathil summons ads . Keep running and gun to foreclose yourself from being overwhelmed .
finally , you ’ll be teleported to a hang up batting cage . This cage will keep moving upwards and should you reach the top , it ’s an crying death . To surround this , you ’ll involve to fool away out three Blighted Eyes . These will spawn indiscriminately around your cage and the cage of your fireteam penis . Just like equipping an atomic number 8 masque in a plane , focus on yourself first before helping others .
Screenshot by Pro Game Guides
Once out of the cages , a few Scorn Pylons should look . There will be a ring around them and a Taken Blight in the center . We ask to do an absurd amount of damage to the Blight in order for it to melt and that can only be done by standing inside the circle . Any damage from outside the circle is entirely ineffective .
The previous two whole step must be done quickly as you ’ll only have 30 second from the time you ’re put in a John Milton Cage Jr. until the Pylons vanish . you may trail this by the " Imminent Wish " countdown in the lower left field of the screen .
Breaking one or both blight will trigger " Naeem ’s Wish Empowerment . " This begins the harm phase against Rathil . You ’ll only have 10 - 20 seconds to do as much DP as potential before Rathil becomes invulnerable again . Rinse and repeat this cycle until you ’ve send this Scorn back to the Great Beyond .
Screenshot by Pro Game Guides
Jailbreak
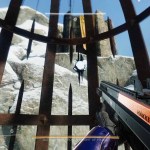
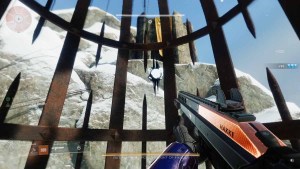
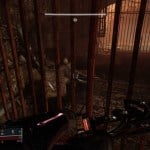
In adjoining cells will be skeletal system with reckoning marks cut up into the stones . Depending on which side of the skeleton they ’re on will secernate you how many phonograph record need to be spinning in that commission . So , if you have one on the leftfield and five on the right , you ’d call out something like " 1L 5R " and coordinate with the other members to assure all six discs are birl properly .
With the discs spinning , the fireteam member who can see the lock will bourgeon it . If done right , the mobile phone will open and you may gather your loot .
For those brave enough to try the encounter solo , you ’ll have great approach to all the cells so you may shoot all of the disk . However , instead of two solidifying of tally mark , there will only be one . So , if it ’s four reckoning marks to the left hand of the frame , you ’ll make four disc spin left while the other two spin justly .

Screenshot by Pro Game Guides
Escape the dungeon
Now that you ’re out of the cell , it ’s metre to get out of the dungeon . It ’s laid out like a tangle but the dead ends are small side halls instead of separate path . Along the manner , you ’ll see a few more of those glow chests . Much like the ones we run into originally , opening them will paralyse you and breed a Screeb death police squad .
As you navigate the hallways , there will be several Corrupted Ravager patrols . ensure to shoot their lantern to defeat them more easy . Eventually , you ’ll reach a tower dwell of several destroyed floors . skip up to the top and make your way outside .
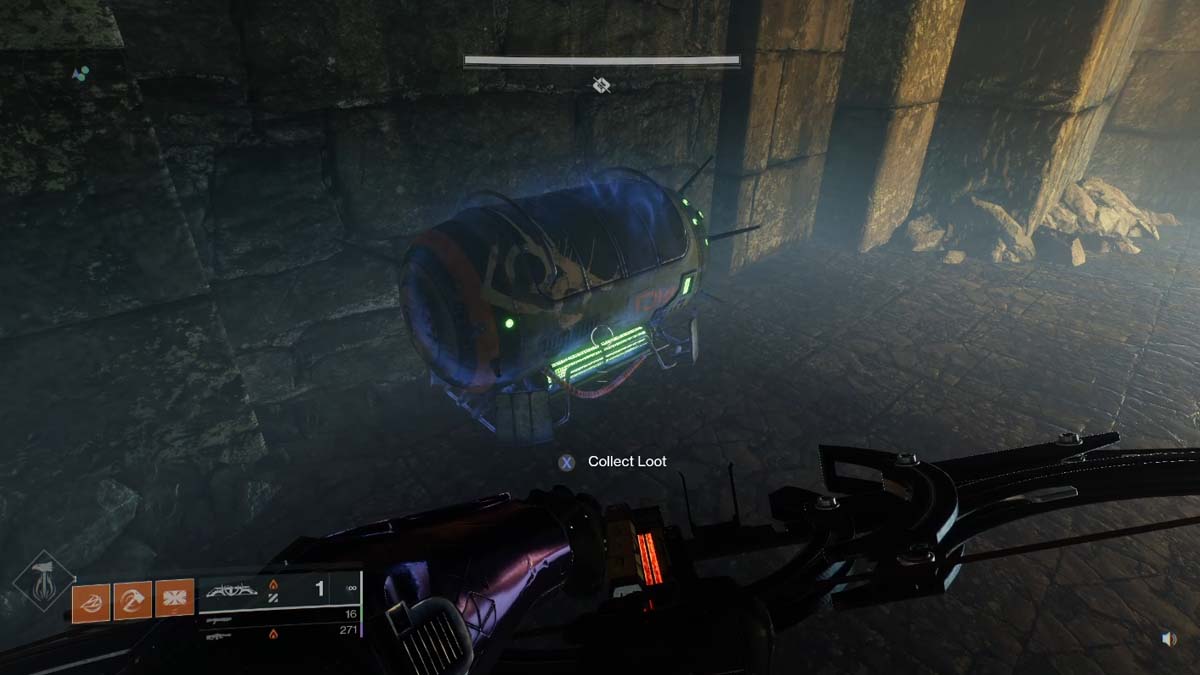
After jump along the cliffs , you ’ll hit a large stone nosepiece . There will be plenty of enemies between you and the next section , include a large float meatball of a chimera . This blimp ca n’t be shot down , so you ’ll want to play conservatively as you take out the throngs of foes .
Screenshot by Pro Game Guides
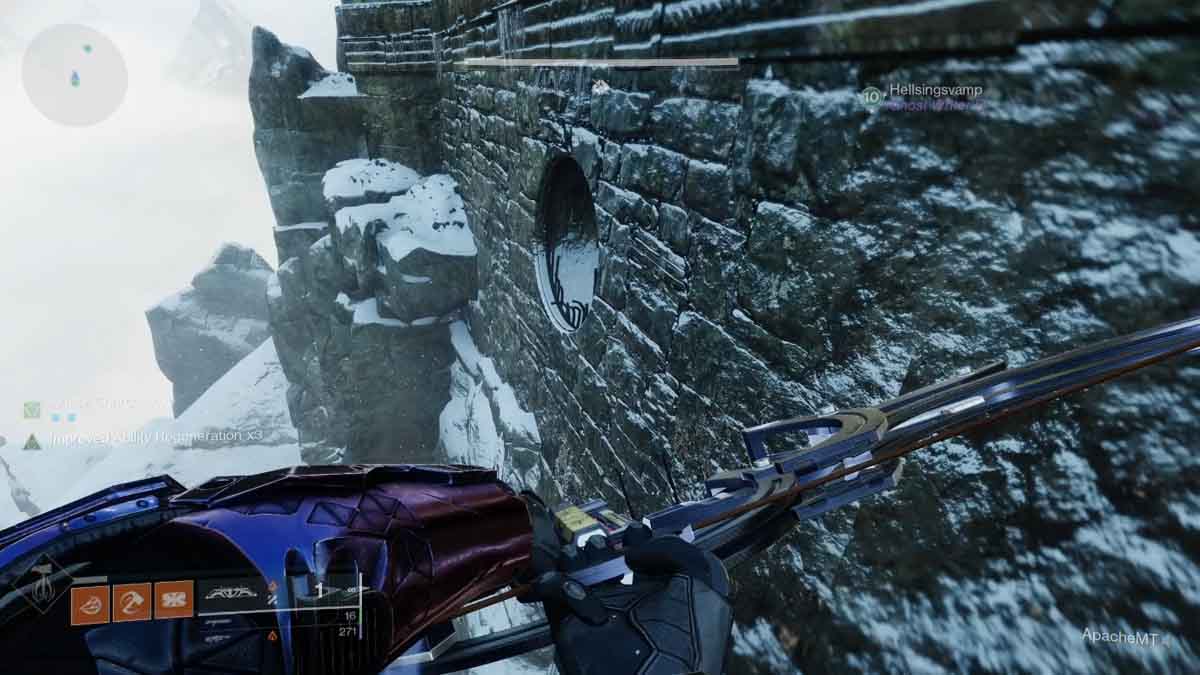
Once you hit the " ingress , " you ’ll find oneself it ’s anything but . To get indoors , you ’ll need to wrap around the left side of the building until you see a tunnel on the side of the wall with a broken gate . channelise inside . After creeping and crawling through a few crack and holes , you ’ll come to the next encounter .
Locus of Wailing Grief
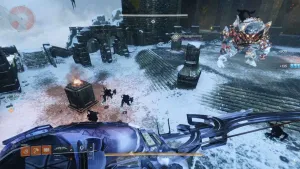
Before beginning the clash , make a mental note of the four pillars in the central courtyard . The objective is to light those pillars so the foreman can be damaged . Also , make note of the torches along the rear edge of the castle bulwark . Every few meters will be a woolly mullein . Standing next to these Verbascum thapsus will give you the " Shelter from the Storm " buff . Always know where the near one is as they are the only means you ’ll survive this fight .
When the fight start , a Taken Ogre , the Locus of Wailing Grief , will seem in the courtyard . Running the distance of the scene of action will be Blighted Eyes . We take to stamp out all of the Blighted Eyes to spark off the next part of the conflict . However , before doing that , I highly recommend taking out the two take Minotaurs in the courtyard as they can be problematic if left live .
Once the Minotaurs and optic have been dealt with , your fireteam will be off with the Biting stale debuff . This will gradually slow you down and you ’ll die upon hand 10 stacks of it . Standing next to the aforementioned blowlamp will remove the debuff .

Screenshot by Pro Game Guides
Once this stage begins , you ’ll see " Imminent Wish … " in the corner of the filmdom with a 30 - second timer . On either side of the upper incision will be a Scorn Knight . They will make Scorn Pylons with Taken Blights just like in the Rathil scrap . That same mechanic apply here , sans the advert cages .
For each Blight destroyed , you ’ll receive a Solar charge in the centre of the upper shelf . The objective is to take four of these charges to the pillars in the court below . Once all four pillars have been lit , the price phase begins .
Around each pillar will be a roofy . Standing in the circle protects you from the Biting Cold debuff while also supply Naeem ’s Wish Empowerment caramel brown . basically , you involve to stay inside the circle to remain alive and do damage to the boss .

Screenshot by Pro Game Guides
It is critical that you and your fireteam put up near the same column as when the buff wears off , any pillars that had been activated will be extinguished . By rotating to each pillar as a team , you’re able to unfold the impairment stage . When the boss is invulnerable again , get aside from it and start the cycle over again .
Hardcore parkour
As is customary for a Destiny 2 dungeon , the phases between a boss fight must be filled with running , jumping , and climb . There ’s nothing remarkable about this ascent aside from another appearance by the fly meatball . Like before , it ’s invulnerable , so take your fourth dimension and move carefully to avoid the 45 - second revive timekeeper .
Before you climb the stairway to the final encounter , you ’ll notice a Taken Rift . betting odds are you do n’t meet the requirements yet , but fret not , you ’ll get put on the right-hand path after the initial run .
Hefnd’s Vengeance, Blighted Chimaera
Alrighty , this is the culmination of everything we ’ve learned up to this degree . The fighting against the Blighted Chimaera is dissever into three phases on each of the four sections . It will be a little consuming out of the gate , but intrust me , it ’s a lot easier than you cerebrate once you get into it .
The conflict begins at the lowest section . After muster the hirer , it will spawn a gang of Taken Psions in addition to two Taken Wizards and several Blighted Eyes . Like in the Locus of howl Grief battle , destroying the eye will trigger the next phase . However , taking out the Wizards beforehand will make the next part well-to-do .
With the Wizards and Eyes make do with , pool of corrosive Taken energy will start appear on the earth . scud the globe above the kitty will clear them . The Scorn Knights and their Pylons also retort with a newfangled trick this metre .
Screenshot by Pro Game Guides
When the Knights seem , you ’ll be afflicted by the " Hex of Vengeful Corruption " debuff . Within 17 seconds , you must melee an unvanquishable Scorn to transfer the debuff to them . Note that if you are score back , the debuff will repay to you . As such , I advise holding onto it until the timer is running low , transferring it , and execute away . Failure to do so will result in instant decease .
Eventually , you will reach the top of the arena , a band of floating platform orbiting the foreman . You do n’t need to worry about the late mechanics and can go HAM here . Note that the boss will profane the current platform , and you ’ll require to rotate to the next one to make it .
Eventually , you ’ll be teleport back to the bottom of the arena where the whole thing start out over . Keep it up until you ’ve reunited this flying meatball with the great pasta in the sky .

Screenshot by Pro Game Guides
Before leaving the dungeon , make certain you loot the Ahamkara bones next to the final hoarded wealth chest . They ’re required to complete the pursuance from Ikora and progress to the next step .
Related : How to get the Wish - Keeper Exotic bow in Destiny 2
Destiny 2 Warlord’s Ruin loot
While I have theloot poolfor each boss broken down in this clause , here ’s a quick sheet of what can be found on your adventures in this EDZ haunt :
For more Destiny 2 content , check outAll young Destiny 2 Season of the Wish weapon & how to get themon Pro Game Guides !
Screenshot by Pro Game Guides
Screenshot by Pro Game Guides

Image by Pro Game Guides
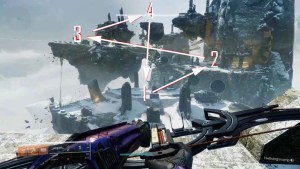
Image by Pro Game Guides

Screenshot by Pro Game Guides
