deliver this charming bird !
In Hogwarts Legacy , you meet several magical fauna and animal while exploring the world , let in the proud Phoenix . You will come across this magical bird during the Phoenix Rising quest give by Deek . Naturally , you need to know where to go to begin the Phoenix rise seeking , and how to complete it quickly . Here ’s a ended walkthrough for the Phoenix Rising quest in Hogwarts Legacy .
How to complete the Phoenix Rising quest in Hogwarts Legacy
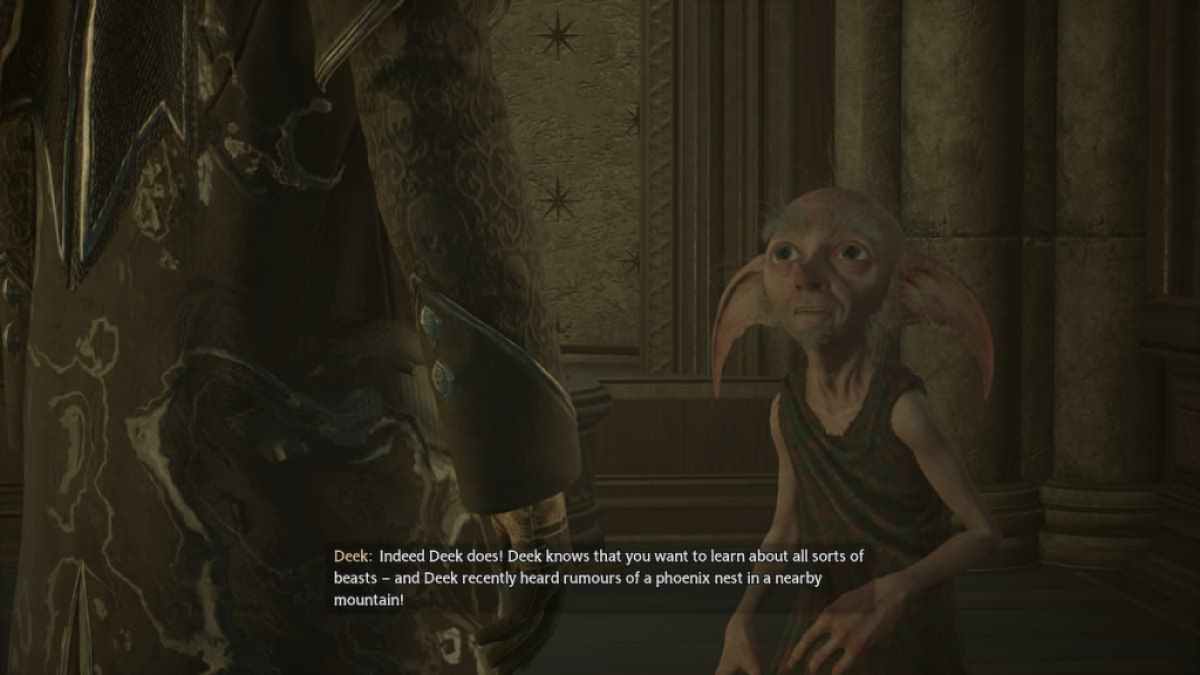
Deek presents thePhoenixRising quest in theRoom of Requirement , and the necessitate horizontal surface for this pursuance is 20 . We got this quest after wintertime started at Hogwarts , so you will require to march on in the main plot line well to get this pursuit . Check your Owl Post forProfessor Weasley ’s missive , and visit the Room of Requirement when you get it . Interact with Deek to learn about the magical bird , nest somewhere to the south in the Poisear Coast Region .
Where is the Phoenix Mountain Cave in Hogwarts Legacy
The Phoenix Mountain Cave is located in the southern region of the mathematical function in the Poidsear Coast part . Check the yellow circle on the map image above to see the exact localisation ofPhoenix Mountain Cave , and you’re able to use the broom or mount to wing to this realm . The Cave is filled with poacher , and you ’ll have to rid of them to get to reach the vizor of the mountain .
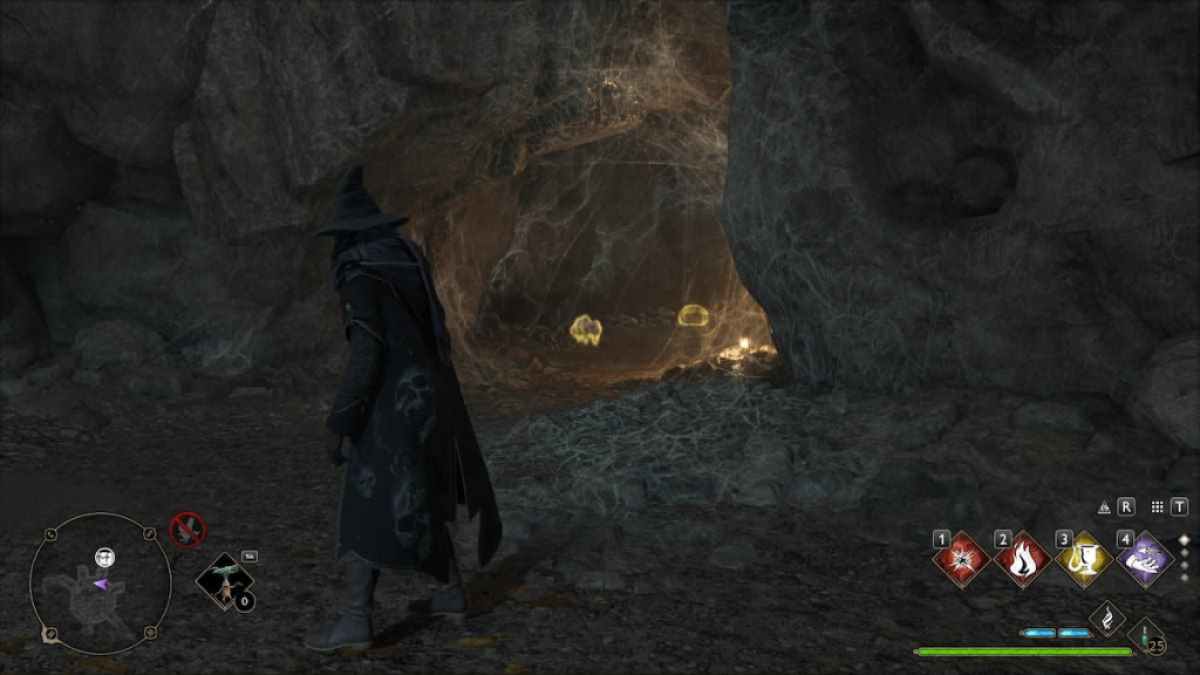
After entering the cave , you need to follow the way of life on the right - helping hand side and navigate forward . You will need to climb up to get to the interior of the cave , but before that check the cakehole on the right , and you ’ll obtain a path blocked by spider webs and Edward Durell Stone . UseConfringoorIncendioto clear through the webs , andDepulsoto break through the gemstone roadblock .
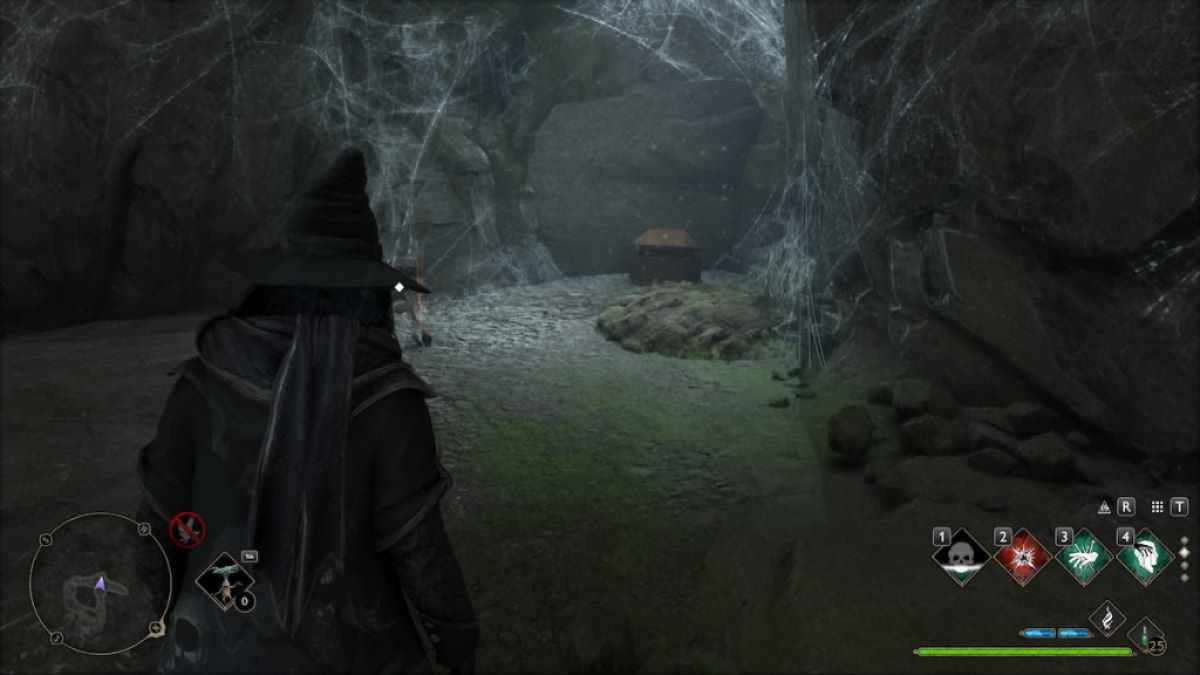
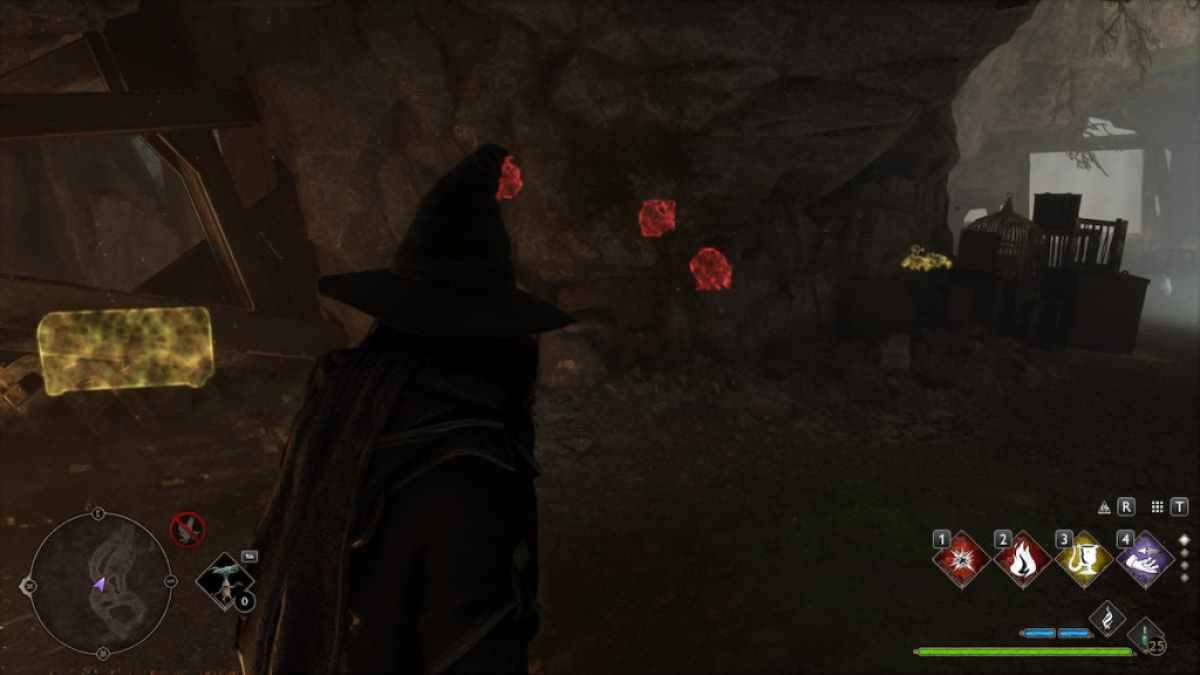
Get within and you ’ll find another set of wanderer webs along with a vicious Ambusher . extinguish the spider and burn the web with the fervidness trance observe above . Here you ’ll determine aCollections Chestbehind the Venomous Ambusher spider .

Related : How to learn Unforgivable Curses if you lack any in Hogwarts Legacy
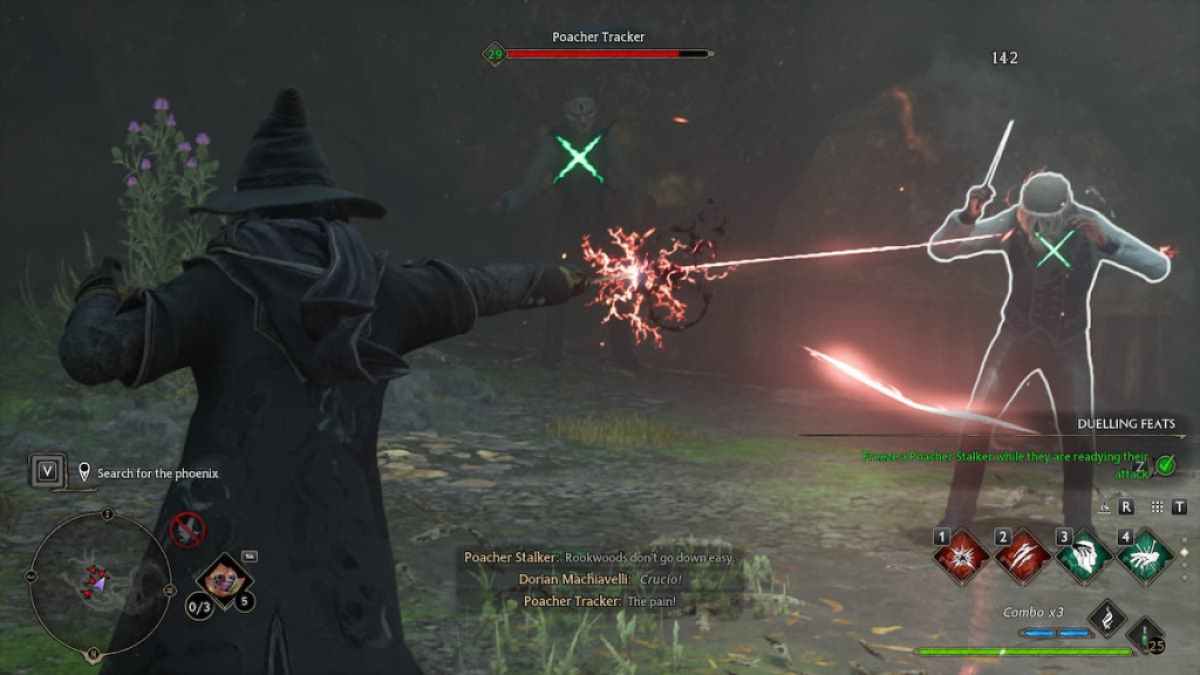
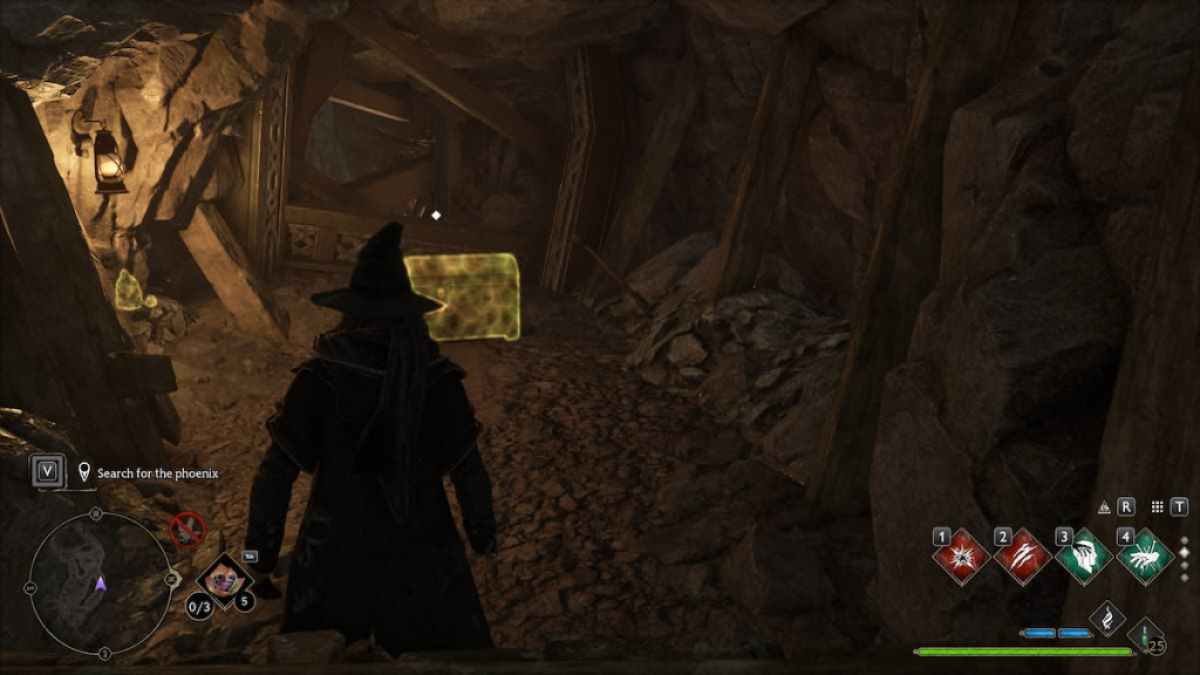
Return to the entrance of this domain , and continue inside the cave . This is where you will come across the first set of Poachers inside the cave . Use any of the spell combinations you require to defeat the Poachers and go ahead to the next area of the cave . Keep in nous that there is a hidden chest here that you may collect by entering a blocked pathway . We have foreground how you could get this chest below .
On the elbow room to the next room to fight the second readiness of Poachers , you ’ll find a couple of treasure bags . Collect them quickly and go to the next room in the cave . At the entry of this elbow room , you ’ll find a Harlan F. Stone platform on the right - hired man side , you’re able to skip on this platform to sequestrate the enemies easily . Check the arrow on the image above to see where this platform is located .
Screenshot by Pro Game Guides
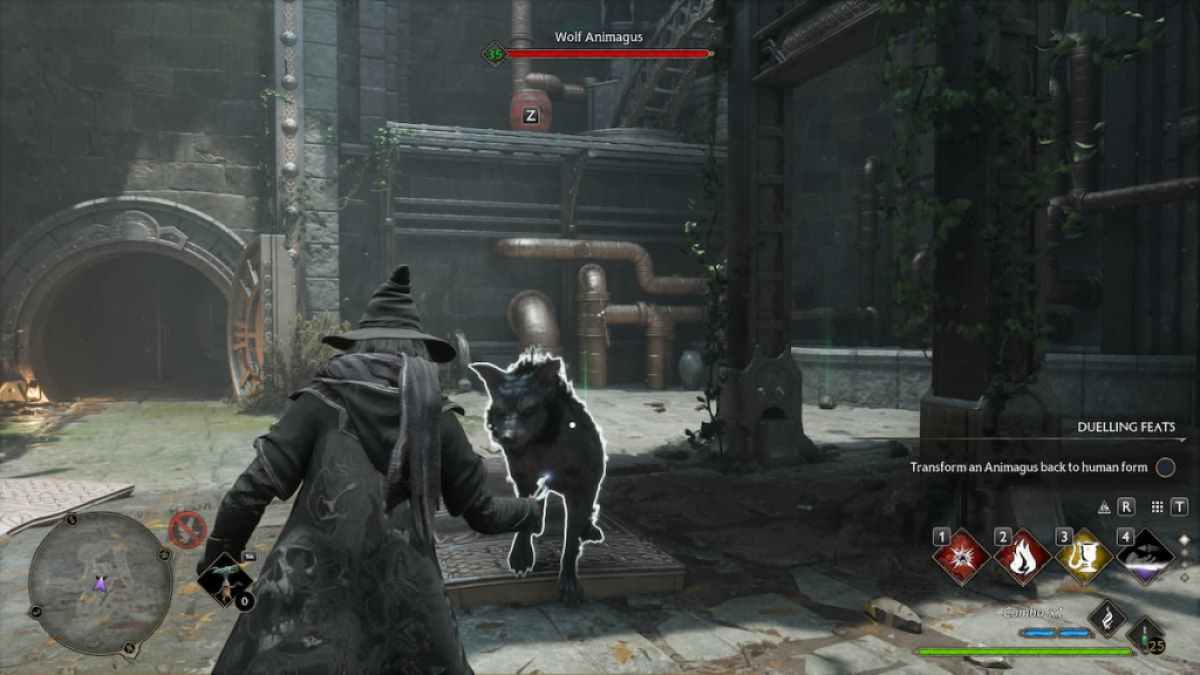
There will bePoacher Animagusin this elbow room , along with a few other enemy . There are also red barrels set around this way which you may use to knock down the foe . For the Poacher Animagus , we recommend turning it into human form with the Transformation spell if the Duelling Feats look in your challenge .
After fighting the second lot of Poachers , you ’ll come across a locked door . Unlock it and enter through the door to blob the Phoenix inside the cave . There is a treasure bag on the left - deal side of the room , roll up it quickly , and then take the ladder on the right - hand side of the elbow room to go to the next area .
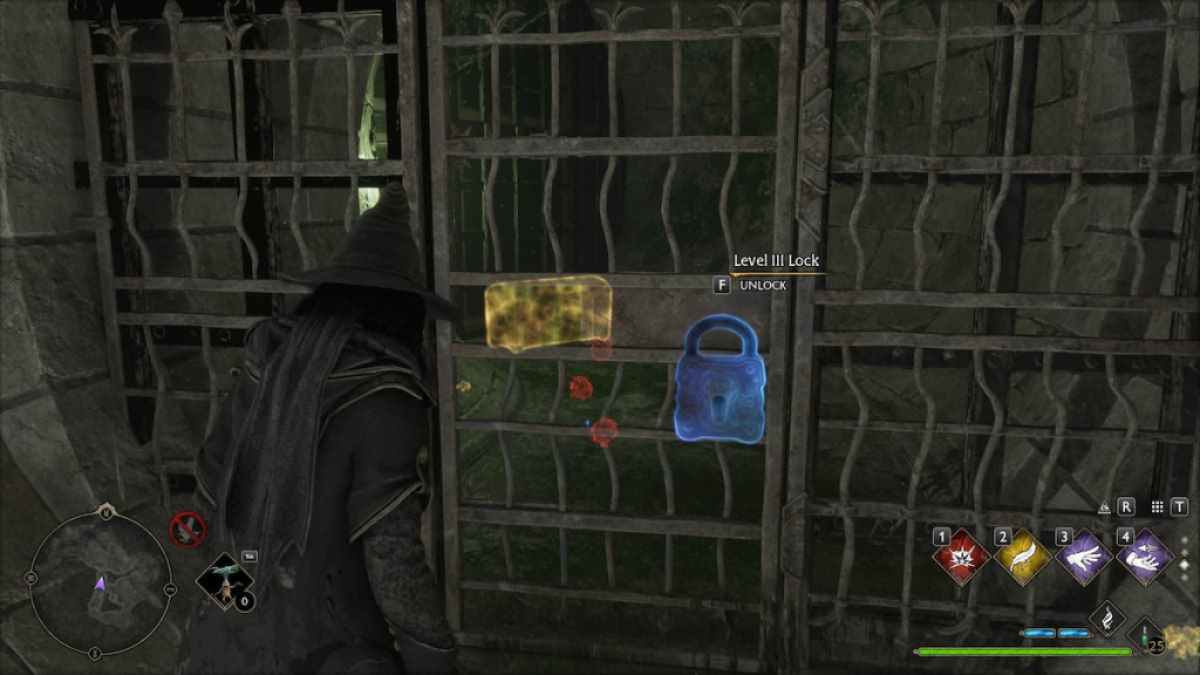
Climb the ladders and you will come across a door with a tier three lock , and inside there is another chest . You need to promote theAlohomoraspell to unlock this doorway . you could repay to this area after learn the spell to unlock this level three lock later on .
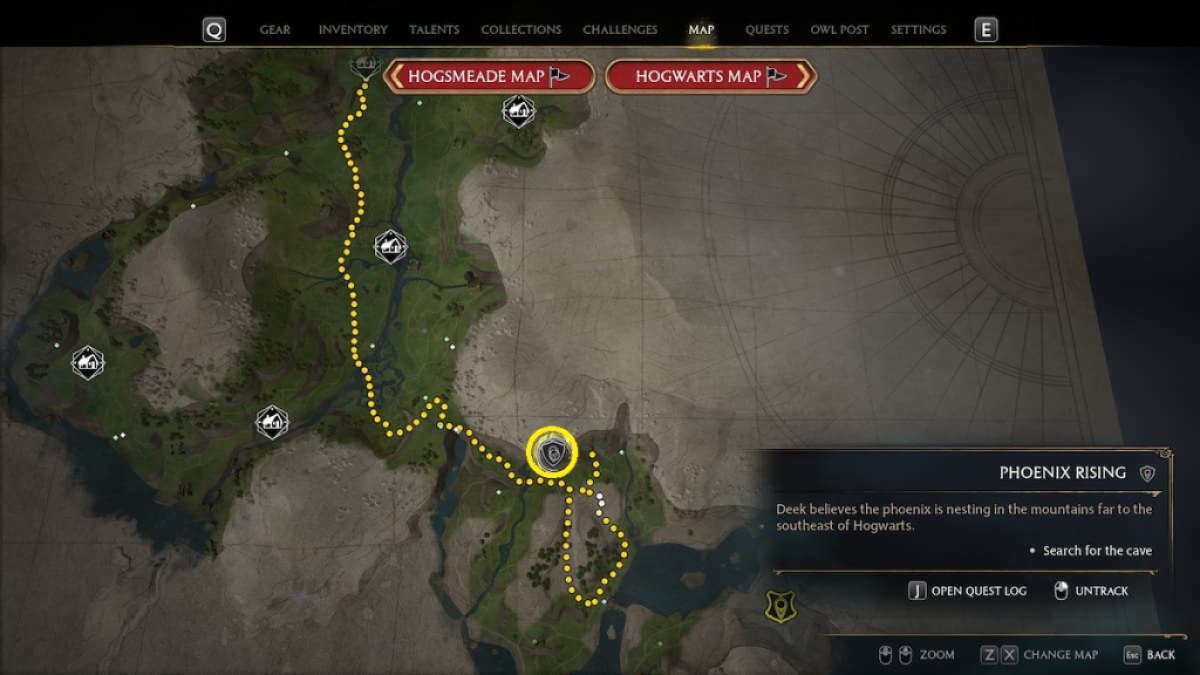
Image by Pro Game Guides
Related : Best Wand Handles in Hogwarts Legacy and how to get them
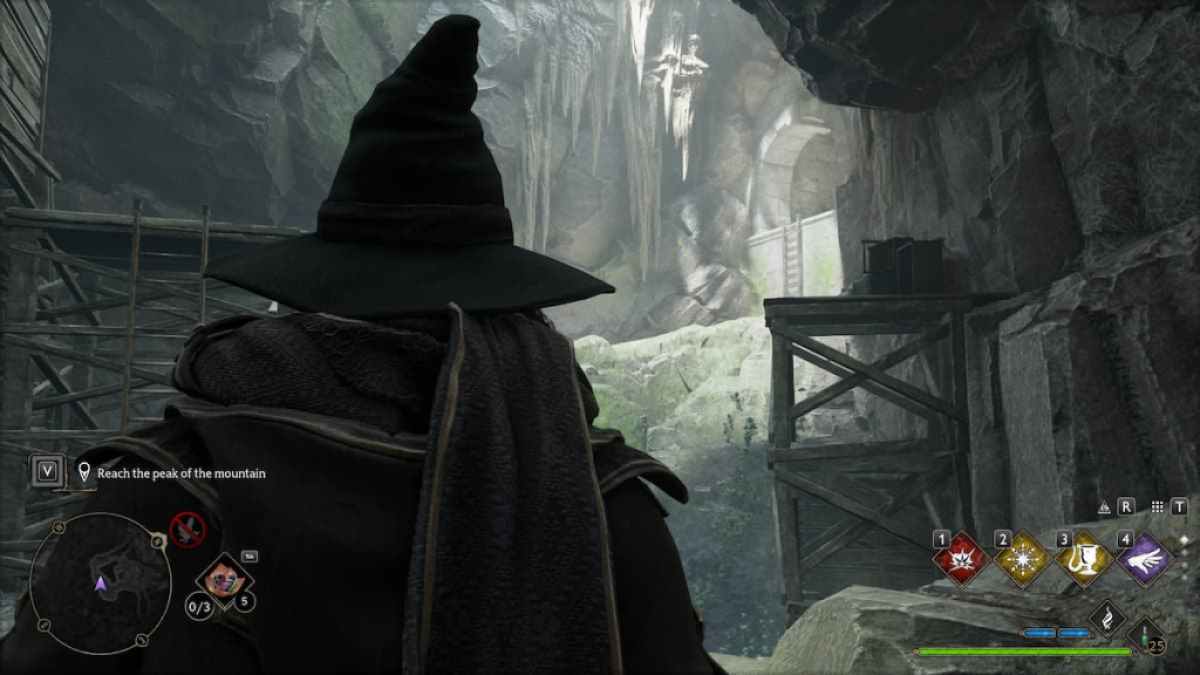
How to reach the peak of the mountain in Phoenix Rising in Hogwarts Legacy
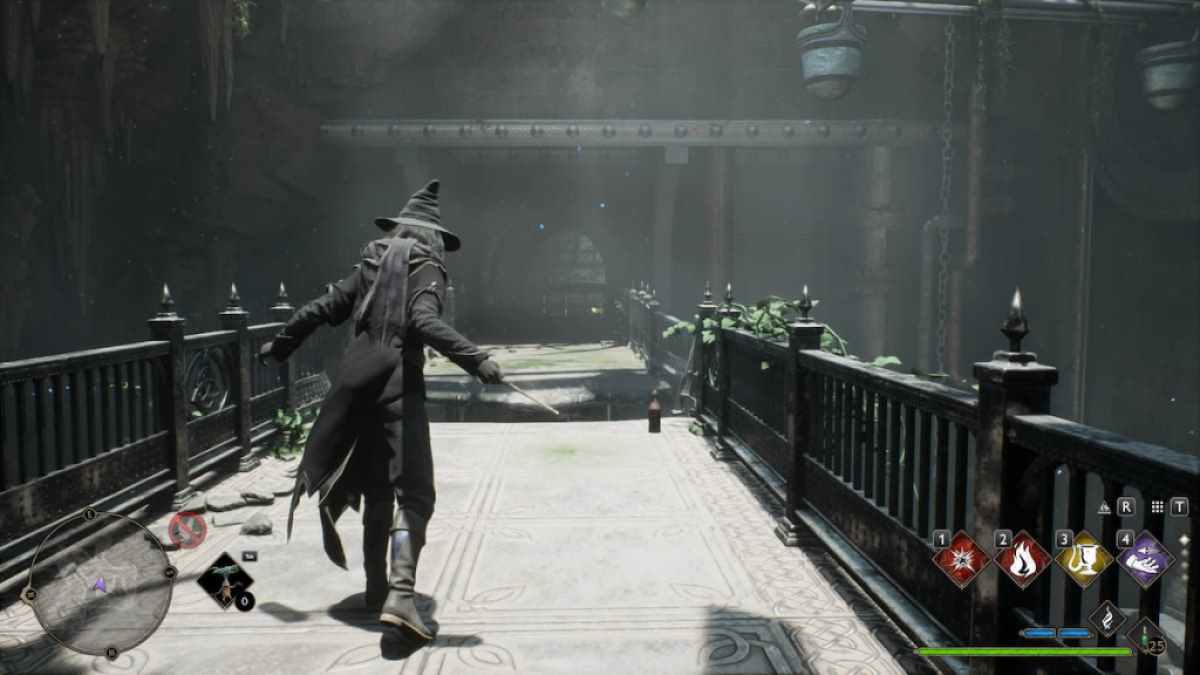
After finding the level three ignition lock room access , you need to take a right to find the kick downstairs metal bridge deck . After sweep this bridge , you ’ll hail across a busted wooden bridge . There is water under the bridge , and a run to get at the bottom area . Climb down the ladder and collect all of the item you find below , and return to the disordered wooden bridge circuit .
span the wooden bridge and vomit Revelio to blob another passage block by spider webs . You ’ll find water system in front of this musical passage and must gain it through an alternate route . get by using Confringo to sting through the spider webs . Check the chickenhearted arrow on the image above to see the locating of the chest .
Take the path on the left over - hand side of this elbow room , and attain the spotlight mighty above the chest . From here , you’re able to leap down below to collect the chest . drown across the small water body and return to the initial area to shape up toward the peak of the lot .
Screenshot by Pro Game Guides
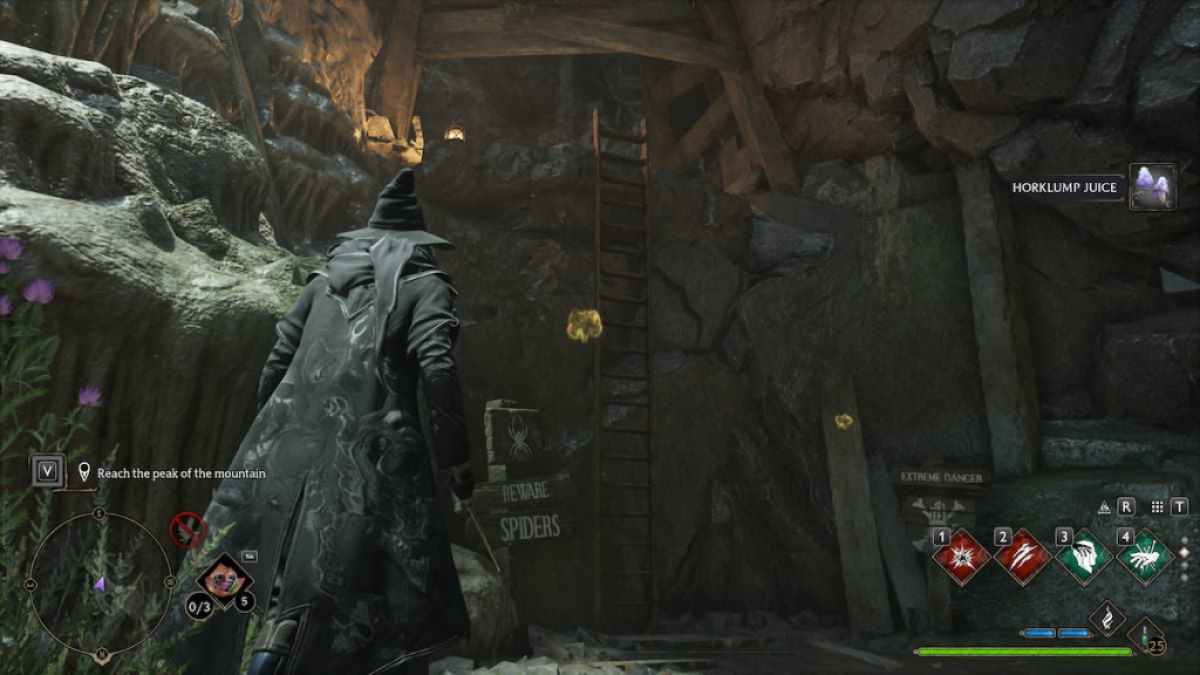
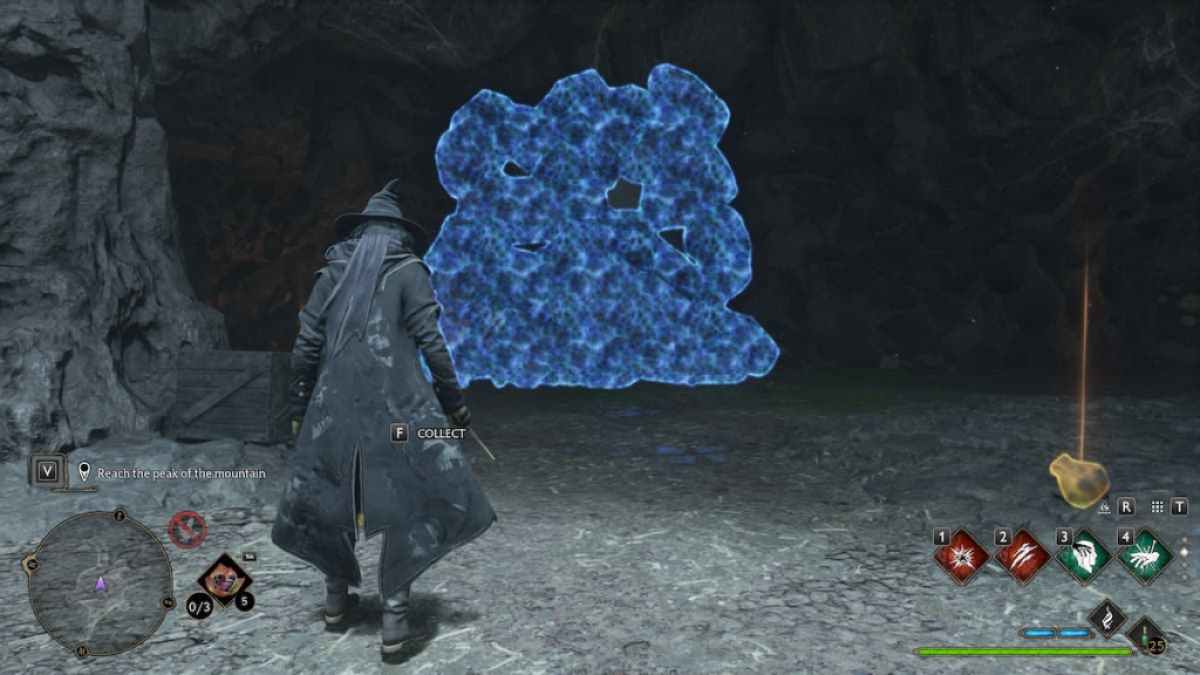
The next room has a ladder that leads to the peak of the deal , and another little entrance blocked by wanderer web . burn down the wanderer webs using Confringo or Incendio , and enter through the burrow to collect Horklump Juice . fall to the entrance and climb up the ladder .
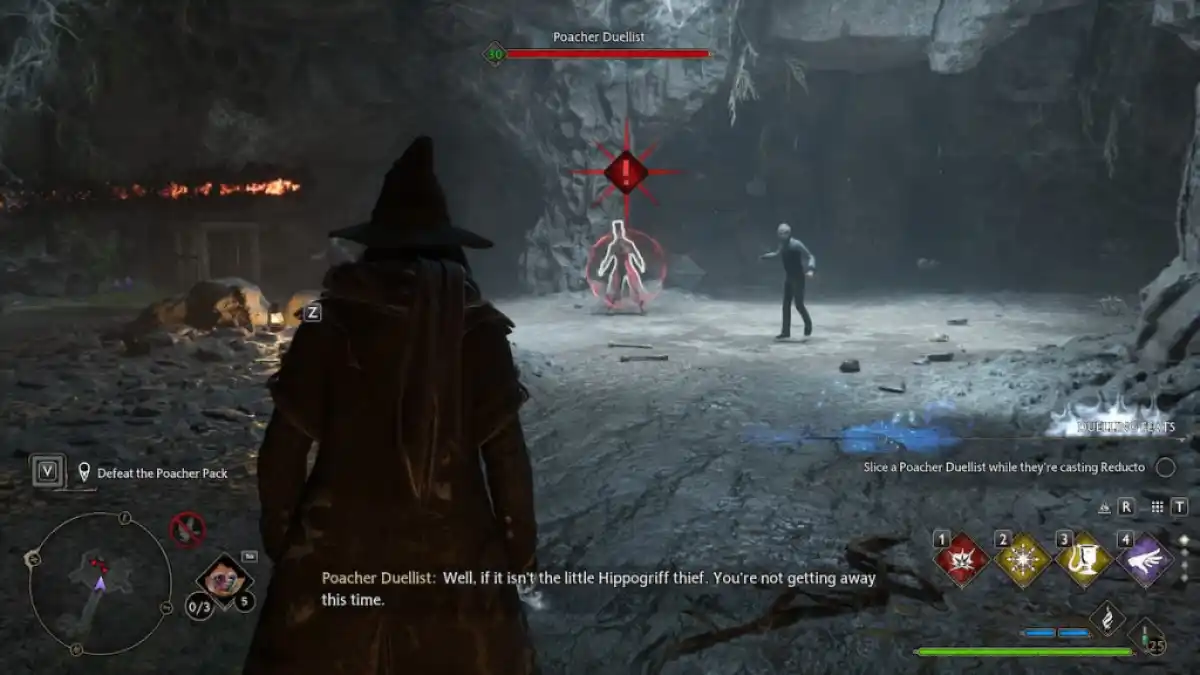
After cross this elbow room , you ’ll come across the third curing of Poachers in the Phoenix Mountain Cave . get the better of the Poachers quickly , and you will find two blocked entrances in this room . One of the entrances is impede by spider web , while the other is blocked by boulders . tick the instruction below to see how to enter these blocked spaces and collect the loot .
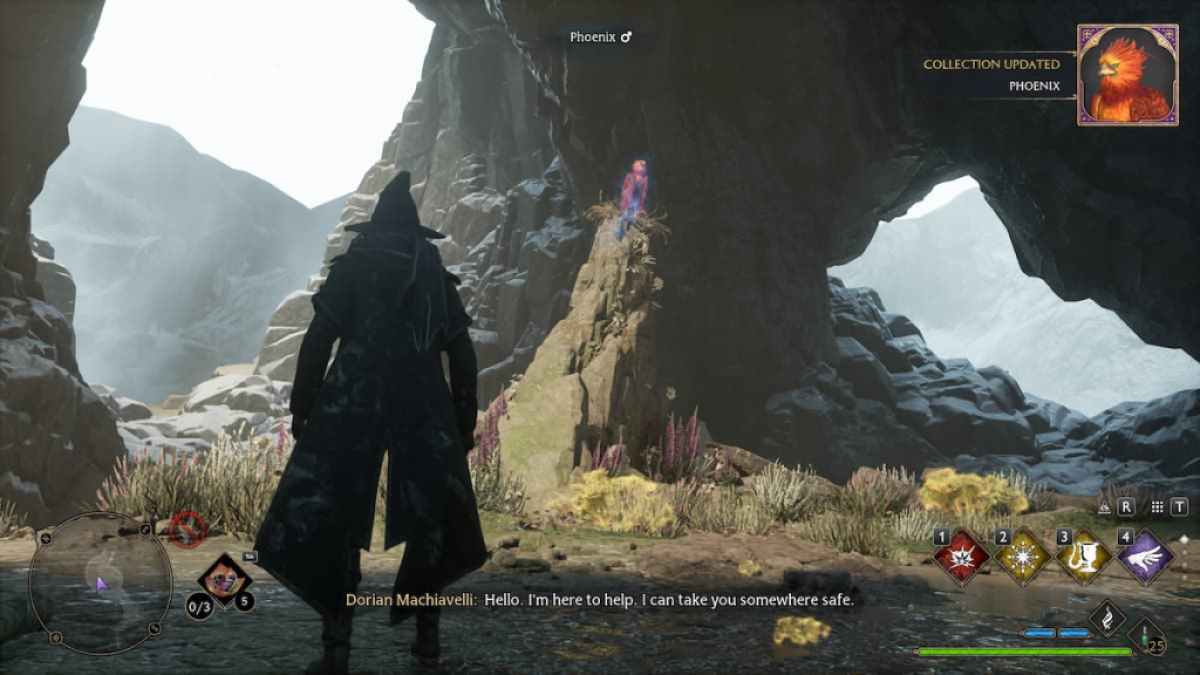
Once you have gathered all the materials from this room , advertise ahead to the peak of the mountain where you ’ll regain the Phoenix .
Screenshot by Pro Game Guides
Here you ’ll have to use the Nab - Sack to deliver the Phoenix and contribute it back to the Vivarium in the Room of Requirement . If you have not collected any of the bureau or treasure bag , you’re able to repay to this spate after completing the quest .
How to get the hidden chests in Phoenix Rising in Hogwarts Legacy
During the Phoenix Rising quest , you ’ll rule several chest inside the cave . Some of these chest are located in guileful spot , so you must pilot around the areas by using different spells to get them . While explore the cave , you will determine a few bag put in areas that are out of reach . To get these bags , you’re able to expend Accio to bring them closer to your character . Here are some of the hidden chest you ’ll find in the Phoenix Mountain Cave .
Before entering the first room with Poacher enemies , you ’ll notice a chest on the left - hand side of the passageway . The way to the bureau is blocked , and you need to find oneself an alternate route . get the better of the Poachers and manoeuver down to the central part of this elbow room .
reckon below the wooden bridgework and you ’ll find a hole block by spider webs . expend Confringo or Incendio and get within from the diminished ingress .
Screenshot by Pro Game Guides
There are a few spider eggs inside that you’re able to destroy easily by using Confringo . pile up the pectus and deliver to the entrance to move to the next room .
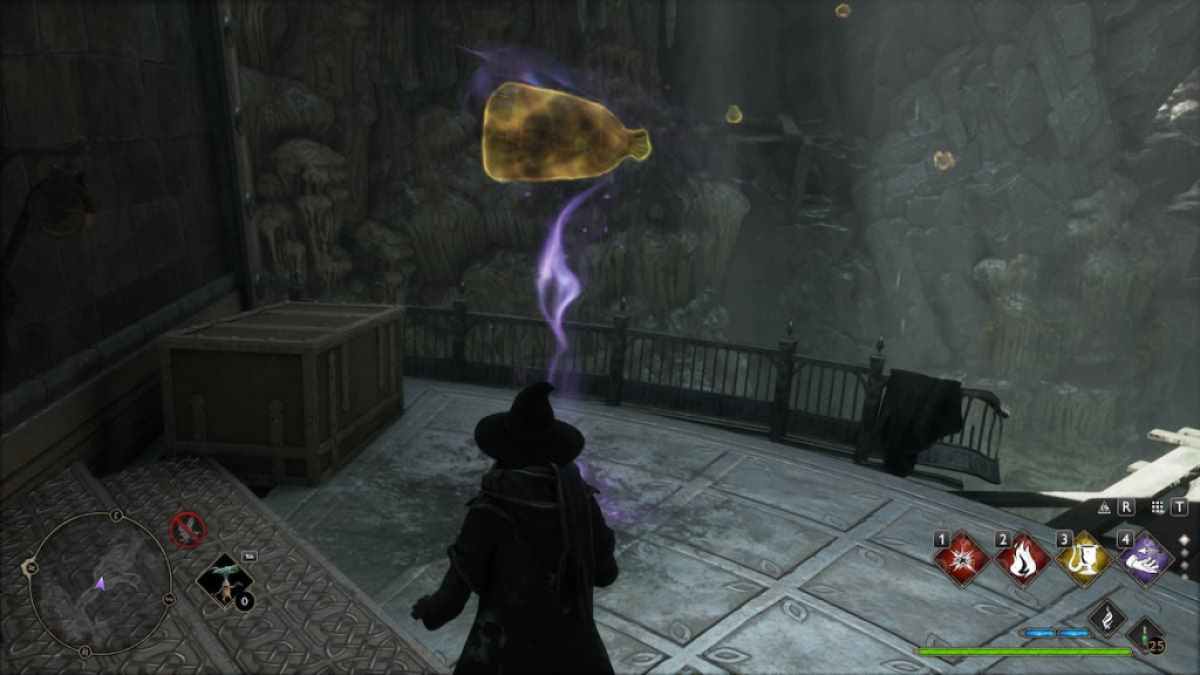
Next up , in the elbow room with the third stage set of Poachers , you ’ll line up two blocked space , one stymie by boulders , and the other by wanderer webs .
Use Depulso on the stones blocking the path to collect the gem udder from inside .
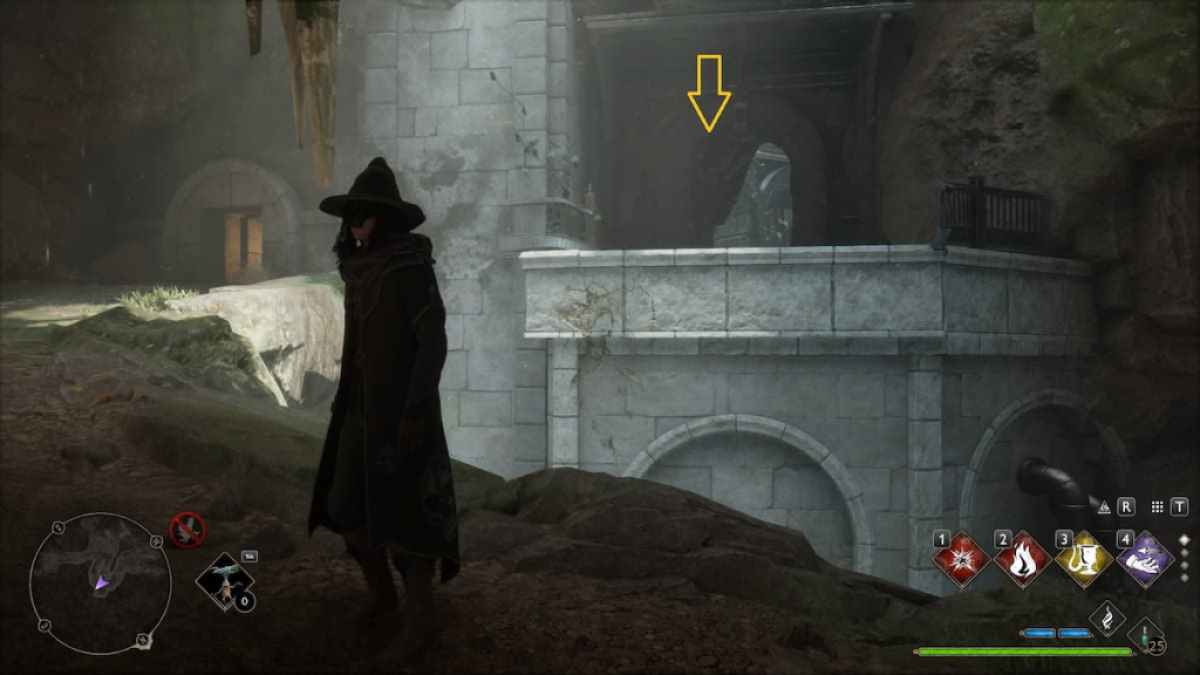
Image by Pro Game Guides
Use Confringo or Incendio on the wanderer web to burn them , and collect the Collections Chest from inside the pocket-sized passage as shown by the yellow-bellied arrow in the image above . These are all the concealed chests and hoarded wealth bags we found in the Phoenix Mountain Cave in Hogwarts Legacy .
Are you looking for more of our picking for the well - looking cosmetics in Hogwarts Legacy ? Check outHogwarts Legacy – Best Brooms Listhere at Pro Game Guides .
Screenshot by Pro Game Guides
Screenshot by Pro Game Guides
Screenshot by Pro Game Guides
Screenshot by Pro Game Guides
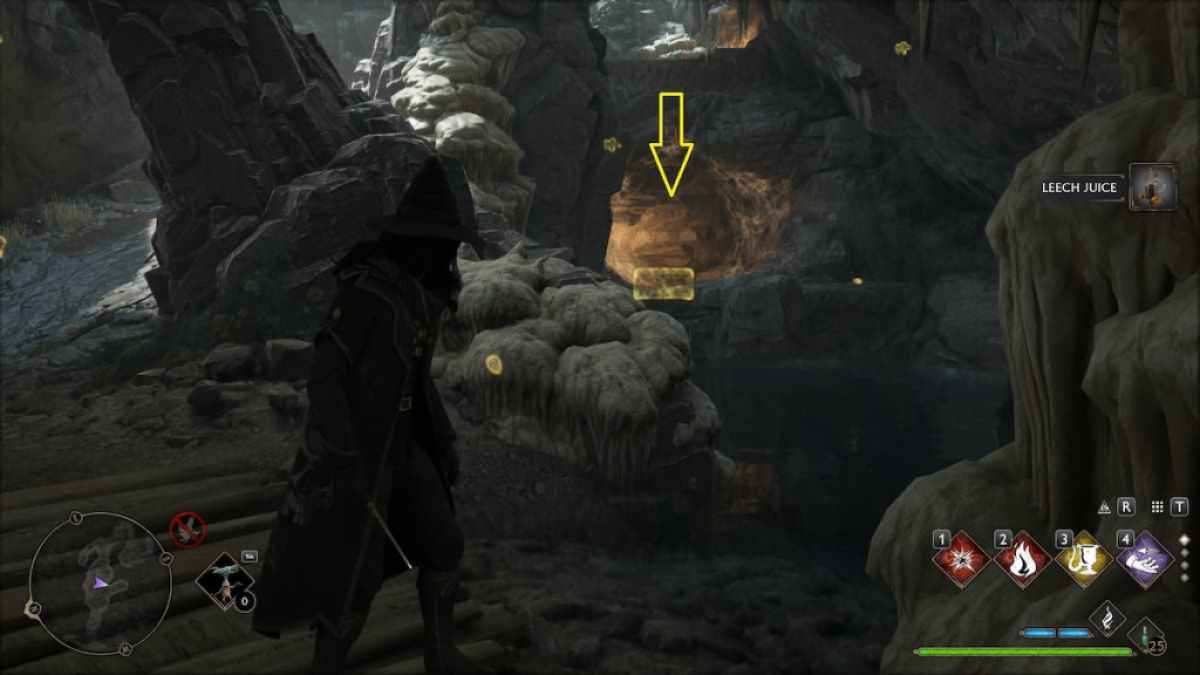
Image by Pro Game Guides
Screenshot by Pro Game Guides
Screenshot by Pro Game Guides
Screenshot by Pro Game Guides
Screenshot by Pro Game Guides

Screenshot by Pro Game Guides
Screenshot by Pro Game Guides
Screenshot by Pro Game Guides

Screenshot by Pro Game Guides
Screenshot by Pro Game Guides
Screenshot by Pro Game Guides
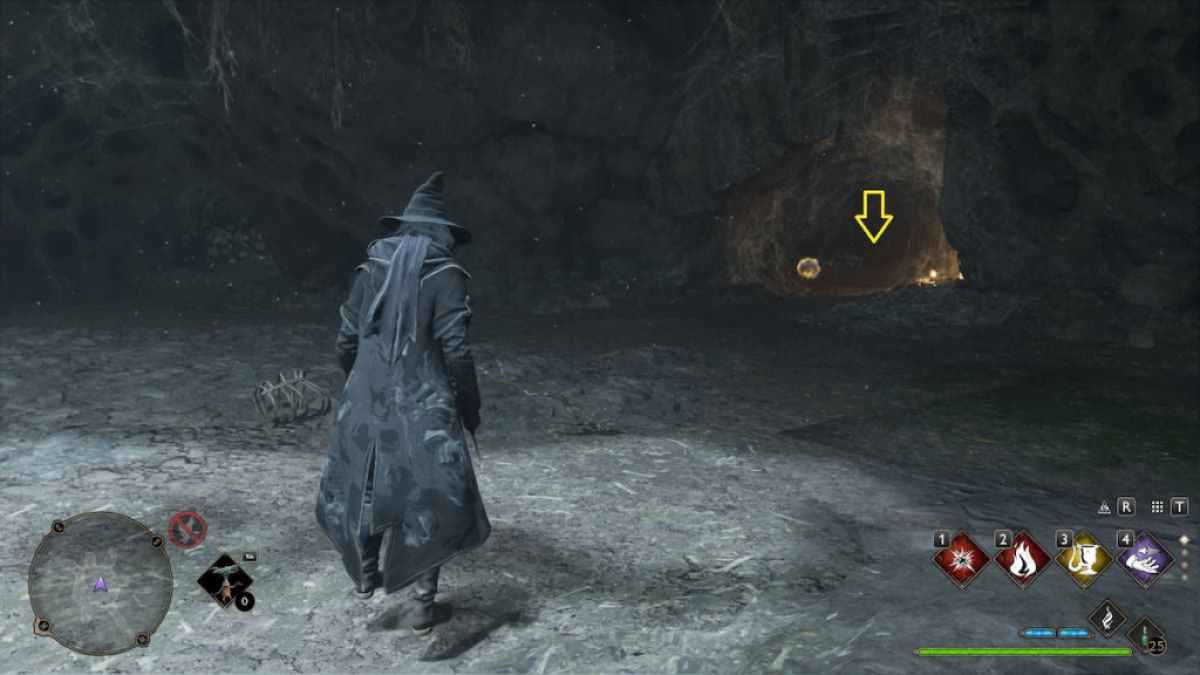
Image by Pro Game Guides
