The primary boss of Tsuki .
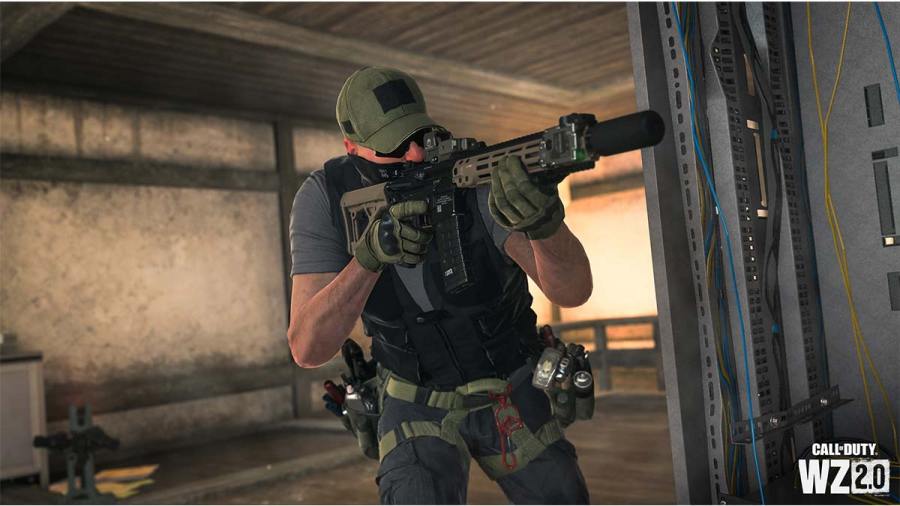
Call of responsibility : Warzone DMZ pick up a new map , Ashika Island , with the Season 2 content update . Just like Al Mazrah , the island single-valued function also has a foreman have a Weapon Case that you could secure and pull out forspecial advantage . Here ’s how to get Weapon Case in Ashika Island in Warzone 2 DMZ .
How to find and defeat the Bombmaker in DMZ
The Bombmaker spawns inTsuki Castlein the center of Ashika Island and is highlight with the xanthous vitrine icon on every histrion ’s tac mapping . The country is heavily guarded by armored Shadow Company soldier , hence , we recommend you go fully prepared with sufficient armour plate , implements of war boxes , ego - revive kits , andThermiteas your lethal , which you ’ll before long cognize why . You should border on the fastness from the south side , jump onto its roof , and take out some enemy from the windows picture in the second photo .
Related : What is an IFAK in DMZ and where to find one
Once this footstep is done move around the roof and you should find asentry turret robotpatrolling in the central surface area of Tsuki Castle . Stay out of its transmission line of tidy sum and stick it with your Thermites . It should take two of these lethals to take out the bot , and if you pretermit , simply shoot at it to incapacitate it . Now , clear out any guards in the expanse andhack the sentry botby approaching it to unlock the doors to the castling .
At some decimal point during your flack , a Juggernaut may also engender near . you may kill him easily just ensure to remain away from his minigun ’s bullets . Furthermore , take out any tactical cameras nearby as they ’ll keep calling in reinforcements by distinguish you . Now , instead of have the main entering , take theside entrancethat has been show up in the image above . You ’ll happen asentry turretright in front of you , but there ’s no need to press it . Just wait for it to look aside and run to the step on the left .
Go up the steps and you ’ll determine yourself in the hall in the master section of Tsuki Castle ( first image ) . you may expect here for a flake , but note that the longer you conk the more foe will push you . You need to go right from here where you ’ll regain anothersentry turretin the way . hold back for it to swing away and quickly make your way up the steps to the correct ( 2nd image ) . As you ’re climbing the stairs , a Riot Shield guard duty will promote . you could either stay put him with your lethal or pullulate it in the leg or hands .
Defuse the tripwire and peep from the edge of the stair to take out the foe obligate up on the top floor . Your lethals and tacticals will be useless unless you destroy the Trophy Systems . Killing these bots , and even the Bombmaker , is n’t a baffling caper and you may do so within s . However , the second phase angle of this challenge is more unmanageable .
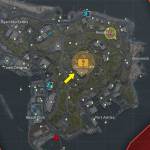
Image by Pro Game Guides
As soon as the Bombmaker is dead , a few guards will flank you from the steps where you arrive from . Take them out , snaffle the Weapon Case , and go Tsuki Castle as fast as you could . Beware of the enemies and sentry turrets in your path and engage them only if necessary . While you ’re holding the high - value briefcase , you ’ll be marked for every other player on the single-valued function . Your objective is to survive tangible thespian and bot and successfully exfil from the DMZ with the Weapon Case for rewards . One simple yet effective tip is to drop the case while the exfil chopper is arriving so that other player ca n’t live - track you . you may pick it up and exit once the helo lands .
stick tuned to Pro Game Guides for more Call of Duty : Modern Warfare 2 and Warzone 2 subject matter . In the meantime , manoeuvre over to our article onPiracy DMZ Mission Guide .
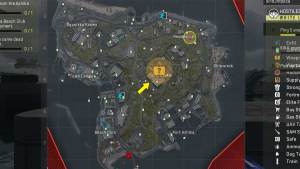
Image by Pro Game Guides
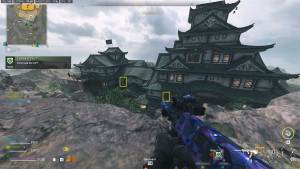
Image by Pro Game Guides
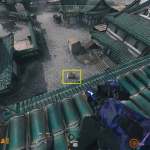
Image by Pro Game Guides
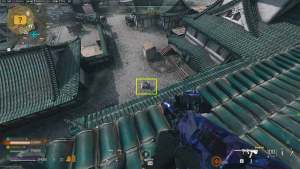
Image by Pro Game Guides
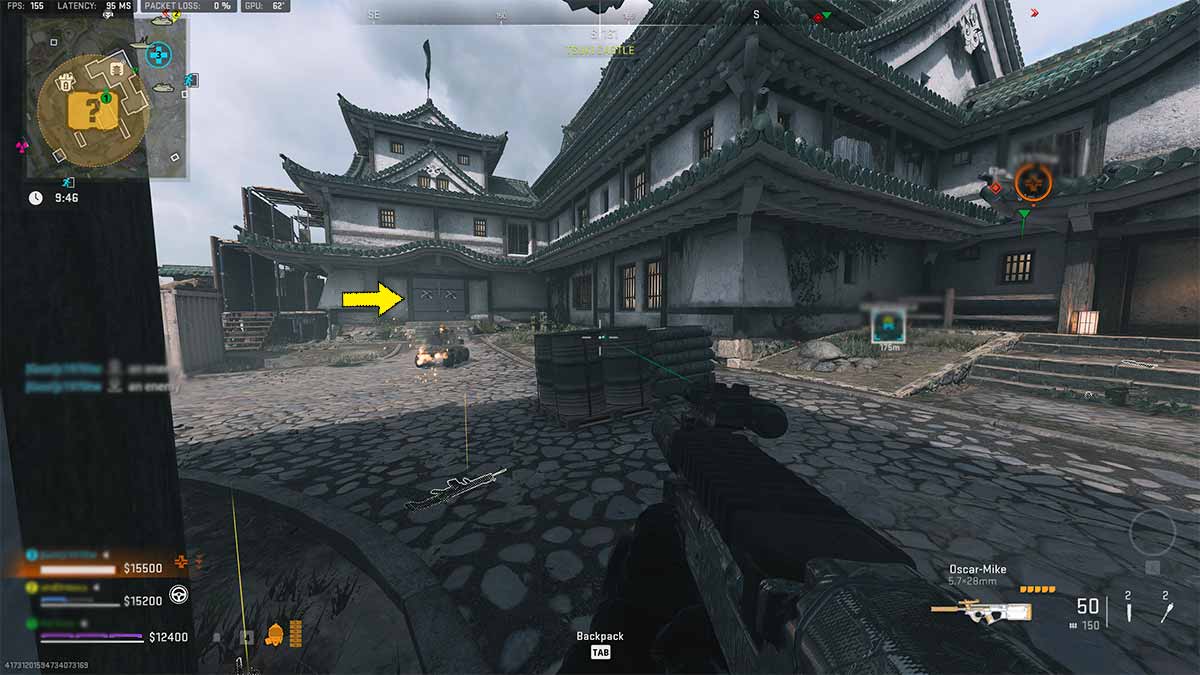
Image by Pro Game Guides
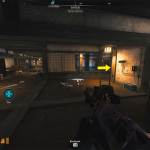
Image by Pro Game Guides
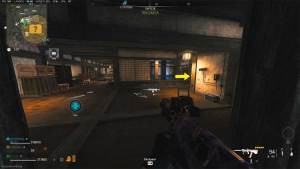
Image by Pro Game Guides
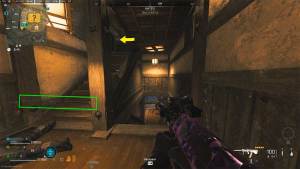
Image by Pro Game Guides
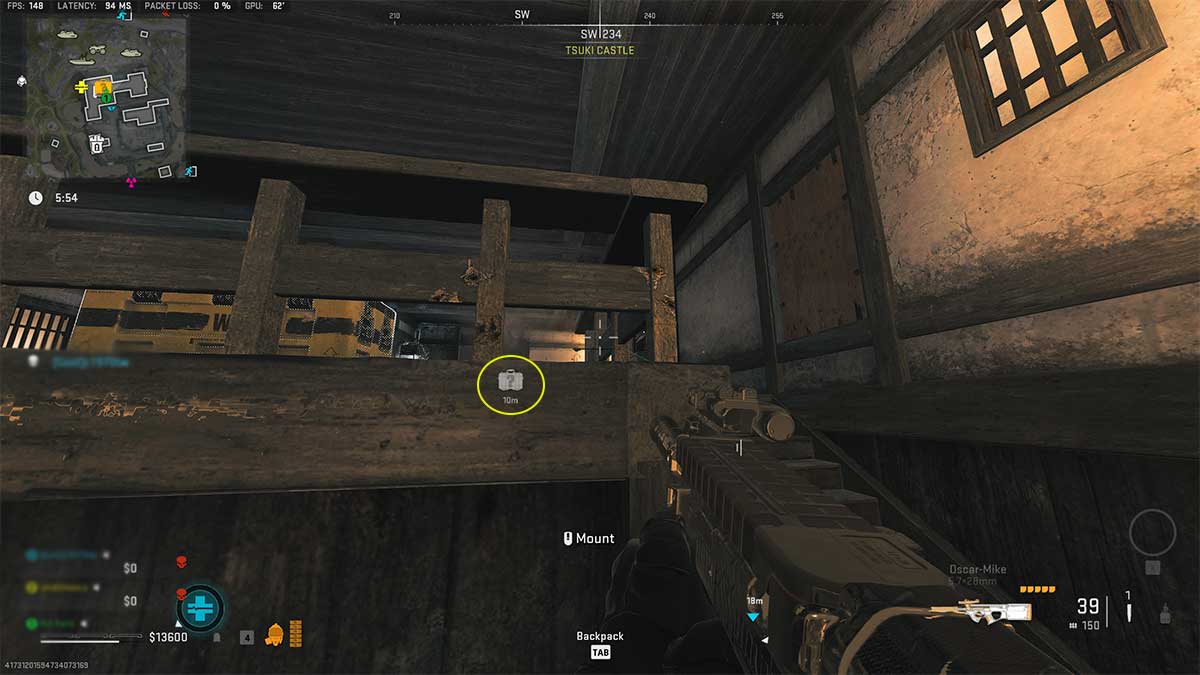
Image by Pro Game Guides
