Only time will secern …
WhileFind the Markersmay seem like just another scavenger - Richard Morris Hunt - flair experience , it actually offers quite an intricate map with more than a handful of challenging secrets to find . With itsWashable Kingdom Anniversaryupdate , discover the Markers addedeightmore markers for players to distinguish , including the one we ’ll be covering in this abbreviated templet , theTime Rune Marker .
How to find the Time Rune Marker in Find the Markers
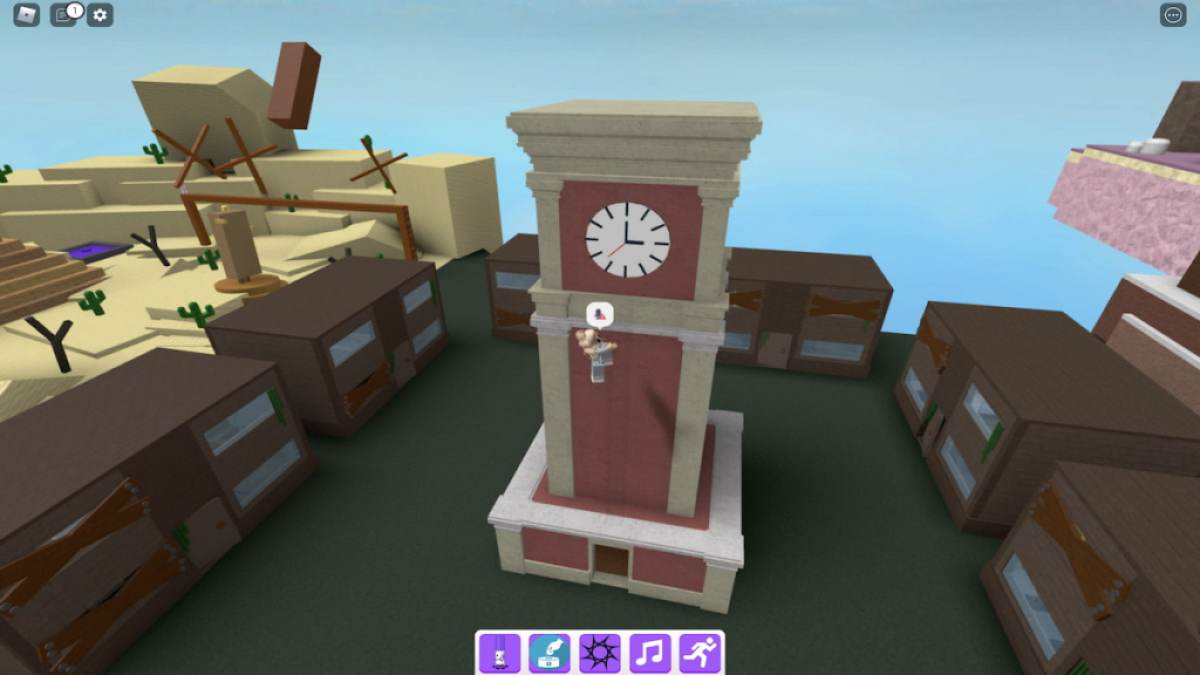
To begin your token - hunting journey , you ’ll first need to enterWashable Kingdomby teleporting through themagical clockpictured below . This clock has asecret ladderhidden behind it that will reserve you to climb up to the first level , followed by another secret run in the front that leads to the existent clock nerve . As before long as you ’ve reached the top of the 2d run , you will automatically be teleported toWashable Kingdom .
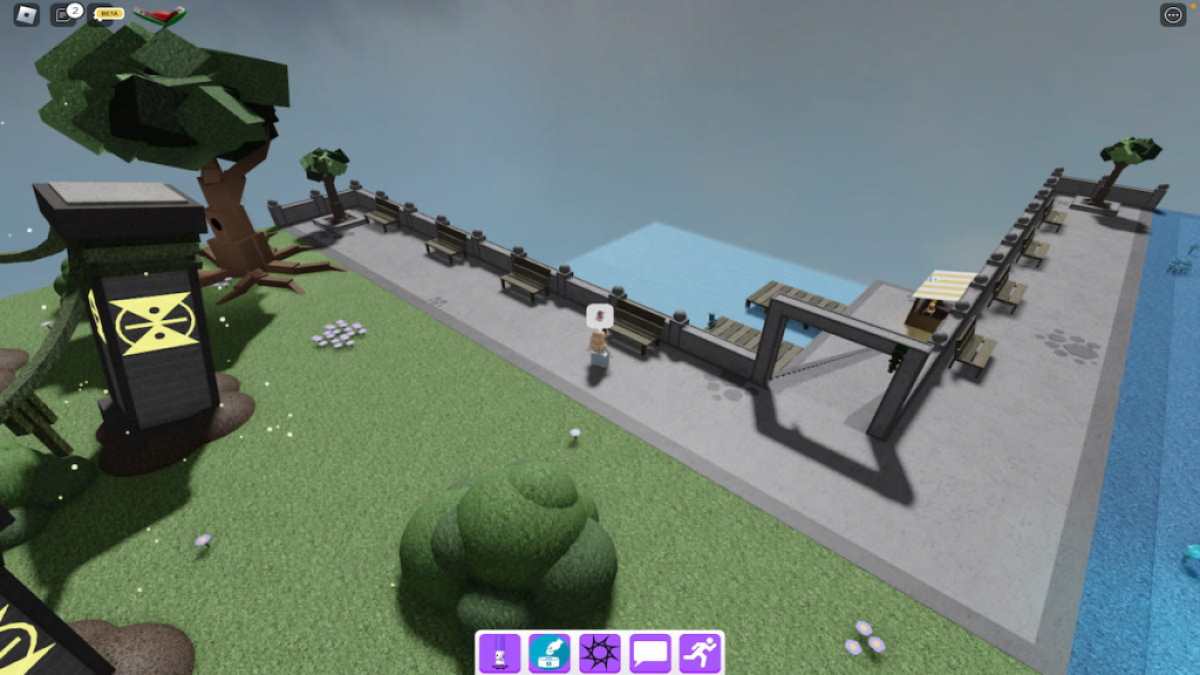
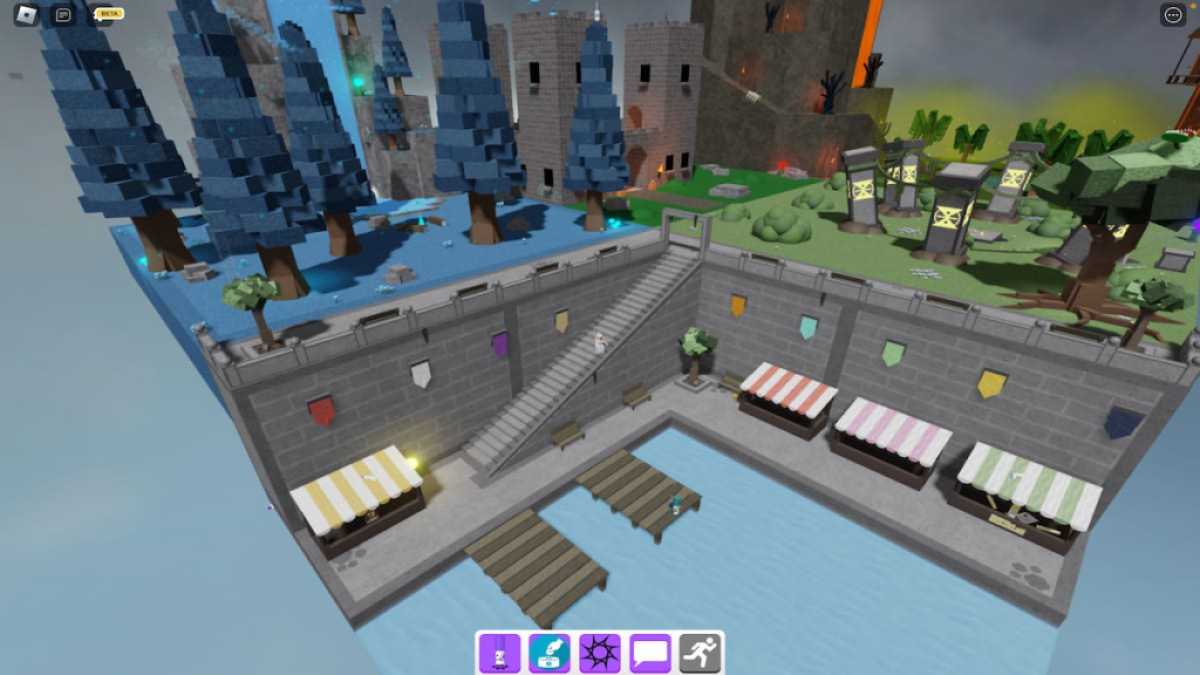
Once inside Washable Kingdom , head left and take the air down the stone stairway that lead to the market place .
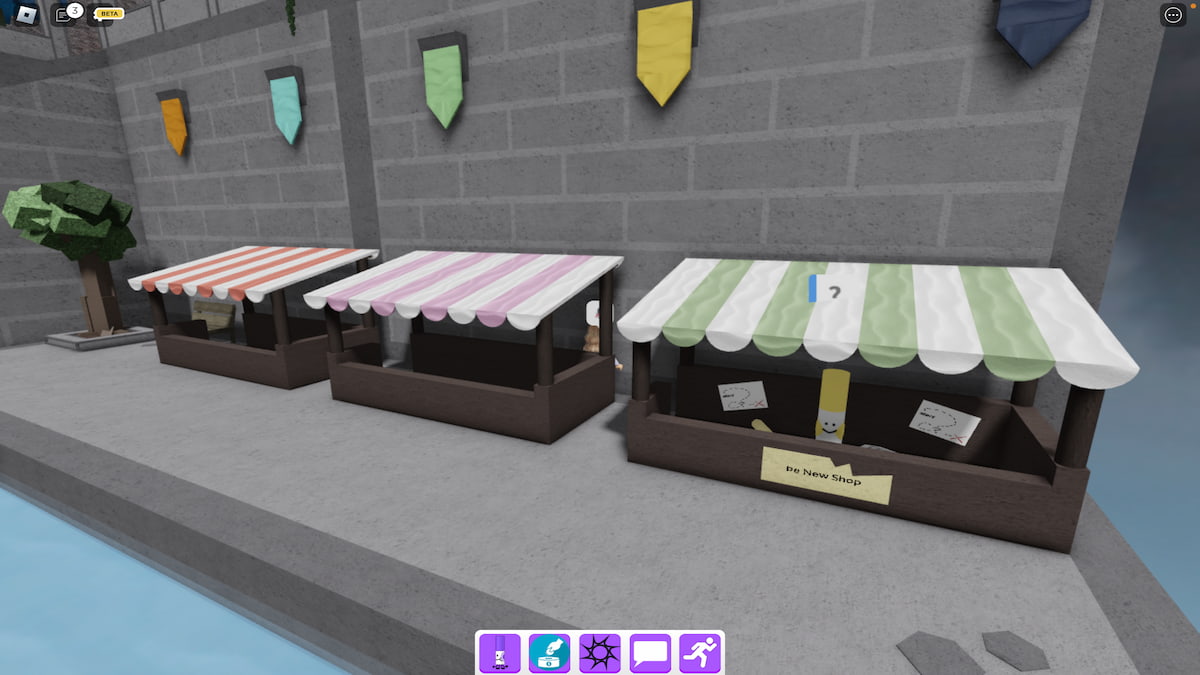
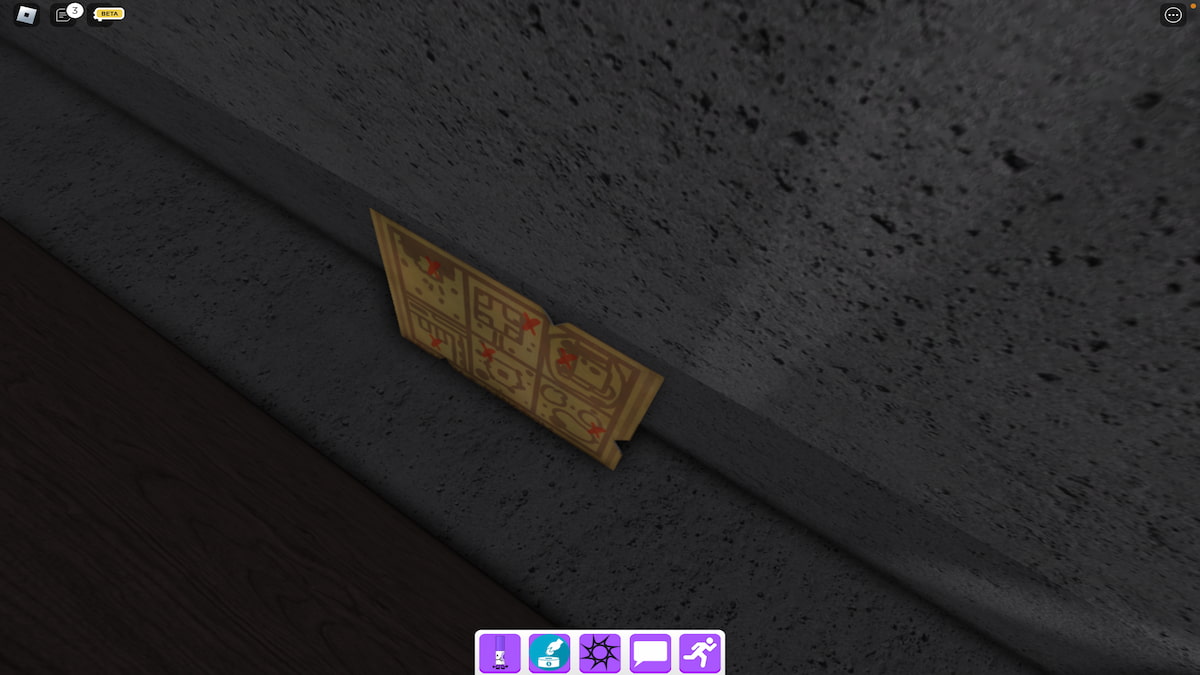
cover behind one of the booths in this marketplace should be a small gem map . When you find it , press it to pick it up .

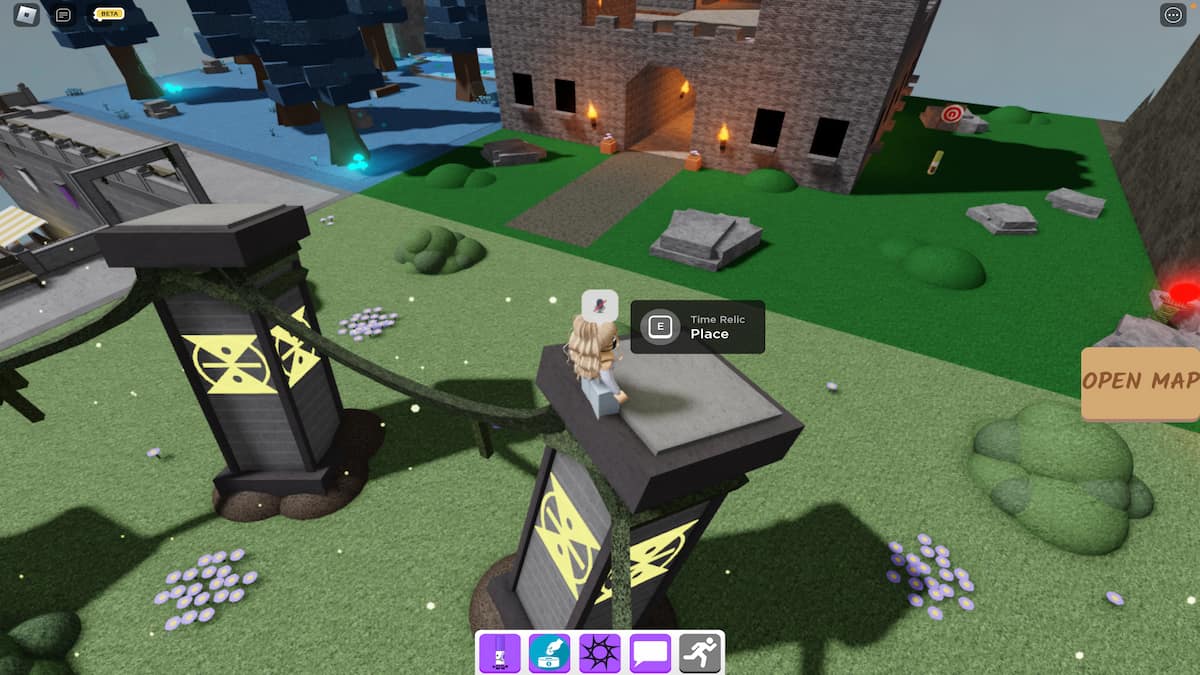
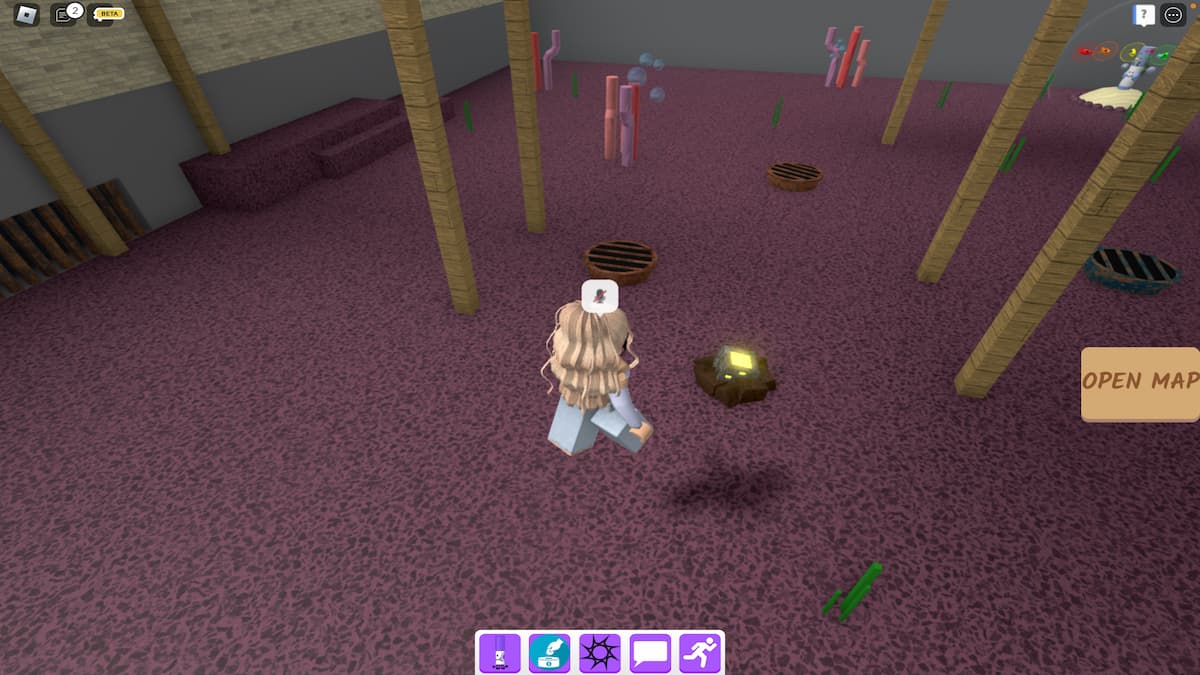
As soon as you do , the runes near spawn will be activate , causing theirsix gibe relicsto appear around the map . To summon the Time Rune Marker , we must collect all six of these relics and yield each one to the Washable Kingdom Runes . After apprehend up and collecting a token , youmustreturn it to a rune column before collecting the next relic — if you attempt to gather all six relic at once , without dropping them off in between , you wo n’t be able to sum up them to the pillars .
The locations of the six relics can be found below .
Related : How to get the Fisher Marker in Find the Markers – Roblox

Screenshot by Pro Game Guides
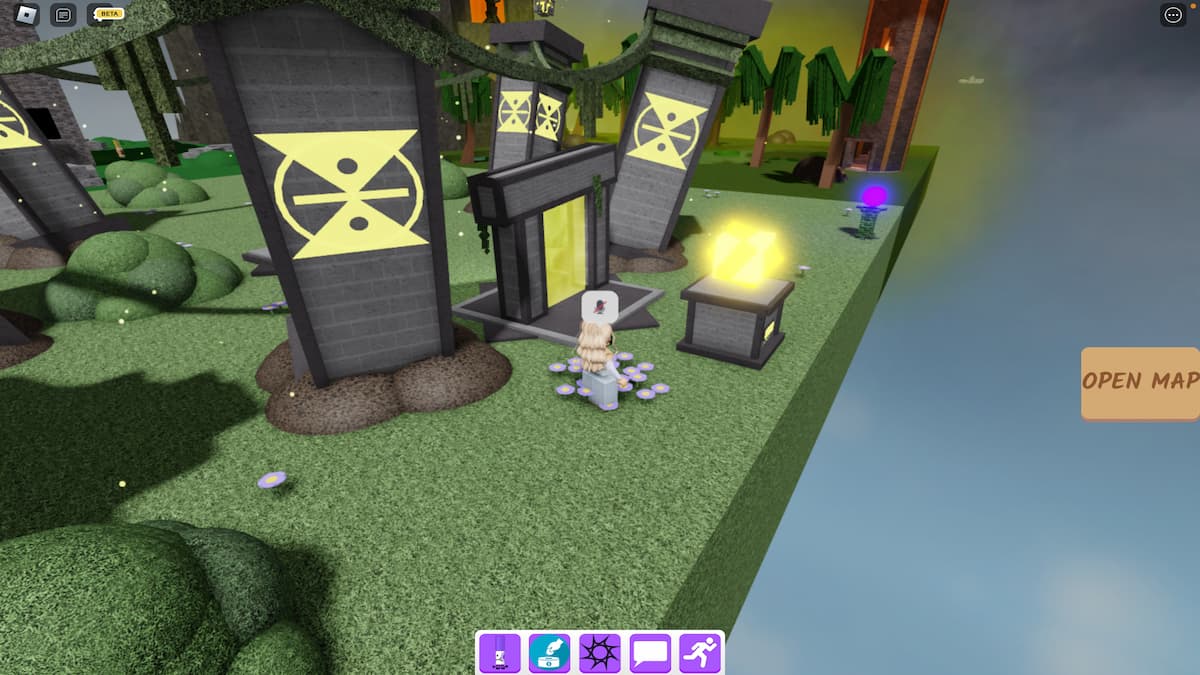
As bring up above , you must pass each relic to the Washable Kingdom Runes before collecting another . To do this , return to Washable Kingdom after pick up a souvenir , climb any of the six pillars , and holdEto rank the relic on top — the parliamentary law in which you collect / place the souvenir does n’t weigh .
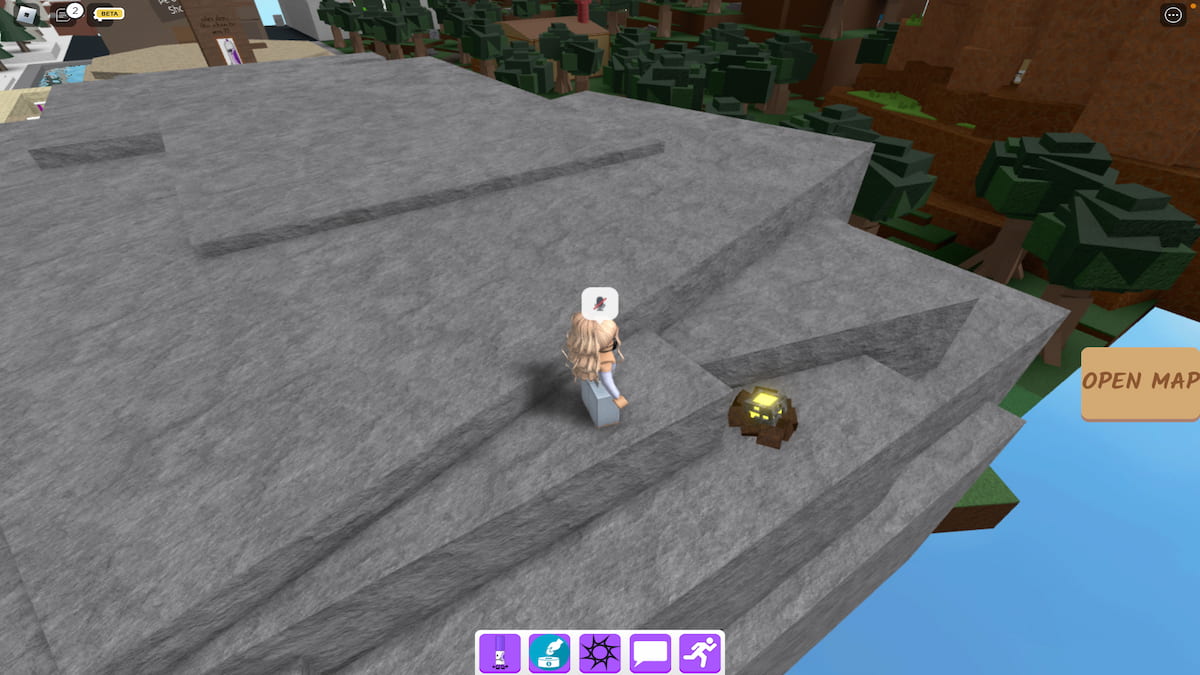
Now , the rest of the relic location are listed below .
interrelate : How to get the Tip Jar Marker in Find the Markers – Roblox
Screenshot by Pro Game Guides
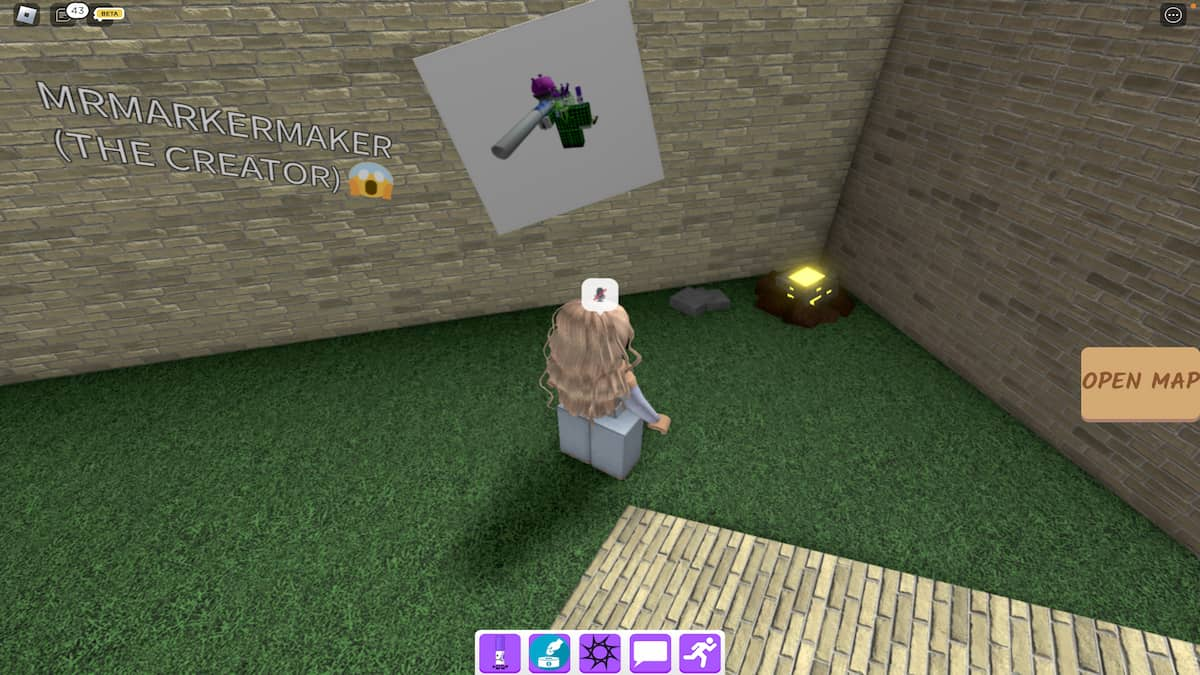
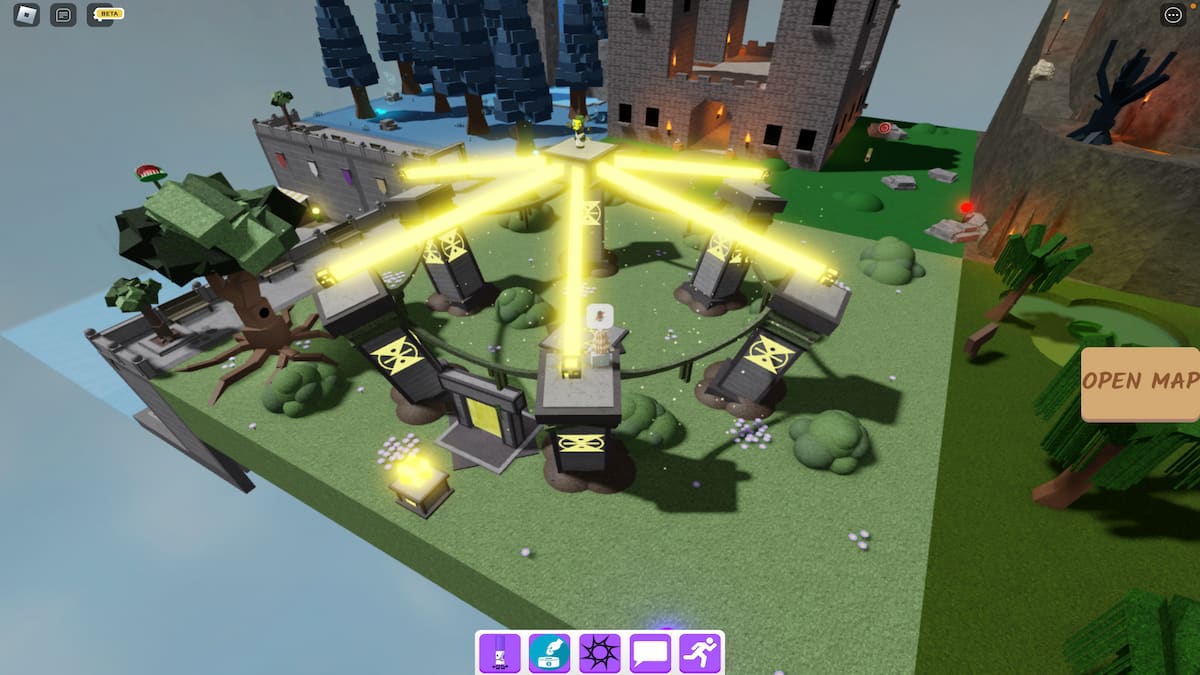
Once you ’ve collected and placed the final keepsake , a beam watch glass should appear on the pedestal that ’s behind the mainland portal site . draw close this crystal and pressEto activate it .
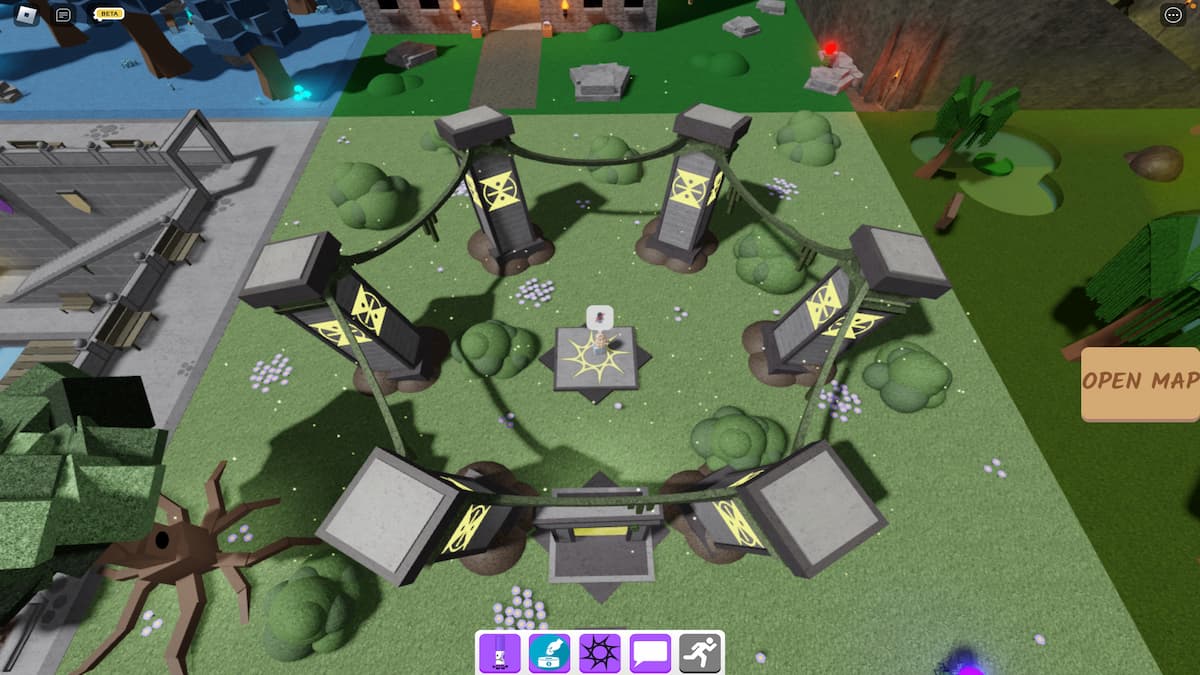
Upon doing so , each while of the runes should emit a beam of luminosity that , when merged , summons the Time Rune Marker .
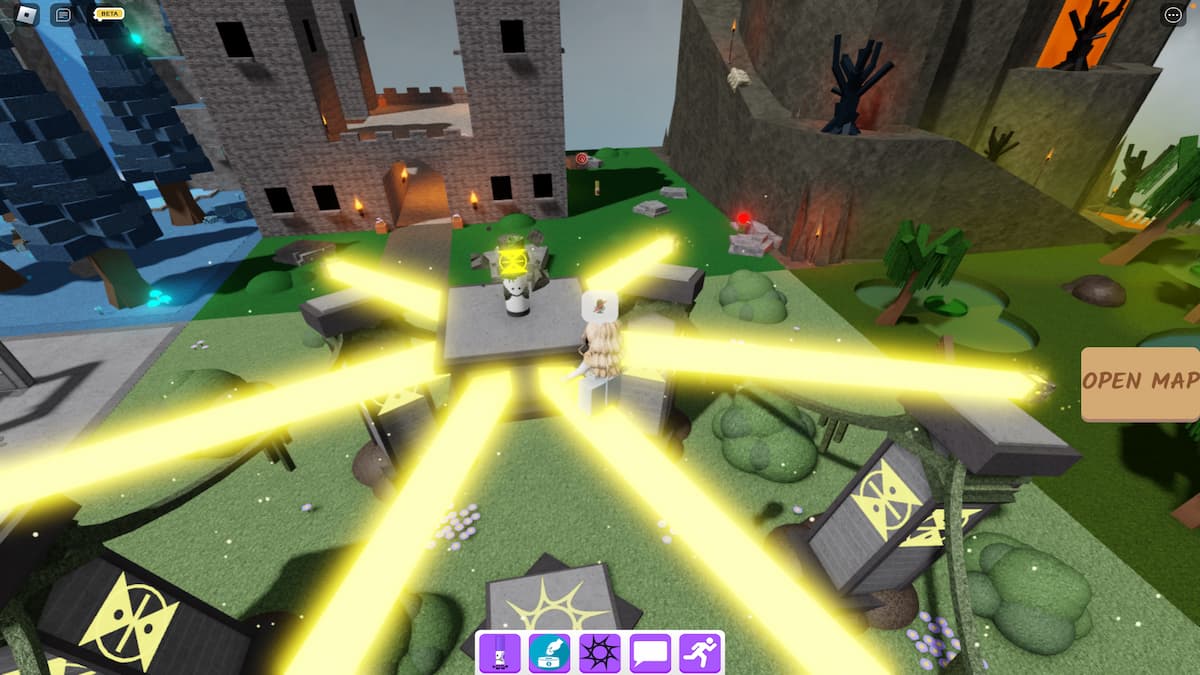
To get to this marking , cautiously walk across one of the beams of lightness to the chopine in the middle .
Screenshot by Pro Game Guides
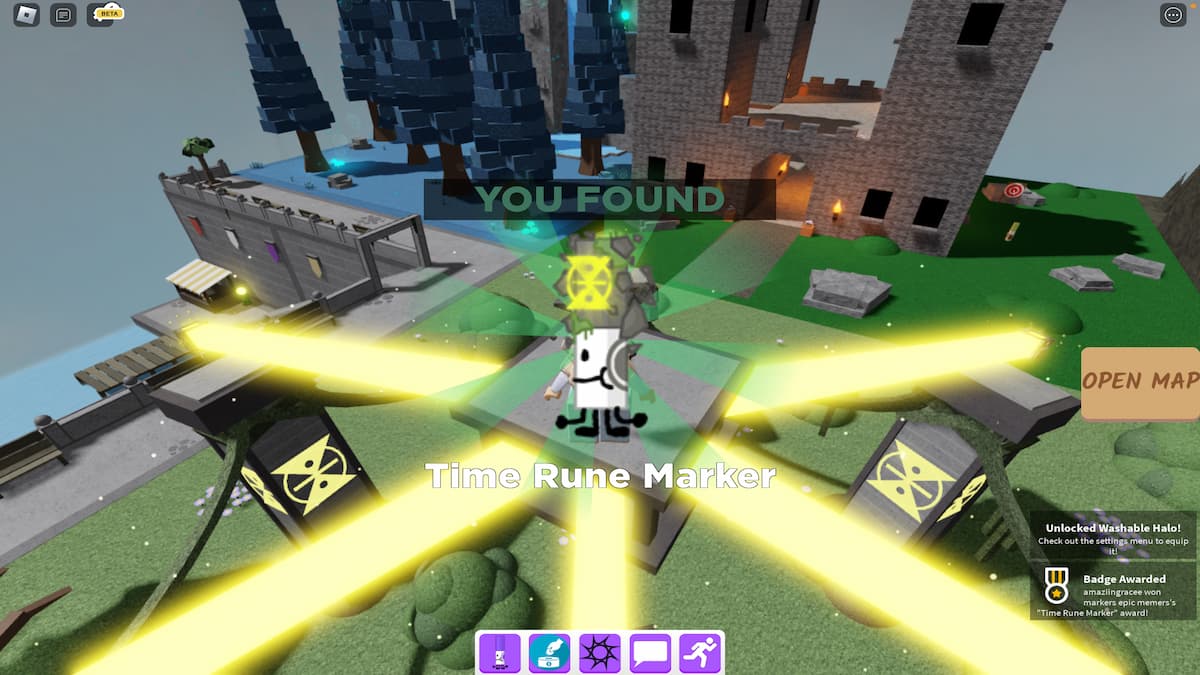
Once there , claim the Time Rune Marker by but walking up and touching it . As soon as you do , the dad - up below should appear , indicating the marker has been added to your Markerdex .
Looking for more regain the Markers content ? Check out our late guide onHow to get the Fallen Log Marker in Find the Markers – RobloxorHow to get the Magma Marker in Find the Markers – Robloxhere on Pro Game Guides !
Screenshot by Pro Game Guides
Screenshot by Pro Game Guides
Screenshot by Pro Game Guides
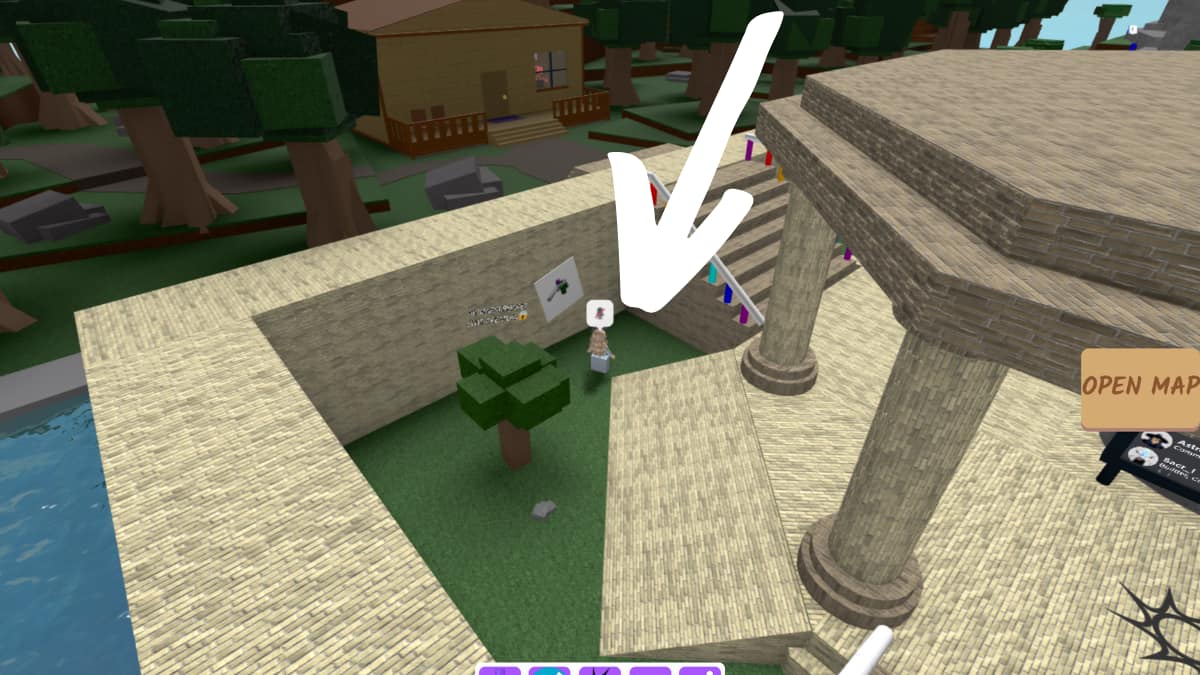
Image by Pro Game Guides
Screenshot by Pro Game Guides
Screenshot by Pro Game Guides
Screenshot by Pro Game Guides

Image by Pro Game Guides

Screenshot by Pro Game Guides

Image by Pro Game Guides

Screenshot by Pro Game Guides
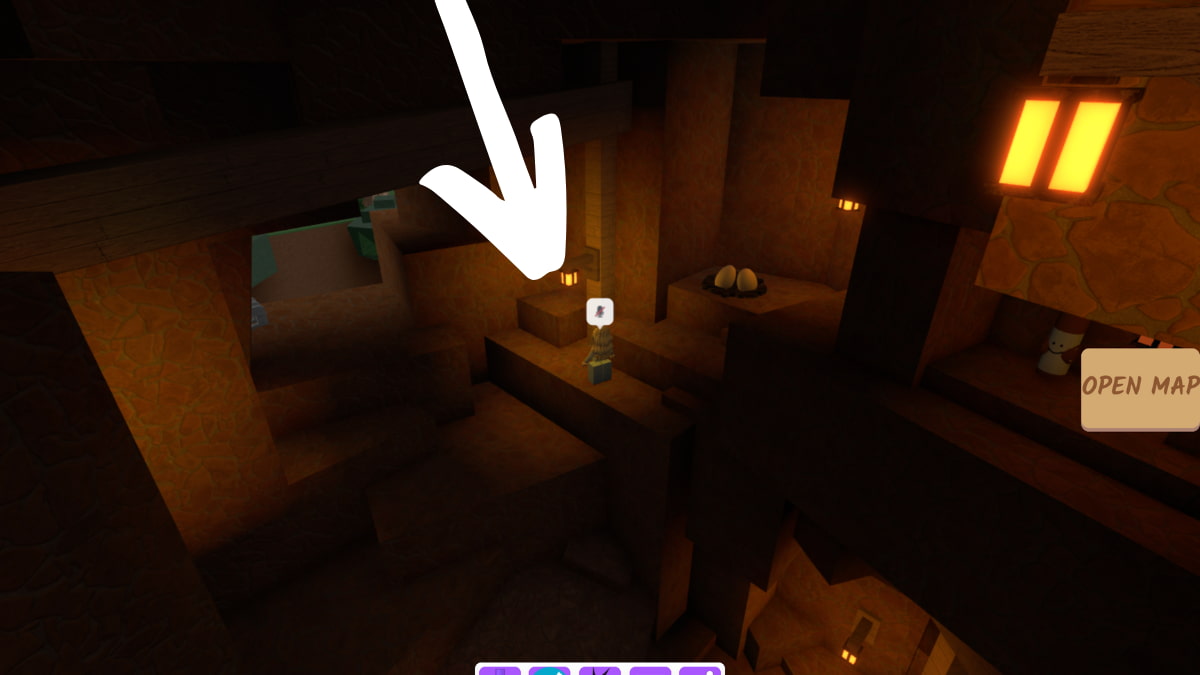
Image by Pro Game Guides

Screenshot by Pro Game Guides
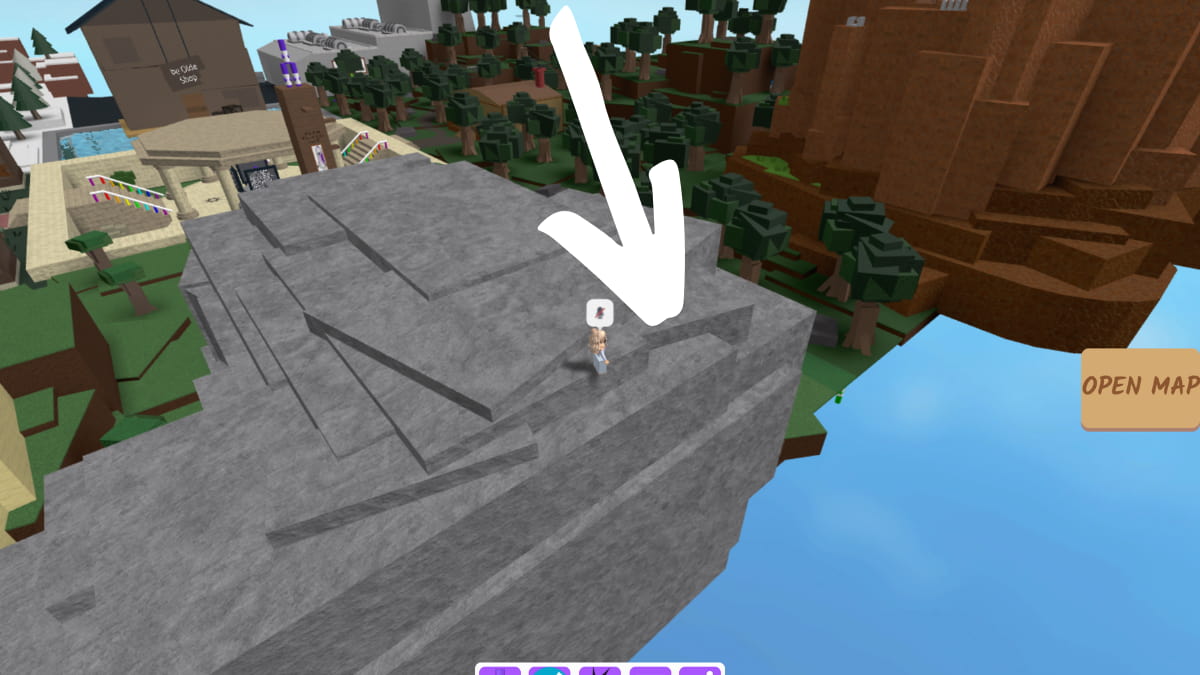
Image by Pro Game Guides
Screenshot by Pro Game Guides
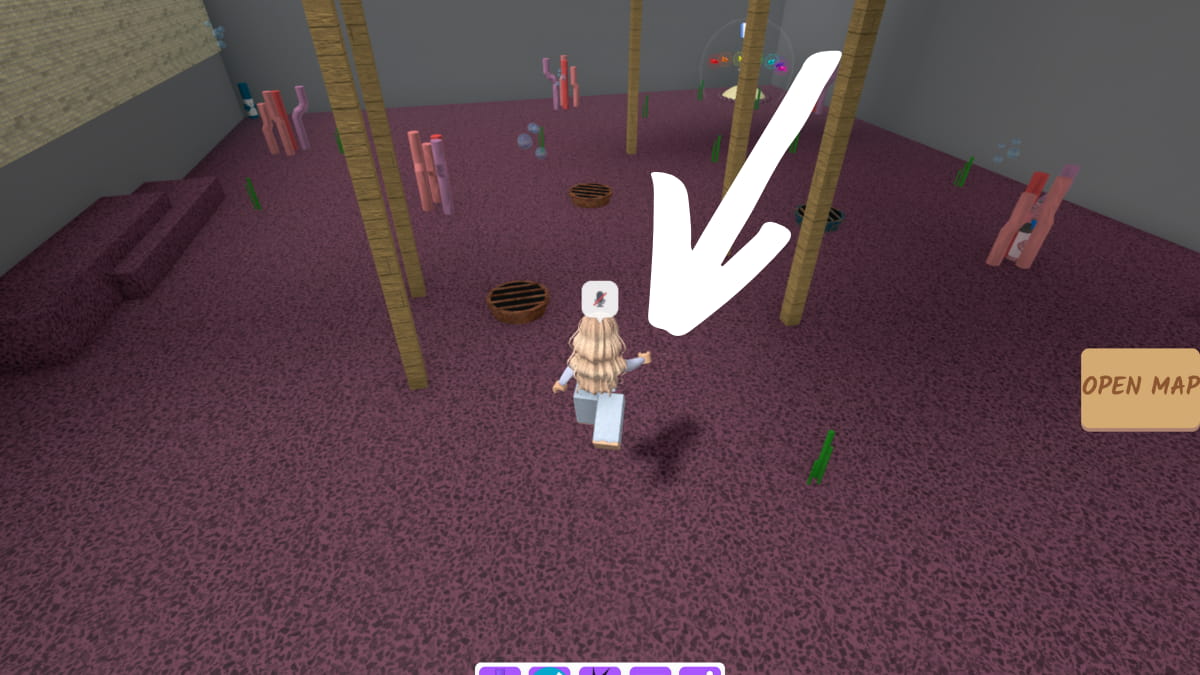
Image by Pro Game Guides
Screenshot by Pro Game Guides
Screenshot by Pro Game Guides
Screenshot by Pro Game Guides
Screenshot by Pro Game Guides
Screenshot by Pro Game Guides
