Make style , make path … !
Sea of Thieves and the Monkey Island Tall Tale part 2 sees you examine to rescue Guybrush from an enchanted rest . But first , you must fill in the Three Trials of Monkey Island .
I was a bit stumped when I start my trials , but thankfully , with some clever thinking and the correct items , I could build up . That said , you ’ll need to get your men on a Treasure Map .

Where to get the Treasure Map in The Quest for Guybrush - Sea of Thieves
As you walk through the town on Mêlée Island , you ’ll blot a familiar face in theCitizen of Mêlée . During The Quest for Guybrush Tall Tale , he has a single item for sales agreement : a Treasure Map . It be 1,000Pieces o ' Eight .
There is another way to get the Treasure Map , though . Instead of purchasing it , the Citizen of Mêlée is willing totrade it for a ocean chartfrom the Governor , Guybrush Threepwood .
Where to find Guybrush’s Signed Sea Chart in Sea of Thieves
First , head to Guybrush ’s Mansion on Mêlée Island . Do n’t bother talk to Guybrush , as he is passed out asleep . Instead , stay on the main story and go to thebookshelf to the left of the step .
you may interact with legion books , but the one you desire to check is on the top of the shelf next to the fish skeleton in the closet on the left of the bookshelf . Interact with the bookto criticise it on the floor . It will hit the primer coat and capable to reveal a ocean chart .
Head back to the Citizen of Mêlée , fit the ocean chart , and provide it to him . He will then trade in you the Treasure Map for Guybrush ’s Signed Sea Chart . After collecting this detail , you ’ll still need the Rubber Chicken and Mighty Pirate Sword .
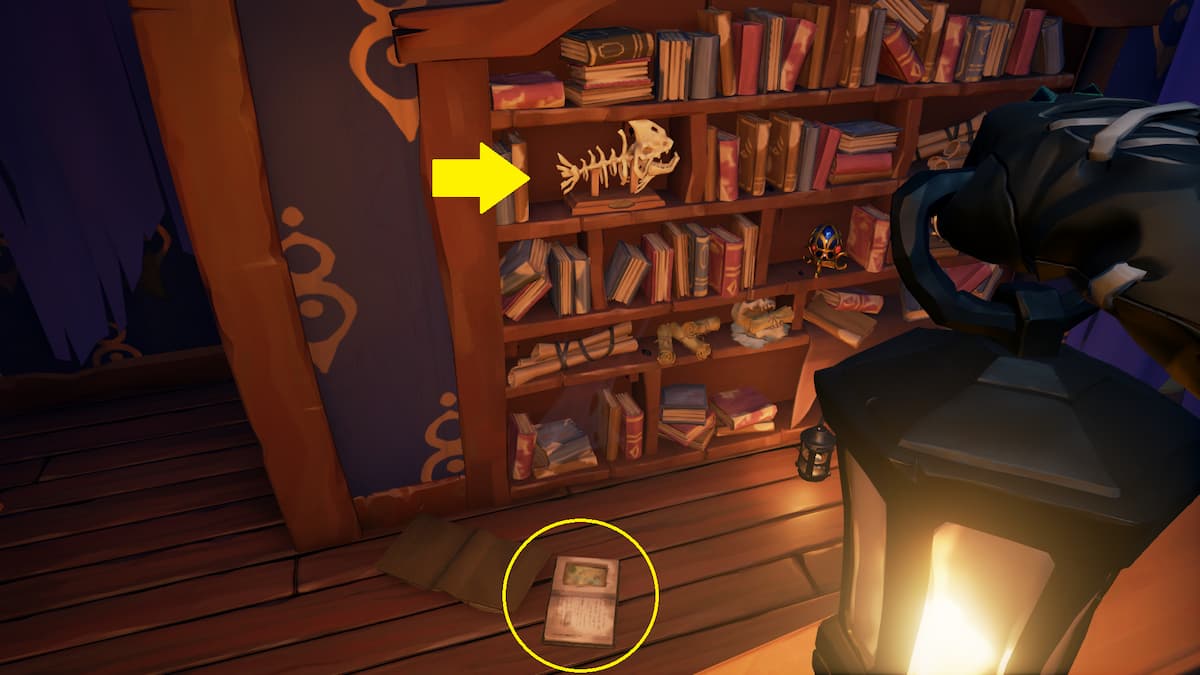
Image by Pro Game Guides
Related : How to get the Chef ’s Uniform in Sea of thief
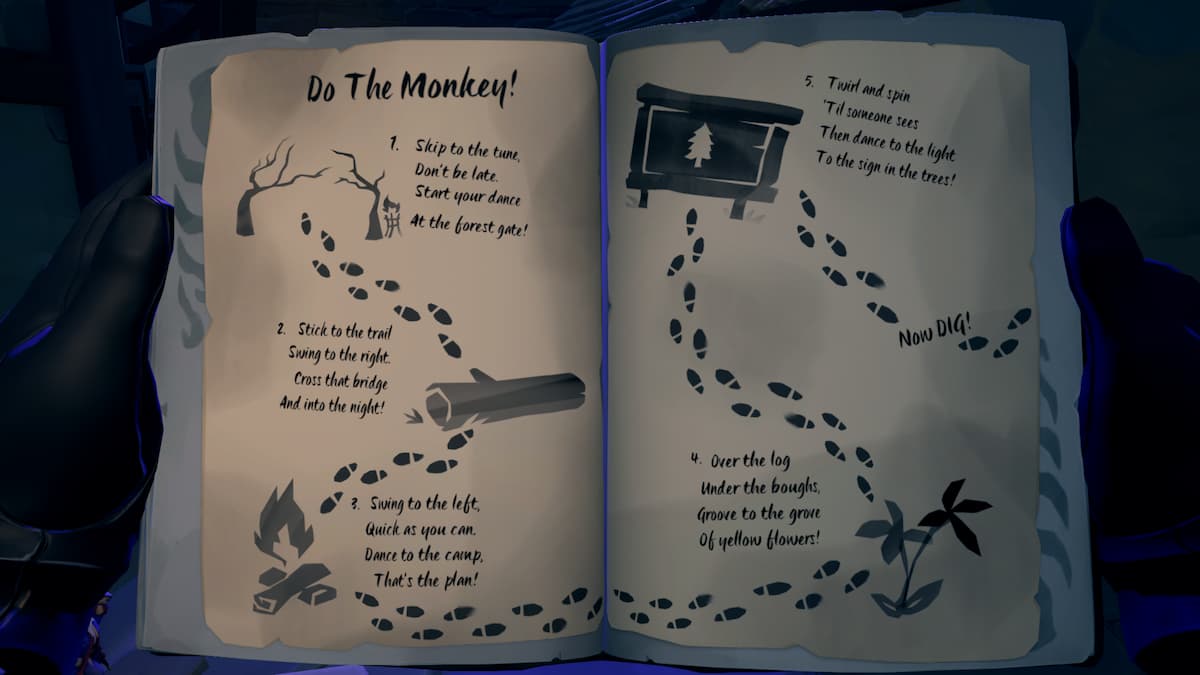
The Quest for Guybrush Treasure Map Guide (Do the Monkey) - Sea of Thieves
queer under the forest logic gate and turn right until you extend to the log nosepiece . cut through this and continue to the campfire . You ’ll take on Guybrush ’s spirit , who points left , and you should head that way to the campfire .
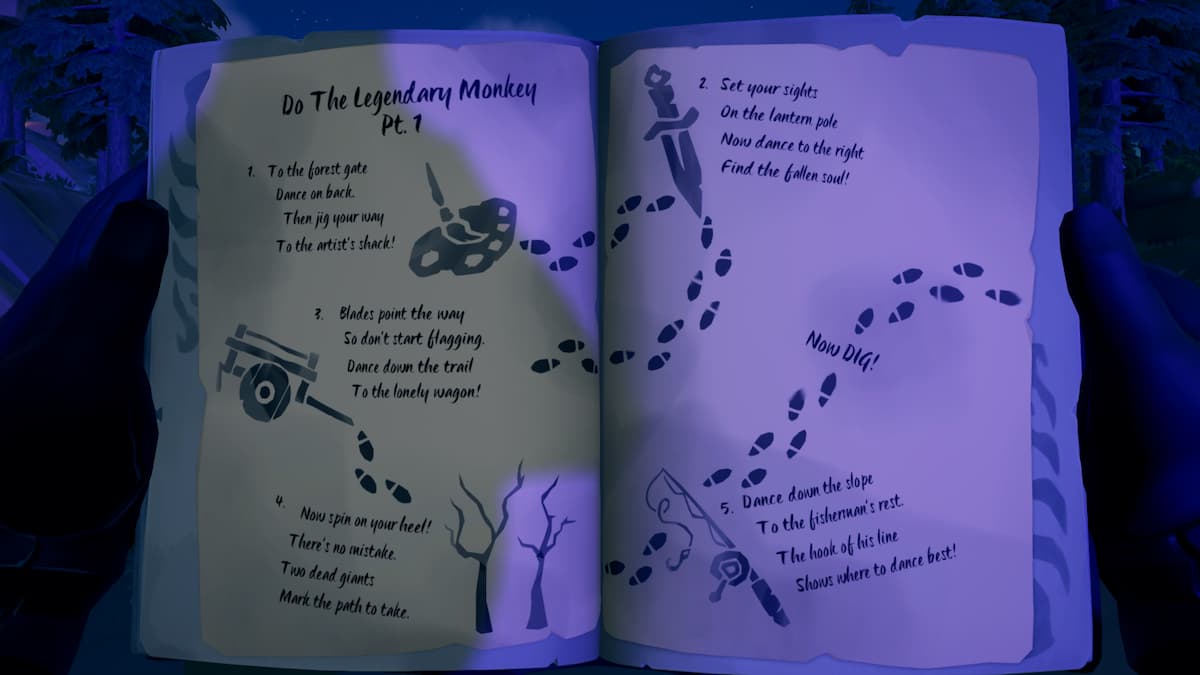
Do the Legendary Monkey Part 1
change by reversal around and return to the forest logic gate and artist ’s shack . manoeuvre toward the lantern Charles William Post and turn right . come up the scarecrow on the primer and follow the daggers down the path . You ’ll overhaul a wagon and a slope ; go down the side between the two dead trees . Locate the fisherman ’s shanty and savvy up the bureau directly in front of the sportfishing pole for your next solidification of guidance .
interrelate : How to fix Sea of Thieves Lavenderbeard Error – religious service temporarily unavailable
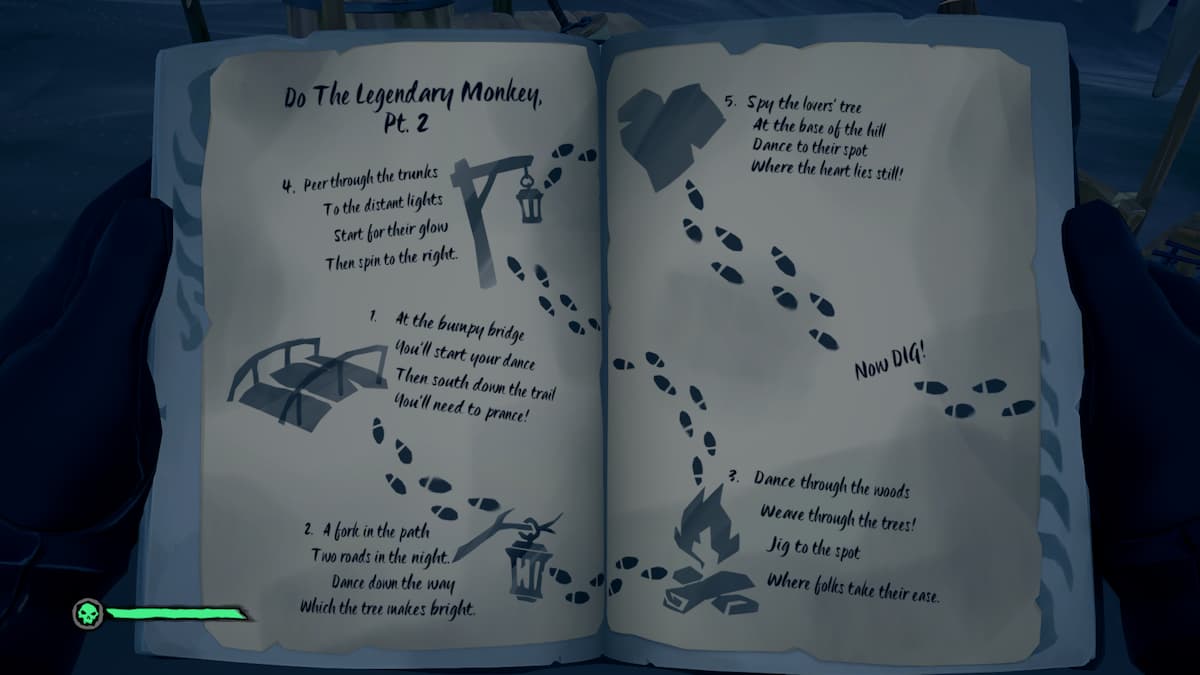
Do the Legendary Monkey Part 2
Cross the span in front of you and go to the tree diagram with a lantern . Take the ripe fork and keep walking until you amount to a camp . Continue fore until the lamp posts , have the ripe turn . Go down the Alfred Hawthorne and toward the big tree on your right . savvy underneath the heart for the next serial of instruction .
Do the Legendary Monkey Part 3
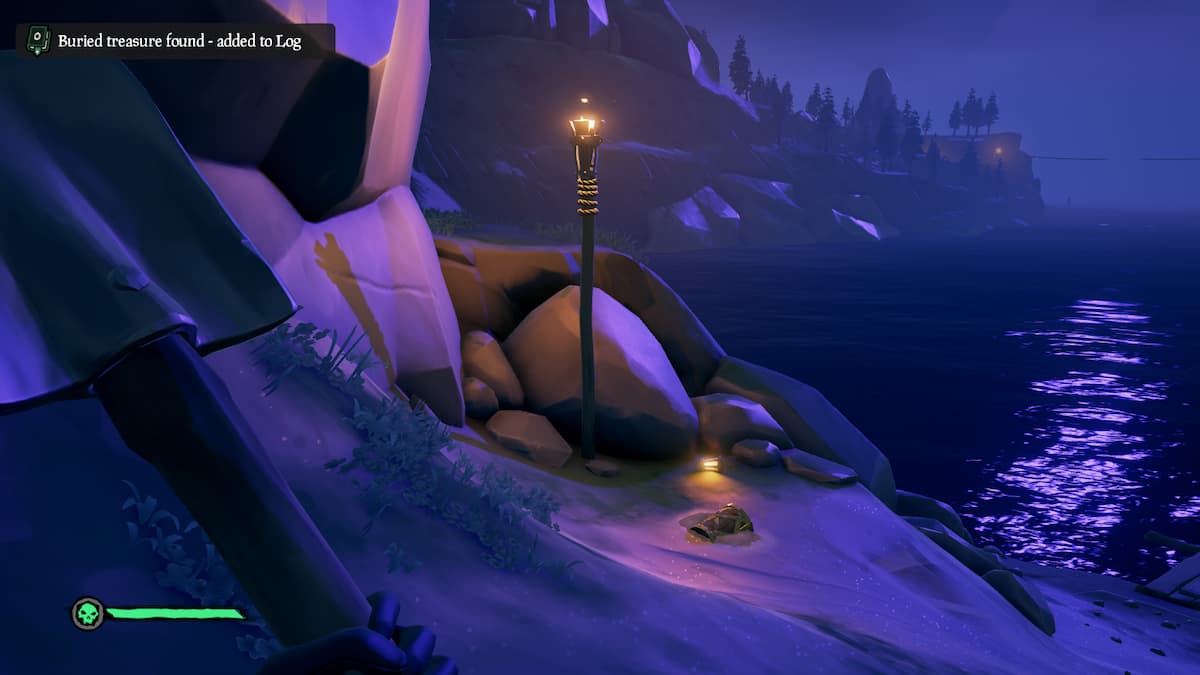
Go left from the tree diagram and find the lamp billet with the zipline . baffle the zipline and steer toward the shipyard . You ’ll know you are going the right way if you recognize the drawstring of flags . Cross the Troll Toll Bridge , pulling the lever if you have n’t already . Find the wiped out estate car and turn left until you make out a light between two rocks . move into the gap and dig under the lights to lay claim the idol , give it to Corina , and completeTrial of the Treasure - Huntery .
For more information on Sea of Thieves , moderate outWhere to get the Clock Tower Key in Sea of ThievesandHow to free Otis in Sea of Thieveson Pro Game Guides .
Screenshot by Pro Game Guides
Screenshot by Pro Game Guides
Screenshot by Pro Game Guides
Screenshot by Pro Game Guides
Screenshot by Pro Game Guides
