We ’re taking a facial expression at where you may regain all of the safes in Last of Us 2 ! We wo n’t keep you in suspense on how - to open them either , because we ’ve got the combination for them all as well . If you ’re looking to stock yourself up with utile item to make your journeying easy , then you ’re really going to want to assay these out and get inside of them !
Do n’t worry about getting the wrong combination if you accidentally input it incorrectly . There ’s no punishment for getting it faulty , and you could essay over and over again . If you want to locate the combinations yourself , look around the domain where the safe is turn up . you could regain them drop a line on panel , or on paper that is on the land . You pretty much just call for to search the area good and you should come across it .
The Last of Us 2 Safe Codes - All Safe Combinations and Locations
I ’m including a brief description of the safe positioning along with the combining . Describing exactly where you require to go is pretty difficult , so you will likely want to refer to the telecasting number below .
Safe #1 - Jackson: Patrol
Go through a whirl in one of the wall , you ’ll then find a room with a safe in it .
Combination:07 - 20 - 13
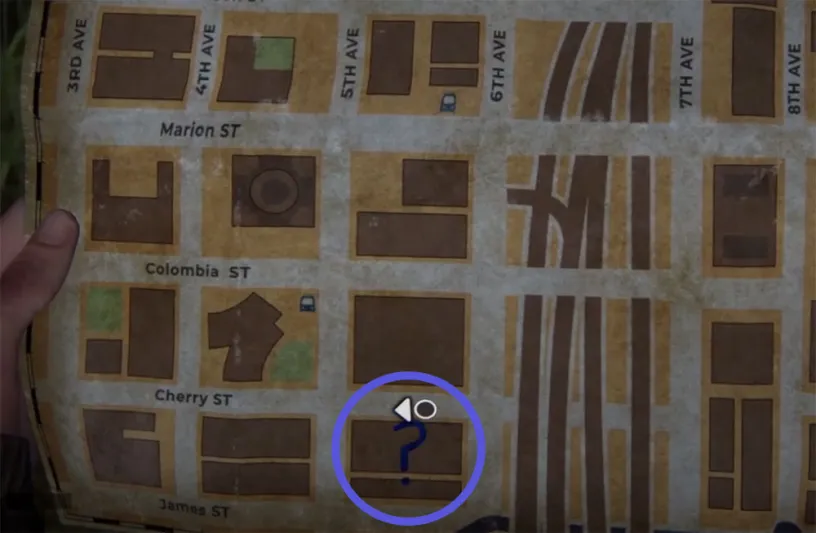
Safe #2 - Day 1: Downtown
Downtown to the south and east on Cherry Street you ’ll notice a building area in the grass that you could enter . Go through the wreckage and down into some piddle . You ’ll eventually find an orifice that lead into the Westlake Bank . There will be some enemies in here , so take them out however you want to . Find a elbow room that ’s label " Safe Deposit Lockers " at the top . This is where you ’ll find the large burial vault secure .
Combination:60 - 23 - 06
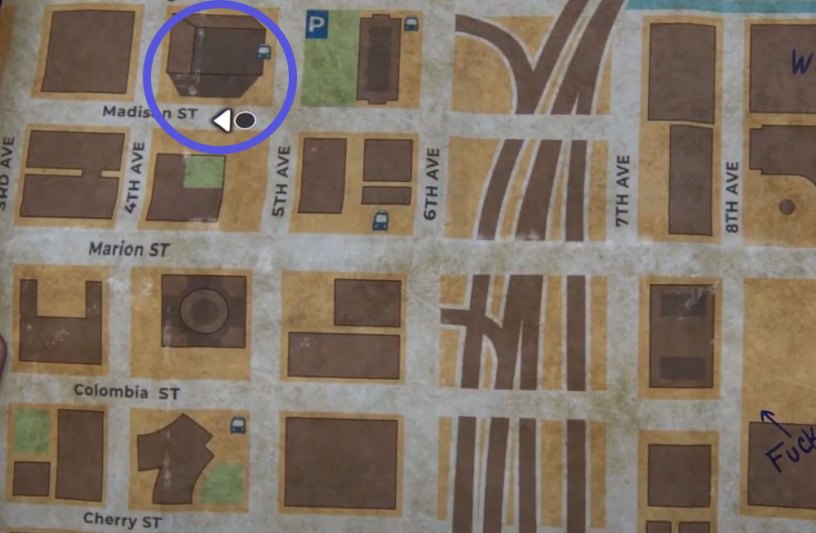
Safe #3 - Day 1: Downtown
Same area as the previous safe , but further north and to the west . take care for " Gate West " here and you ’ll find a part open up logic gate . Shimmy through the opening and to your right you should regain the safe .
Combination:0451
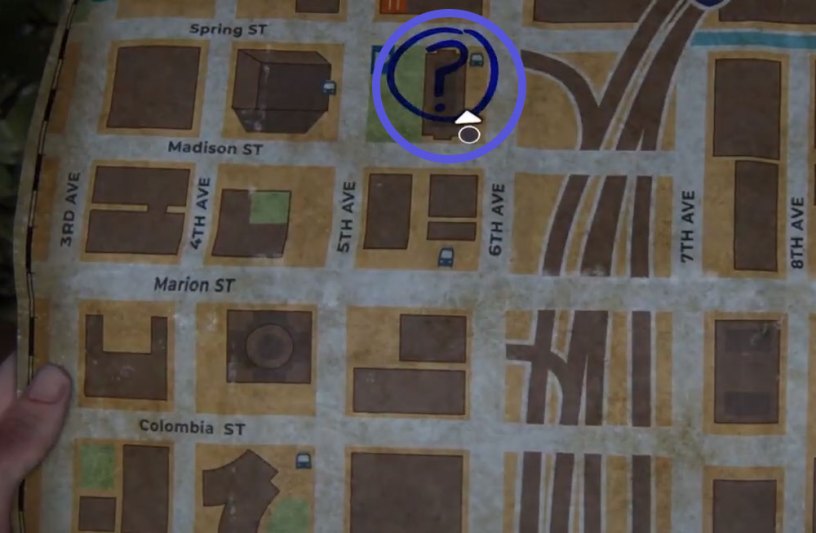
Safe #4 - Day 1: Downtown
Towards the halfway area where the main road was you ’ll find a building on 6th ave . There ’s a hand truck here with some boxes in the bed that you’re able to climb on to . Go to the right on the cement area , and you ’ll find a new location to explore . You need to open up the cloggy logic gate to get inside . There ’s enemy here so be careful . The field is a former court of law way , head out of that room and into the hallway . Go to the stairs field , there ’ll be a door you necessitate aid gap . Head down the stairs and through the hall until you reach a way with windows . Break through the glass and there ’s a safe rightfield under the desk . The code is written on the wry erase display board !
Combination:86 - 07 - 22
Safe #5 - Day 1: Capital Hill
expect for the Wellwish Store & Donation location . Once you head inside , go into the back and you ’ll find the safe .
Combination:55 - 01 - 33
Safe #6 - Day 2: Hillcrest
In this area there ’s an Auto Parts & Repairs edifice . Move the unripe dumpster away from the doorway . There ’s at least a few infect in here , so prepare for them before you open it . Once you ’ve ingest care of them , the good is right inside .
Combination:30 - 82 - 65
Safe #7 - Day 2: The Seraphites
Once you ’re at this chapter , you ’ll come in across a large apartment building . scat up the stairs , and then go out the window onto the platform . Jump across to your left and go through the windowpane . There will be a safe in the loo of this sphere .
Combination:10 - 08 - 83
Safe #8 - Day 2: The Seraphites
Look for the Weston ’s Pharmacy , which is at address 3855 . Head in spite of appearance and you ’ll find a fix in the wall between two defer units . Crawl under there to find the good in this room .
Combination:38 - 55 - 23
Safe #9 - Day 3: The Flood City
Once you reach a gate that you may open by pulling down on a chain , you may head upstairs in the nearby stairwell . Once you go into the room , go to your right and you ’ll see a clump of rubble . Crawl underneath it , go out the windowpane and drop down to the weewee where the dependable will be located .
Combination:70 - 12 - 64
Safe #10 - Day 1: On Foot
Look for the MS : Corporation Soft Drink Distribution Center edifice . melt down around towards the back of it and you ’ll recover a paries with a heavy crack in it . creep through the crack and you will find the safe .
Combination:17 - 38 - 07
Safe #11 - Day 1: Hostile Territory
Find the Jasmine Bakery , you ’ll see a purple signboard above it with some Taiwanese letters . let out through the window of the front and head into it . The good is settle right behind the front desk .
Combination:68 - 96 - 89
Safe #12 - Day 1: The Coast
On a great green gravy holder , you ’ll see a augury for a Sun Deck with a No Smoking sign underneath it . Climb up the stairs to the Sun Deck and then sour around to observe the ship ’s helm . The safe will be located in there , you just demand to hop up into it from the hole in the rampart .
Combination:90 - 77 - 01
Safe #13 - Day 2: The Shortcut
When you fare across the expectant hole in the road with a honorable sized waterfall hunt down down the other side you will want to turn to your left . There ’s a blue apartment edifice there that you may leap to . Breakthrough the window , steer inside , and open up up the bedroom threshold where you will recover the safe .
Combination:30 - 23 - 04
Safe #14 - Day 2: The Descent
Look for Orchards Juice Bar and head down the hallway near it until you find a gymnasium field with crank paries labeled Hotel Blacray . Across from the desk near the glass elbow room is a doorway that has a secure inside of it !
Combination:12 - 18 - 79
Video of Safe Locations