desire to upgrade Diamond gear into Netherite ? Well , you are go to require a Smithing Table for that .
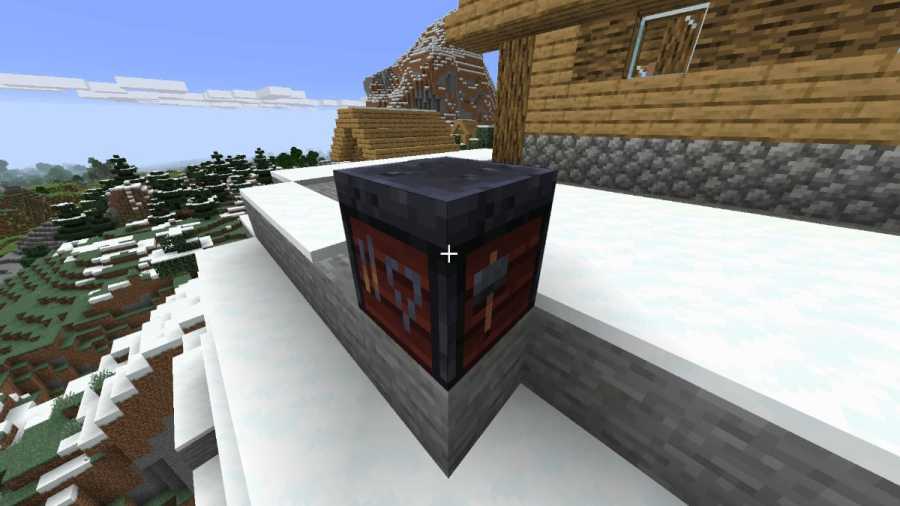
Smithing Tables are not just a occupation stoppage for Toolsmiths — they are also the block to use when upgradingDiamondgear to Netherite and adding Armor Trim to any armor . In this pathfinder , I ’ll take the air you through crafting one as well asall of its purpose .
How to make a Smithing Table in Minecraft
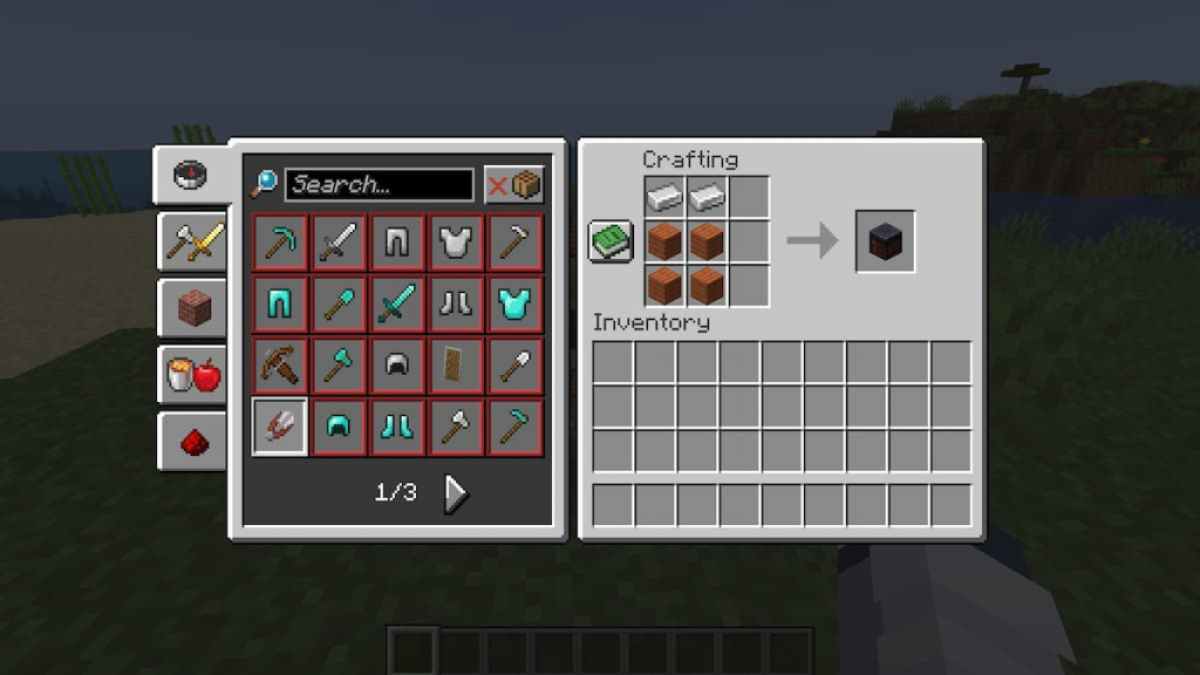
To make a Smithing Table , you needto meld four Natalie Wood planks and two iron ingot on a Crafting Table . invest the two iron ingots in the top left and top middle slots , and then place the four Sir Henry Joseph Wood planks underneath them in the left-hand and halfway slots of the middle and bottom rows . You will need to leave the right-hand side of the board empty(see prototype below ) .
To get wood planks , you only demand to receive a tree diagram and chop it down , rather with an ax . After that , take the Natalie Wood you get and put it either inside a crafting tabular array or your inventory crafting public square to make wood plank . One log will make four Grant Wood plank .
To craft iron metal bar , you will need to mine Fe ore — we commend find a cave or Stony biome and just mine . It wo n’t take long to find smoothing iron as it spawns nearly at all city block levels underground , as well as on the control surface of biome like Stony Shores and Stony Peaks . After gather raw iron from mining Fe ore , practice a furnace or blast furnace to smelt the raw branding iron into atomic number 26 ingots .
interrelate : Best Y Level For Iron in Minecraft
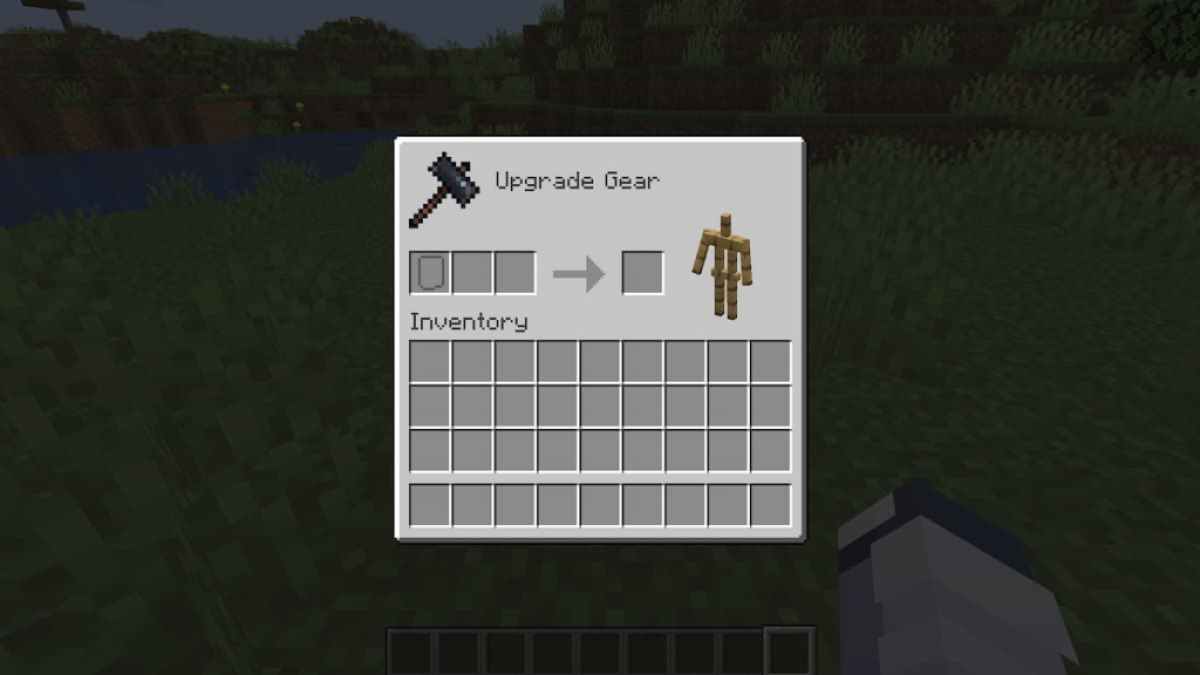
How to use a Smithing Table in Minecraft
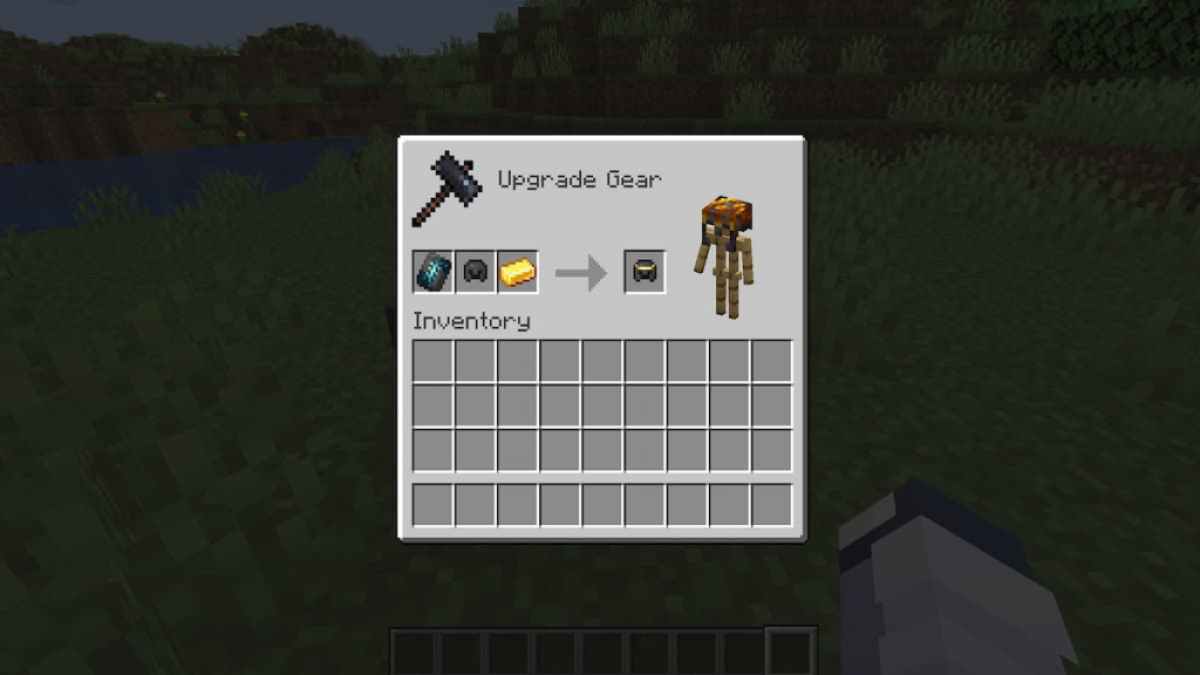
To use a Smithing tabular array in Minecraft , you will demand to place it on the ground and right - click it . Afterward , a small window containing the Smithing Table ’s port will pop up . Within it , you will see a place to put a piece of power train , a place to put a smithing factor , and a place to put a Smithing guide . You will also see a practical armor stand , which shows what the finished gear will see like after upgrading or adding trim .
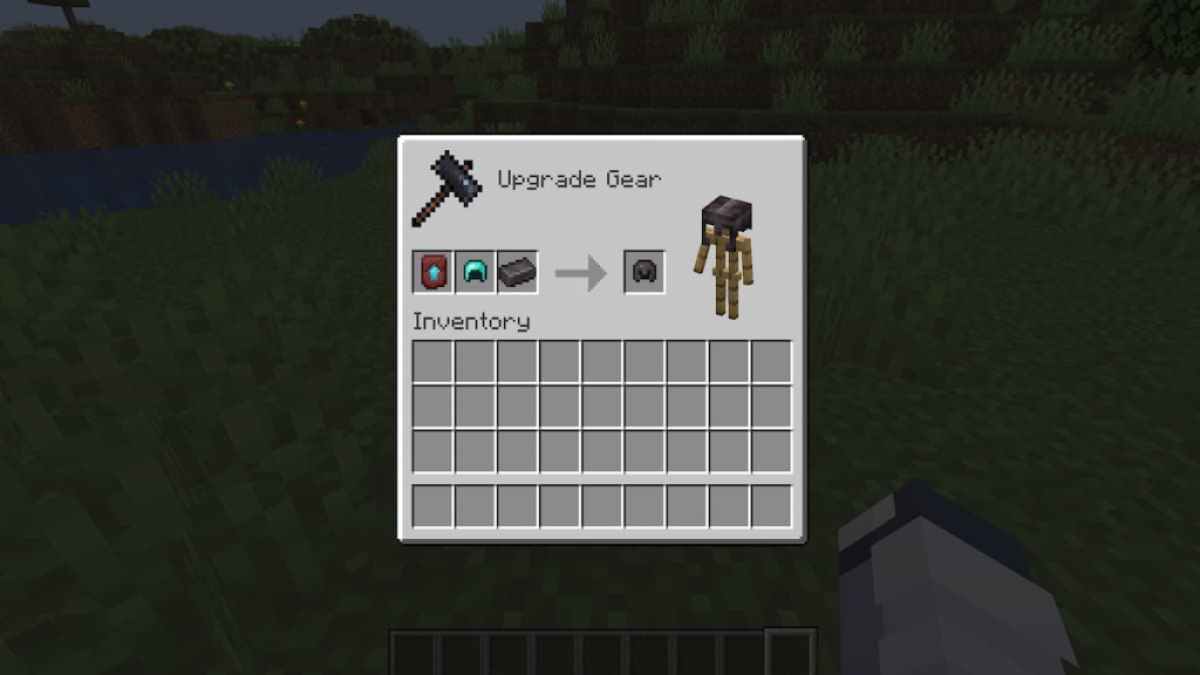
Using the Smithing Table to Upgrade Gear to Netherite
If you want to elevate your Diamond gear to Netherite , you ’ll ask a Netherite Ingot , aNetherite Upgrade Template , and a piece of Diamond gearing . Place the Upgrade Template in the first loge , the piece of gear in the second box , and the Netherite Ingot in the third box .
After doing so , a Netherite version of whatever item you put in the smithing board will appear . trail it into your inventory to complete the upgrading process .
Related : Minecraft : Netherite vs. Diamond – Which is Better and Why ?
Screenshot by Pro Game Guides
Using the Smithing Table to Add Trim to Armor
Adding Armor Trim to any man of armor is closely identical to upgrading it to Netherite . All you need is anArmor Trim Template , a piece of armor made of any material , and an component to choose the color . merely place the Trim Template in the first box , the firearm of armour in the second , and the color - determining constituent in the third box .
Like with the Netherite Upgrade , drag the newly decorated armor into your inventory to complete the process of add trim . One piece of armour can only practice one type of trim in a exclusive gloss at once , but you could add new trim over already decorated armor as much as you would like .
Using the Smithing Table as a Toolsmith’s Job Block
you may also practice a smithing mesa tochange a villager ’s jobto a Toolsmith , which will open up more trading options with that enunciate villager . They trade a change of tools for emeralds and will to boot trade emerald for certain ores .
If you want to even out up your geartrain even further , check out our template on theBest Enchantments in Minecrafthere on Pro Game Guides . Plus , for morecool Minecraft guide , tips , and tutorials , check out the sleep of ourMinecraftsection .
Screenshot by Pro Game Guides
Screenshot by Pro Game Guides
Screenshot by Pro Game Guides
