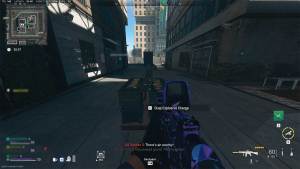
Deliver the bomb here .
The Transporter is the final story delegation for the Tier 3 Legion Faction in Call of Duty : Warzone 2 DMZ . For this mission , you need to retrieve a live bomb from one location and extradite it to the other before it burst forth .
How to complete The Transporter mission in DMZ
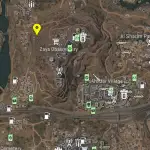
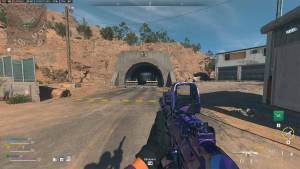
Where to pick up the charge in the closed tunnel near Zaya Observatory
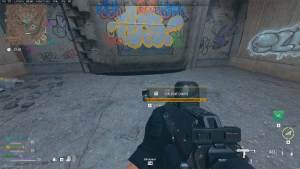
you could find the volatile charge placed inside the closed tunnel T1 situated to thewest of Zaya Observatory . At the base of Mt. Zaya , you’re able to locate this tunnel next to the modest village . The most important thing to note here is that thecharge is already activeand time to blow up5 minutesafter the match begins . Therefore , you must deliver the dud to the dropoff full stop before the timekeeper hits 20 minutes . This can easily be done if you spawn close to Zaya Observatory anduse a vehicle .
Related : Lachmann Weapons Testing DMZ Mission Guide
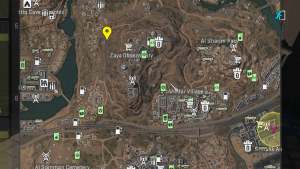
Where to drop the charge near the supply site at the US Embassy
After you ’ve pick up the explosive from the burrow , header towards the Second Earl of Guilford of the map . You require to give birth the charge to theUS Embassy , a heavily - guarded , locked facility in central Al Mazrah City . The supply web site will be in thecenter of the compoundwhere you could drop the guardianship before the match timer strike the 20 minutes mark .
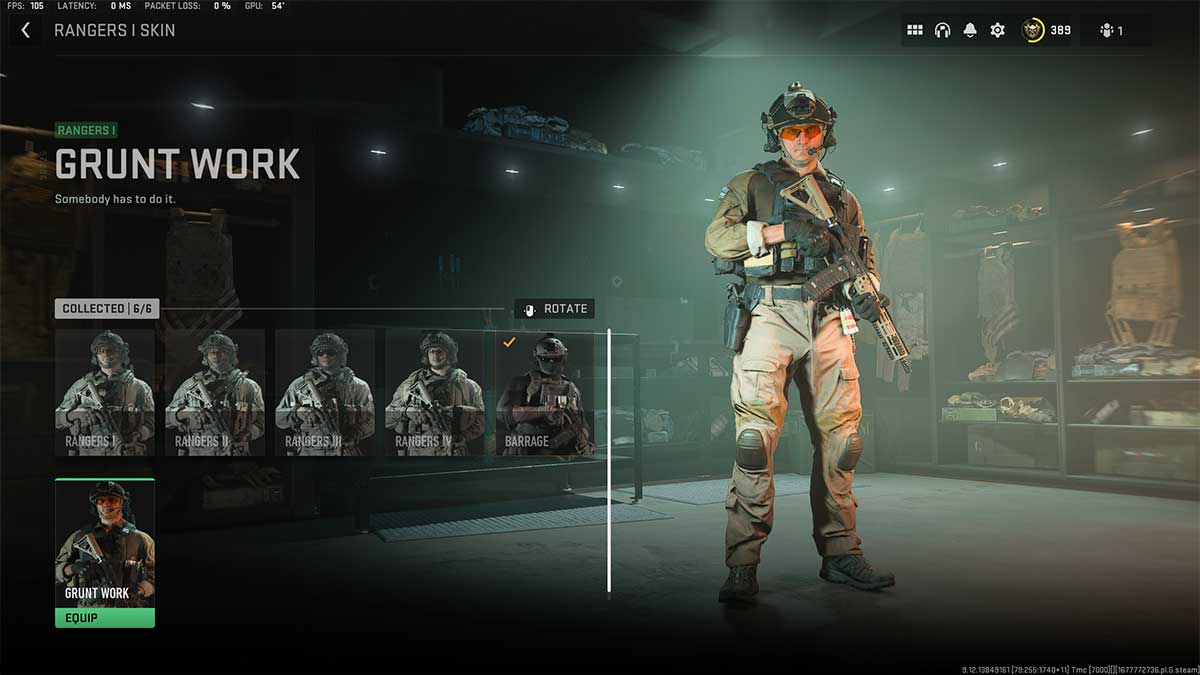
You ’ll have to climb up the wall to go in the US Embassy and most likely oppose a few armored bot . Once the bomb calorimeter has been set , waitnear the provision site until detonation to discharge The Transporter DMZ foreign mission . This will unlock the Tier 4 set of missions for Legion and reward you with theGrunt Workskin for the Rangers I operator .
Stay tuned to Pro Game Guides for more Call of Duty : Modern Warfare 2 and Warzone 2 content . In the meantime , channelize over to our article onDMZ Waterlogged Bag Key Location – Warzone 2 .
Screenshot by Pro Game Guides
Screenshot by Pro Game Guides
Screenshot by Pro Game Guides
Screenshot by Pro Game Guides
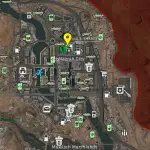
Image by Pro Game Guides
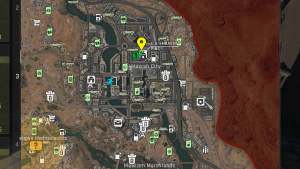
Image by Pro Game Guides
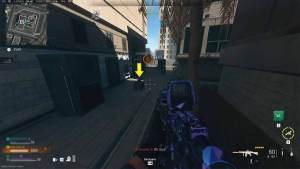
Image by Pro Game Guides
Screenshot by Pro Game Guides
Screenshot by Pro Game Guides
